The King's Army
Commander: Hopton (Good)
The Infantry:
2 bases Veteran Foot (mixed)
6 bases Trained Foot (mixed)
1 base Trained Foot (shot)
The Cavalry:
1 base Veteran Horse (S)
1 base Trained Horse (S)
1 base Trained Dragoons
The Artillery:
1 base Artillery
Parliament's Army
Commander: Ruthven (Average)
The Infantry:
5 bases Trained Foot (SH)
2 bases Raw Foot (SH)
The Cavalry:
2 bases Trained Horse (D)
2 bases Raw Horse (D)
The Artillery:
2 bases Artillery
1 base Trained Dismounted Dragoons (the artillery guards)
The Parliamentary artillery was to roll a die each turn to see if it arrived, needing a '6'.
The Set-Up:
 |
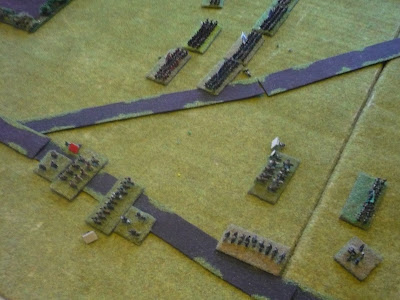
| There was a few turns of advancing and manouevring, but this was the position when the Royalist Infantry got into musket range. |
 |
| On the Parliamentary right, Ruthven launches a squadron of cavalry to try and capture the Royalist artillery. Luckily for Hopton, they are halted by the fire of the commanded shot. |
 |
| Hopton attacks at the head of his veteran horsemen: somewhat against the odds, the Parliamentary troopers repulse this attack with loss! |
 |
| A wider contextual shot of the situation just before the main infantry combat. |
 |
| A few turns of to-and-fro took place and it looked briefly as if the Royalist attack would grind to a halt, but then the Parliamentary foot panicked and fled as one... |
A slightly predictable Royalist victory although the roundheads did hold on perhaps a little better than might have been expected. They were unlucky in that their artillery never reached the battlefield at all. Gameplay was quite smooth, I don't remember encountering problems except to wonder if interpenetration of units was allowed or not.
The key to the Royalist Infantry's success is a feature of the rules: it is possible to get two moves in a row by being the non-tempo player in one turn then the tempo player in the next turn. The Royalists took advantage of this to get into close combat without facing any defensive fire. A 1:1 pike:shot unit has a basic +2 advantage against a 1:2 pike:shot unit un close combat under these rules; so given a three battalia vs three battalia match up, there is a strong chance that at least one defending unit will be routed instantly, which pretty much guarantees the eventual victory of the attackers (they will start to get the overlap bonus as well). Obviously there is a counter to this, but it does make defending a position quite difficult and can create some very difficult/impossible situations for a player.
The figures and the house are from Baccus 6mm. The table is 4' x 3' and the game took about an hour of playing time.
Solo Play Notes:
The system I use for solo play with Polemos ECW is as follows:
I generate tempo points as per the rules, except I do not roll a D6. Instead, each commander is assumed to roll the same score every turn. This score is dependent upon their ability in the scenario. So, a good commander is considered to get a '6' every turn, a poor commander to get a '4' and so on. Then, at the beginning of each turn, each side rolls a D6 - this number is the bid for each side. Play then proceeds as normal. In other Polemos sets I use different dice to reflect the greater chance of a side with more tempo points bidding higher, but as tempo bids are limited to a maximum of 6 in Polemos ECW I just use a D6,
Many thanks to Dean Heathcote for creating and sharing his scenario.


Nice report. Did you play this solo? If so, how do you handle tempo point bidding? Hard to bid against yourself, no ?
ReplyDeleteThanks. I did play this solo. Rather than reply as a comment, I'll amend the report to include a section at the end on the solo mechanic I use.
DeleteAll the best,
John
That would be great! Thanks.
ReplyDeleteHey, just spotted this. Glad you enjoyed the scenario!
ReplyDeleteThanks very much for writing and posting it
ReplyDelete