Heretical Gaming is my blog about my gaming life, featuring small skirmishes and big battles from many historical periods (and some in the mythic past or the far future too). The focus is on battle reports using a wide variety of rules, with the occasional rules review, book review and odd musing about the gaming and history. Most of the battles use 6mm-sized figures and vehicles, but occasionally 15mm and 28mm figures appear too.

Saturday 23 April 2016

In Praise of Heroquest

Over the last few months, I have been re-visiting the old Milton Bradley/Games Workshop game Heroquest.


My two eldest children have had a whale of a time playing this game.  The elder (8) took on the roles of Barbarian and Wizard, the younger (6) the roles of Elf and Dwarf.  The good thing about this dungeon quest type game is that the mechanics are simple enough so that young children can grasp them, with a little help; the quests are challenging enough to be interesting but easy enough to be winnable without me (as the "Evil Wizard") deliberately throwing the game.  I think all of the characters except the Elf were killed at some point during the campaign, which was a useful lesson, as it really taught the value of teamwork and protecting the less tough characters!  And the lesson was well learned, I must admit, since the two did apply the lessons rigorously afterwards and they got through the last six quests or so without losing anyone.

Heroquest Game in Progress
All the mechanics are very simple.  Characters can move and do an action per turn (fight or search or cast a spell etc.), or do an action then move.  Combat is resolved by throwing custom D6, which have 3 skulls, 2 "good" shields and 1 "evil" shield; the attacker is after skulls, the defender wants the appropriate shield, so the heroes are no better than the equivalent monsters when attacking, but twice as effective when defending.  The heroes can take a lot more damage than the monsters, but the wizard and elf in particular are quite 'killable' if you can get a few monsters to attack them simultaneously.  There is a degree of risk and reward: the more rooms and corridors which are searched, the more treasures will be found but the more monsters may be activated and the more traps set-off, which can cumulatively weaken the heroes to make them easier meat for the monsters.

During the adventures, certain special and magical items can be found and some can be kept.  Gold can also be looted, or given as payment for successfully completing missions.  This can be spent on new weapons, armour and equipment and so forth, to make the heroes more effective.  We found that missions take between 40 minutes and 75 minutes to complete (or fail).

Magic is really easy: there are 12 spell cards in four sets of three, representing the different elements.  The wizard picks one set of three, the elf picks one and the wizard then gets the remainder.  The spell effects are all explained on the card so the player and evil wizard don't have to remember what each spell does exactly.

The setting is Games Workshop's Warhammer world (or at least, that setting as it was in the late 80s and early 90s).  The four heroes are basically employed by the Empire to battle a range of goblins, orcs, fimir, undead, chaos warriors and sorcerers to rescue prisoners, find items, kill particularly vicious chaos lords and so on.  All the monsters are controlled by "the evil wizard" i.e. the Dungeon Master.  There can therefore be up to five players in a game (one per hero, plus the evil wizard).  A full range of models for the heroes and monsters is included in the game but they can easily be replaced by other models if desired.  We often use female models for the barbarian and the wizard, especially since the Dice Bag Lady has started up her one-stop shop.  Some of them I had before though, I think they might be from Ral Partha.

A selection of the female figures we use as alternatives/replacements for fighters: a variety of ranges are represented including Westwind, Ral Partha, Bad Squiddo and Perry Wars of the Roses' with head swaps

As these are gaming pieces for children, I have just gone for basic, simple painting (plus I am not really interested in producing art works myself, however much I admire the exquisite skill shown by others!  15 minutes a figure is about my maximum)


In addition, there are 3D models of tables, bookcases, treasure chests and torture racks and so on!  They all help to increase the immersion and the interest for the younger gamers!

My children have asked for more but I am not sure how to proceed.  The expansion sets for Heroquest seem quite expensive, more collectors' prices than gamers' prices perhaps.  I remember that Advanced Heroquest was a distinct step-up in complexity, so I'd be interested in any recommendations for dungeoncrawl games pitched at the same easy, intuitive level.  Anyway, highly recommended as an introductory game for children and novices.

Thursday 14 April 2016

Further Thoughts on Simplicity in Practice: Encounter at Plattdorf

 In a recent post, I discussed Neil Thomas' Simplicity in Practice rules which were discussed in Battlegames 23.  Although I think these rules are a lot of fun and basically sound, I think that the close combat factors in it are very poorly calibrated, making "local superiority" as important as being "charged in the flank", for instance.  So I decided to modify these rules as follows:

"Each side rolls 3 additional dice for each of the following conditions that apply":
Attacking enemy flank or rear

"Each side rolls 2 additional dice for each of the following conditions that apply":
Defenders with terrain advantage (depending on strength of terrain)
Fewer DP than enemy unit
COI defending against COI with same number of DP
COI attacked frontally by HC, DG or LC
COI, HC, DG or LI attacking LI in open terrain
HC fighting DG or LC
DG fighting LC

"Each side rolls an additional die for each of the following conditions that apply":
More friendly than enemy units within 10 cm of melee
Defenders with terrain advantage (depending on strength of terrain)

I feel confident that this very minor rules change will take away unrealistic advantages to simply massing units and give a realistically better bonus to those units that manage to find a flank (which will pretty much give a certain victory unless the outflanked unit has some serious mitigating advantages).  To test out these changes, I had a go at the Henry Hyde-penned Don Featherstone tribute scenario "The Encounter at Plattdorf" from Miniature Wargames 366.


I won't give all the details of the scenario but the forces involved were:

FRENCH:
5 Infantry Bns
1 Light Infantry Coy
1 Light Cavalry Regt
1 Artillery Bty

AUSTRIANS:
5 Infantry Bns
1 Light Infantry Coy
1 Light Cavalry Regt
1 Artillery Bty

The French were trying to take and hold the town of Plattdorf and the Grungrat ridge whilst the Austrians were trying to stop them as well as hold the bridge and the line of the Stierbach.

Set-Up:

The French approached from the South, the Austrians from the North.  The objectives are mainly obvious, except that the French are looking to secure the high ground to the south of the river.


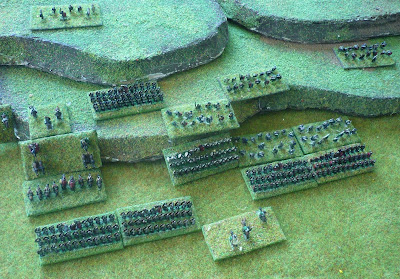
A close-up of the French advance guard - a light infantry company and a line infantry battalion

And from another angle (from above and west)

Arrival of the main body of each side was determind by dice rolls: the Austrians rolled rather better than the French and thus have more of their troops earlier, and more of them where they should be (on the road)

Notice that the advance guards have now seen each other; the Austrian grenzers are on the high ground to the west of the bridge


The French lead battalion has got rather the better of the musketry exchange by the bridge and their Austrian opponents are on the point of collapsing; but a bold advance by the Austrian light infantry and cavalry has enabled them to ambush the French


The Austrian cavalry charge and devastate the French light infantry, caught in the open.  This was the first test of my amendments: in the rules as written, the French light infantry should have had the advantage, entirely because the French units in the vicinity would negate the advantage of the Austrian cavalry catching skirmishers in the open just by virtue of being there.

Same position, from closer in

The Austrian cavalry takes casualties from French fire, but retains enough cohesion (just!) to charge the leading French battalion in the rear; Austrian skirmishers and French artillery exchange ineffective fire

The wider position; towards the West, Austrian infantry advance across the Stierbach; the Austrian cavalry retreats to regain its supports

The Austrian infantry has advanced and shooed the French Hussars from the Grungrat ridge; meanwhile the French infantry advance towards the bridge; both units are fresh but are facing two Austrian infantry units supported by artillery

Same position but here one can see the remaining Austrian infantry to the West, in the Plattwald: they are 'bickering' with the French garrison of the church on the hill (no casualties on either side); a more telling firefight is taking place between the Austrian infantry by the stream and the French garrison of the town

The French infantry assault on the bridge has failed and one of the French units has dispersed; the Austrian grenzers have seen off the French light infantry despite being under artillery fire too (the French light infantry were already extremely weak after being hit by the Austrian cavalry)

Position from behind the Austrian infantry defending the bridge (note the pile of casualties!)

Position around the village at the end of the game
  

Game Notes: A really fun game, with the Austrians turning out triumphant.  Having more of their forces arrive just a little earlier helped, as did the decision to boldly advance with the light infantry and cavalry.  I felt that the rule changes, deliberately kept to a minimum, did provide a better game by increasing the importance of tactics and decreasing the ability of "mass" to overcome this.  I am going to incorporate this as standard in future games.  I still think the mechanism might be refined a little further, but that will require more thought.
These rules, yet again, provided a very simple and easy game.  Although I often disagree with Neil Thomas' calibration of tactical effects, I love the simplicity of his designs.  They give good wargames without ever causing the "so what do we do now" moments of headache.   The scenario is a cracker too - simple but challenging - and I can definitely see myself having another go at this one soon.
One thing I would really like to is incorporate some features to make the rules a little more Napoleonic in feel.  Squares are the obvious answer, but I don't want to mess about with rebasing or, ideally markers.  I was thinking more of the way that he incorporates March Column: just include the effects without mucking about with showing the change of formation.  So I need to sit down and think about how to do this...


The Three Battles of Mons Graupius: A Rules Comparison

Over the last couple of days I have had a go at re-fighting the Battle of Mons Graupius three times using separate rulesets, almost like a mini Society of Ancients game day.

The battle reports featured games using:
Polemos SPQR (AAR here)
Neil Thomas' Ancient & Medieval Wargaming (AAR here)
DBA v3.0 (AAR here)

Rather than re-hash the actual reports, I want in this post to capture what I think are the comparative virtues and vices of each set of rules:

POLEMOS SPQR:

Virtues:
The command system conveys the advantages in commanding regular troops over irregular troops and it limits the options to each in convincing ways
The command system creates lots of friction
The combat system is subtle and easily resolved and the troop types are modelled convincingly
Although it doesn't model attrition per se, the combat results include an element of long-standing disruption
There is an army-level morale system with more alternatives than okay-defeated
The writing style is easier to understand than DBA

Vices:
The extra subtleties in terms of command come at a cost in playing speed and ease of play
The subtleties in the combat system come at a similar cost, having a two-stage combat system and more than twice the number of factors of the other rules sets
There are discrepancies between the QRS and the main body of the rules
Outcome moves and the interaction of bases remain the weak spot in this family of rules IMHO
Beginners would probably struggle with these rules
When I don't know how to resolve a given situation, it normally takes a little searching before I am reasonably sure whether I have missed something or need to hand-wave a rule and move on (this came up with pursuits, for instance).  I still couldn't be sure I have "done it right".

ANCIENT & MEDIEVAL WARGAMING:

Virtues:
The rules really are simple to understand, novices could play these rules without too much difficulty
There are no rules of marginal importance in these rules, everything is big and bold (contrast the rules on interpenetration of troop types between the various rules)
The author is a master at using an unhistorical mechanism to prevent messing around but still achieve the historical result (no complicated wheeling rules)
The author takes care to reduce the number of rules by including things once only: troop quality is only a factor in morale, for example, not in combat
The rules are written in a very easy to comprehend manner
The rules are so short that you can be very confident you haven't missed something important

Vices:
The author clearly believes in a very attritional model of combat; personally I think that this underplays the importance of tactical factors and shock in combat
There are no command rules at all
Combat is a buckets'o'dice system: roll lots of dice to hit (16 is not uncommon for one round of combat), lots of dice to save, and perhaps a dice at the end for a morale check
There is no army morale until the army reaches its break point and loses the game

DBA 3.0:

Virtues:
The rules are pretty easy to understand once you get the hang of them
Phil Barker is really good at anticipating difficulties or tricky situations and providing an explanation and/or diagram to show how the situation should be resolved: it is a "tight" ruleset.  These are also easy to find, so no long searching for answers
There is a lot of subtlety in the rules created by the interplay of troop combat ratings and characteristics
The army lists are very comprehensive!
The D6 PIP roll does create simple but effective command dilemmas.
The combat system is easy but effective and concentrates on key tactical factors, with appropriate weighting.
The game is very smooth and quick (easily the quickest of all these quick games, because combat is decisive and based on shock rather than attrition; and because the army break point is set much higher than in the other two games)

Vices:
The D6 PIP command mechanic lacks subtelty: commanding Imperial Romans feels the same as commanding Caledonian tribal warriors.
The rules probably do allow too much "country dancing" in comparison to real-life
Light troops and missile troops are harder to use than in either A&MW or SPQR
The combat system is more variable than in the other two games: it is much easier to create almost certain wins in SQPR and A&MW than in DBA (I leave this to taste as to whether this is a virtue or a vice!)
There is no army morale until the army reaches its break point and loses the game


Summary:
This was a fun couple of days of gaming, with victories for both sides and a chance to compare slightly different visions of how ancient-period wargames might be played.  As a brief summary of each:
POLEMOS SPQR took the longest and required the most brainpower to administer.  It made the most determined attempt to re-create the problems of Ancient generals and re-create the factors in ancient combat at the cost of some simplicity.  The rules are the hardest to make work on the tabletop and the least streamlined.
ANCIENT & MEDIEVAL WARGAMING was the easiest on the brain, the most intuitive (it is easily the most traditional of the three rules) and most suitable for beginners.  It didn't make any real attempt to model command difficulties, although the logic of troop abilities actually provided some useful restrictions on activity anyway.   I liked the way it dealt with how harrying light troops work.
DBA 3.0 was the quickest game and the tightest written.  It is the hardest to read initially because the information is given precisely and in the tersest way possible. It gives a brief but intense gaming experience.  It can feel a bit blander historically than the other two because the command representation is more basic than SPQR and it doesn't have the narrative flow of A&MW because it is over with far less movement.

One day, I would like to extend the test to Phil Sabin's Lost Battles; and to Arty Conliffe's Armati if I get around to acquiring a copy.


The Battle of Mons Graupius III: A DBA v3.0 refight

Background: For the third refight of Mons Graupius in the series, I chose Phil Barker's DBA rules, now in its 3rd version.  The terrain was kept the same, whilst the armies were chosen from the appropriate lists but modified to incorporate the larger numbers of Caledonians and giving them some light cavalry.


Orders of Battle

Caledonians (from List II/60):
1 x General and chariots (LCh)
1 x Chariots (LCh)
8 x Warriors (3Wb)
2 x Javelinmen (Ps)
2 x Cavalry (LH)

Romans (from list II/56):
1 x General and cavalry (Cv)
1 x Equites (Cv)
4 x Legionaries (Bd)
4 x Auxiliary pedites (4Ax)
1 x Numidians (LH)
1 x bolt-shooters (Art)

Set-Up:

Romans at the bottom: Left - Cavalry, Front Centre - Auxiliaries, Centre - Legionaries, Rear - Light Horse, Right - Cavalry and Artillery


The view from behind the Roman infantry

The Roman artillery fire is useless; the Romans then advance and get to grips; they appear to be making some headway, but the Roman cavalry unit on the right and the general have already been eliminated!

Same situation, different angle

The tide of battle turns against the Romans as they recoil down the slopes

The Roman artillery has been eliminated by chariots and a unit of auxiliaries is destroyed too: the Romans are defeated!

The situation at the end of the battle

Game Notes:
Played on the same 3'x2' board, this game only took about 35 minutes of playing time.  The key tactical difference in this game was that the Auxiliary vs Warband match-up in DBA is pretty even, whereas in Polemos SPQR and A&MW the Romans have a distinct advantage.  The only place where warbands come off worse is in recoils but because of the advantages of slope and depth, they would have to be unlucky to lose in the first place.  The PIP roll in DBA does provide some challenges but it is nowhere near as difficult as SPQR, especially for the Caledonian side: put simply in this game the Caledonian infantry could get into a deep formation in time, whereas in SPQR it just could not be co-ordinated in time.  I played this in a semi "as history" fashion, but if playing as hard as possible, I would never have used Auxiliaries to lead such an attack, I would have reversed the positions of the Legionaries and the Auxiliaries.  Blades against Warbands is a good match-up even with the slope in favour of the warbands.  The playing experience isn't quite as simple as A&MW but it really rattles along - the lack of any attritional mechanism/buckets'o'dice/markers speeds up play (and gives a very smooth gaming experience).  There are a lot more subtleties in the interactions of the troop types in DBA (of which there are more) which take more getting used to.  And light troops are a bit harder to use effectively.
Figures from Baccus 6mm.

More DBA Reviews:
Ancient Wargaming
and Wall of Shields
andHistorical Wargaming Podcast

The Battle of Mons Graupius II: An Ancient & Medieval Wargaming Re-fight

Background: For the second battle in this series, I have used the "Classical" period rules in Neil Thomas' Ancient & Medieval Wargaming book.  I have played these rules a few times but not for a while.  However, the rules are quite simple to remember and I didn't envisage encountering that many problems.  The terrain was left exactly as it was for the previous re-fight.  Typically A&MW uses less units than Polemos SPQR so I expected a more open look to the game and a more fluid battle.


Order of Battle:
These were chosen to be the closest fit from the scenario in Polemos SPQR with the army lists given in A&MW.   For the Caledonians, this meant using the "British Army 55BC - 70AD" list, but using javelinmen instead of slingers.  The Romans used the "Imperial Roman Army 25BC - 300AD" list (without changes, although I did consider that if Auxiliary infantry can be upgraded to heavy infantry they should probably be upgraded to heavy armour as well).

Caledonians:
 2 units of Nobles (Light Chariots, Javelin, Elite, Lt. Armour)
2 units of Light Cavalry (Light Cavalry, Javelin, Average, Lt. Armour)
2 units of Javelinmen (Light Infantry, Javelin, Average, Lt. Armour)
6 units of Warriors (Warband, Average, Lt. Armour)

Romans: 
3 units of Auxiliary Cavalry (Heavy Cavalry, Med. Armour, Elite)
3 units of Auxiliary Infantry (Heavy Infantry, Med. Armour, Average)
3 units of Legionaries (Heavy Infantry, Hvy Armour, Elite)
1 unit of Artillery

Set-Up:

The Romans at the bottom, Caledonians defending the hill.  The Romans have Left - Cavalry, Front Centre - Auxiliaries, Rear Centre - Legionaries, Right - Artillery and Cavalry
The Battle:
In this shot you can see the final Roman unit - a cavalry unit in the rear in reserve; the battle has just opened with an unusually effective strike by the roman artillery on the Caledonian infantry (see the blue and red counters)

Same position, different shot


The Romans advance; their cavalry have taken some losses (note red counters on the right-hand cavalry; blue counter on the left); in this battle, the Caledonian light troops have been very effective at harassing the heavier Roman units

The two red counters indicate two lost bases for the Roman cavalry; or put another way, it is down to 50% effectiveness

The Roman cavalry on the left hits the Caledonian warriors in their flank; the Roman cavalry on the right storms up the hill and hits the Caledonian javelinmen

Same moment from a different angle

The Roman auxiliaries storm forwards and eliminate two of the three Caledonian warrior units in the front rank; however the Caledonian light troops on each flank have eliminated the Roman cavalry unts;  the Caledonian chariots (bottom-right) have also eliminated the Roman artillery


Same position, but viewed from the summit of Mons Graupius to the rear of the Caledonians

The Roman infantry continues to surge forwards and another Caledonian infantry unit is eliminated; the Caledonian chariots to the right are almost - but not quite - destroyed

The sea of red markers indicate the heavy Caledonian losses, the blue counters indicate the rather less severe Roman losses; the Roman advantages in close combat (better troops, better armour) are telling...


The final position: the Romans have eliminated nine Caledonian units, including all the warrior infantry, and the game is over (the battered second chariot unit didn't quite reach the Roman baseline in time to inflict additional losses upon them whihc might have saved the game)

Game Notes:
Same set-up as the previous Polemos SPQR game: a 3'x2' table with Baccus 6mm miniatures.  The Caledonian light troops were very effective in this game: with smart play against an opponent with no missile troops, they can cause a lot of damage!  It is extremely difficult even for Roman cavalry, never mind infantry, to bring them into combat. One gets a little understanding of how Caesar felt when harassed by all those chariots and why the Britons often relied on light harassing troops against the armoured might of Rome's legions.
I used the auxiliaries as heavy infantry in this game as permitted by one of the army-specific special rules: it seemed to suit the situation.  However, this probably made the difference: heavy infantry are roughly twice as effective as warbands in these rules.  Although this didn't happen by design, the Roman cavalry were effectively sacrificial pawns in this game to allow the majority of the Roman infantry to reach the Caledonian warriors at full-strength, which almost guarantees a victory...as in fact happened!
The absence of any command and control rules didn't give a vastly different "shape" to the game but did seem to allow the Caledonian light troops to become more effective in actively harrying the Roman advance.  The Caledonian troops were also rated more strongly than in the SPQR game but as the Romans were too, it kept the qualitative difference roughly the same.
I will say more in the comparison, but Neil Thomas' rules really are a joy to play because they are so simple.  They aren't necessarily shorter games, because there is more dice-rolling and more attritional combat, but they are easy on the brain.  I think this one took about 40 minutes of playing time.

Reviews of Ancient & Medieval Wargaming:
here
and here


The Battle of Mons Graupius: A Polemos SPQR re-fight

Background:
The battle of Mons Graupius took place around AD83 in Scotland between the Caledonians and the Imperial Romans: further details here.  This battle is one of the scenarios in the back of the Polemos SPQR rulebook and I have Late Republican Roman and British armies which I thought would be close enough, so I chose this battle for a rules comparison test, the idea being to re-fight the battle three times with three different rulesets. So, the first game using the Polemos SPQR ruleset itself.


Order of Battle:

The scenario gives the following forces:

Caledonians:
Calgacus (Poor general)
3 bases of Chariots (Raw/Elite)
3 bases of Light Horse (Raw)
11 bases of Tribal Foot (1 base Trained, remainder Raw)
3 bases of Skirmishers (Raw)

Romans:
Gnaeus Julius Agricola (Average general)
1 base of Boltshooters (Trained)
5 bases of Auxiliaries (Trained)
7 bases of Legionaries (Trained)
5 bases of Cavalry (2 bases Veteran, remainder Trained)

Set-Up:
Romans at the bottom (no prizes for guessing that!): Left - Cavalry Front - Auxiliary Infantry Rear - Legionaries Reserve - Cavalry Right - Artillery and Cavalry

Caledonians on the slopes of Mons Graupius behind: tribal infantry in the centre in three lines, whilst each wing has chariots at the front, followed by skirmishers and light horse

View from the Roman right

View from behind the Caledonian centre on the top of the hill down onto the Romans

Same position, wider perspective


And from the Caledonian left, on the steep slopes behind the chariots
 The Battle:
The Romans attack after an ineffectual artillery bombardment; they advance their flanking cavalry, and a unit of auxiliaries is assisting them on the left: the red markers indicate the shaken Caledonian chariots being pushed back

A closer detail of the Roman left: Roman cavalry and auxiliaries push into the Caledonian right flank

And Roman cavalry do the same on the right (the other cavalry unit on this flank had refused to charge!)

The Roman pressure continues and both Caledonian flanks start to wilt...

And collapse!  the Caledonians in flight on the Roman left wing!

And the same result on the right!  Roman cavalry pursue the routed Caledonian chariots

The Caledonians attack in the centre to try and restore the situation and relieve the pressure on their flanks

Closer in; the next photos weren't usable, but showed the Caledonian infantry making some progress and routing some of the Roman auxiliaries, but eventually the tied turned when the Roman legionaries got involved and the Caledonians were defeated and routed.  The Caledonian general was killed in this combat: disastrously, as the Caledonian second line never managed to get forward to support its fellows

The Roman left flank has cleared away its opponents and is threatening the flanks of the Caledonian second and third lines

The legionaries have bolstered the auxiliaries who have destroyed the tribesmen to their front: they are now advancing up the slope; the Caledonians collapsed at this point


The position on the Caledonian left at the end of the battle: although they suffered some losses, the Caledonians were largely victorious here: you can see one unit of Roman cavalry routing, the other unit was trapped whilst pursuing and destroyed.

Game Notes:
I'll cover the comparative aspects of the game later but in its own right it was a good game, relatively brief.  Manoeuvre is very hard in this game, it is more about timing and exercising (very limited!) control.  I set up the Caledonians according to the scenario map in the Polemos SPQR rulebook, but I would never use this deployment in a game with free set-up.  The Caledonians need to be in bigger, solid blocks especially their infantry.  The tempo point costs are just too great for the general to cope with using various lines like the Romans can.

Figures are from Baccus 6mm.  As mentioned at the top, the rules used were Polemos SPQR, there are some reviews here from:
Meeples & Miniatures
Wargaming for Grown Ups
Me