Heretical Gaming is my blog about my gaming life, featuring small skirmishes and big battles from many historical periods (and some in the mythic past or the far future too). The focus is on battle reports using a wide variety of rules, with the occasional rules review, book review and odd musing about the gaming and history. Most of the battles use 6mm-sized figures and vehicles, but occasionally 15mm and 28mm figures appear too.

Sunday 18 January 2015

A Small ECW Battle

I played out a small battle set in the English Civil War this morning, using Neil Thomas' Wargaming: An Introduction ruleset and some of my 6mm Baccus ECW troops.  The buildings used were the lovely Timecast models.

The scenario was very simple: a small Royalist Army tries to force a crossing over a small river defended by an equivalent-sized Parliamentary force. 

The Royalist Army consisted of 4 Regiments of Horse (2 x Veteran, 2 x Trained) and 4 Battalia of Foot (2 x Veteran, 2 x Trained).  The Parliamentary Force consisted of 2 Regiments of Horse (Raw), 5 Regiments of Foot (1 x Veteran, 4 x Trained) and an artillery unit (representing a couple of guns).

The initial deployment: Royalists to the South (bottom), Parliamentarians to the North (top) in the slightly eerie dawn light(!)

The sun comes out and the Royalists attack: On the left the Royalist cavalry have already overthrown their opponents, but the intervention of the Parliamentary Foot is restoring the situation.  The infantry is coming to grips in the centre, whilst the Parliamentary troopers are just about holding on against the Cavaliers on the right.

Same position, different angle.

The struggle in the centre: Royalist infantry take heavy casualties crossing the stream into the town, but can their local superiority in numbers pay?

It can!  The Royalists push on in the face of heavy casualties and the Parliamentary centre is on the verge of collapse...

Same position, closer-in.

Victory to the Royalists! The river crossed, the town taken and the Parliamentary army reduced to two functioning units.  Long live the King!

Game Notes: An exciting game, with Royalist marginal advantages telling in the end.  The rules were good, considered as a game.  Where I am not so sure is about the dynamic of infantry combat.  It tended to be quite a protracted slog.  Strong morale rolls on both sides helped this, but I'm not totally convinced that infantry in the ECW could engage in a protracted close-range combat.  I'd be interested if anyone reading this who has more period knowledge could comment.

Saturday 10 January 2015

Campaign Battle 15: The Battle of Bejar

The Battle of Bejar, mid-January 1809

General Situation: The French Corps continue their pursuit of the Anglo-Spanish forces as they retreat westwards.  Napoleon has departed the Peninsula, leaving command of the pursuit to King Joseph and his military advisor Marshal Jourdan, whom the French Corps commanders are but little inclined to obey.  However, although absent from the battlefield himself, Jose has at least managed to get the main French forces into contact with Wellington and Castanos' troops near the town of Bejar.  Just as Marchand was let down by badly by neighbouring forces at the end of 1808, now it is Wellington and Castonos' turn to feel isolated, as not a single one of the adjacent divisions responded to Wellington's appeals in time - including his main cavalry reserve!  Wellington and Castanos were on their own...

The Forces:

Imperial Forces (no C-in-C, the three French Corps acted independently).

IV Corps (CinC - Lefebvre (Plodding))
Sebastiani's Division: 3000 Infantry, 6 Guns
Leval's Division: 4000 Infantry, 6 Guns
Artillery Reserve: 24 Guns

V Corps (CinC - Mortier (Capable))
Suchet's Division: 9000 Infantry, 6 Guns
Gazan's Division: 9000 Infantry, 6 Guns
De Laage's Cavalry Brigade: 1000 Cavalry
Artillery Reserve: 24 Guns

VI Corps (CinC - Ney (Decisive))
Bisson's Division: 7000 Infantry, 6 Guns
Maransin's Division: 8000 Infantry, 6 Guns
Mermet's Division: 7000 Infantry, 6 Guns
Colbert's Brigade: 1000 Cavalry
Artillery Reserve: 24 Guns

Anglo-Portuguese Forces (C-in-C Wellington (Decisive))
Anstruther's Division: 9000 Infantry, 6 Guns
Spencer's Division: 6000 Infantry, 6 Guns
Baird's Division: 12000 Infantry, 6 Guns
Artillery Reserve: 36 Guns

Army of Andalusia (C-in-C Castanos (Capable))
Venegas' Division: 5000 Infantry, 1000 Cavalry, 6 Guns
Espana's Division: 1000 Infantry, 1000 Cavalry, 18 Guns

The Deployment:


The west of the Battlefield: Anglo-Portuguese forces at the bottom (South) facing Imperial forces approaching from the top (North).  Anstruther is on the allied left, then Spencer's troops are at the right-edge of the stream, Baird is furthest back in the centre.  Mortier's V Corps is at the top-left, Ney's VI Corps is at the top-right.

The east of the battlefield: Castanos's two divisions (bottom) face Lefebvre's Imperial IV Corps.

Closer-up of Castanos and Venegas' Division facing Sebastiani's troops (left), a grand battery of IV Corps artillery (centre) and Leval's Germans (right).

The Battle: 

The initial fighting on the allied left - Anstruther's troops did waver as Gazan's veteran infantry attacked supported by a large concentration of artillery, but the British 'reverse-slope' tactics proved successful and Anstruther held on...just.

Ney's VI Corps, with Bisson's Division in the lead, march down the main road: 12 Allied guns and a brigade of redcoats are in position to stop them.

Lefebvre leads his IV Corps (quite small, after recent losses) towards Venegas' Division on the French left.

Castanos brings up his reserves as the direction of Lefebvre's advance becomes clear.


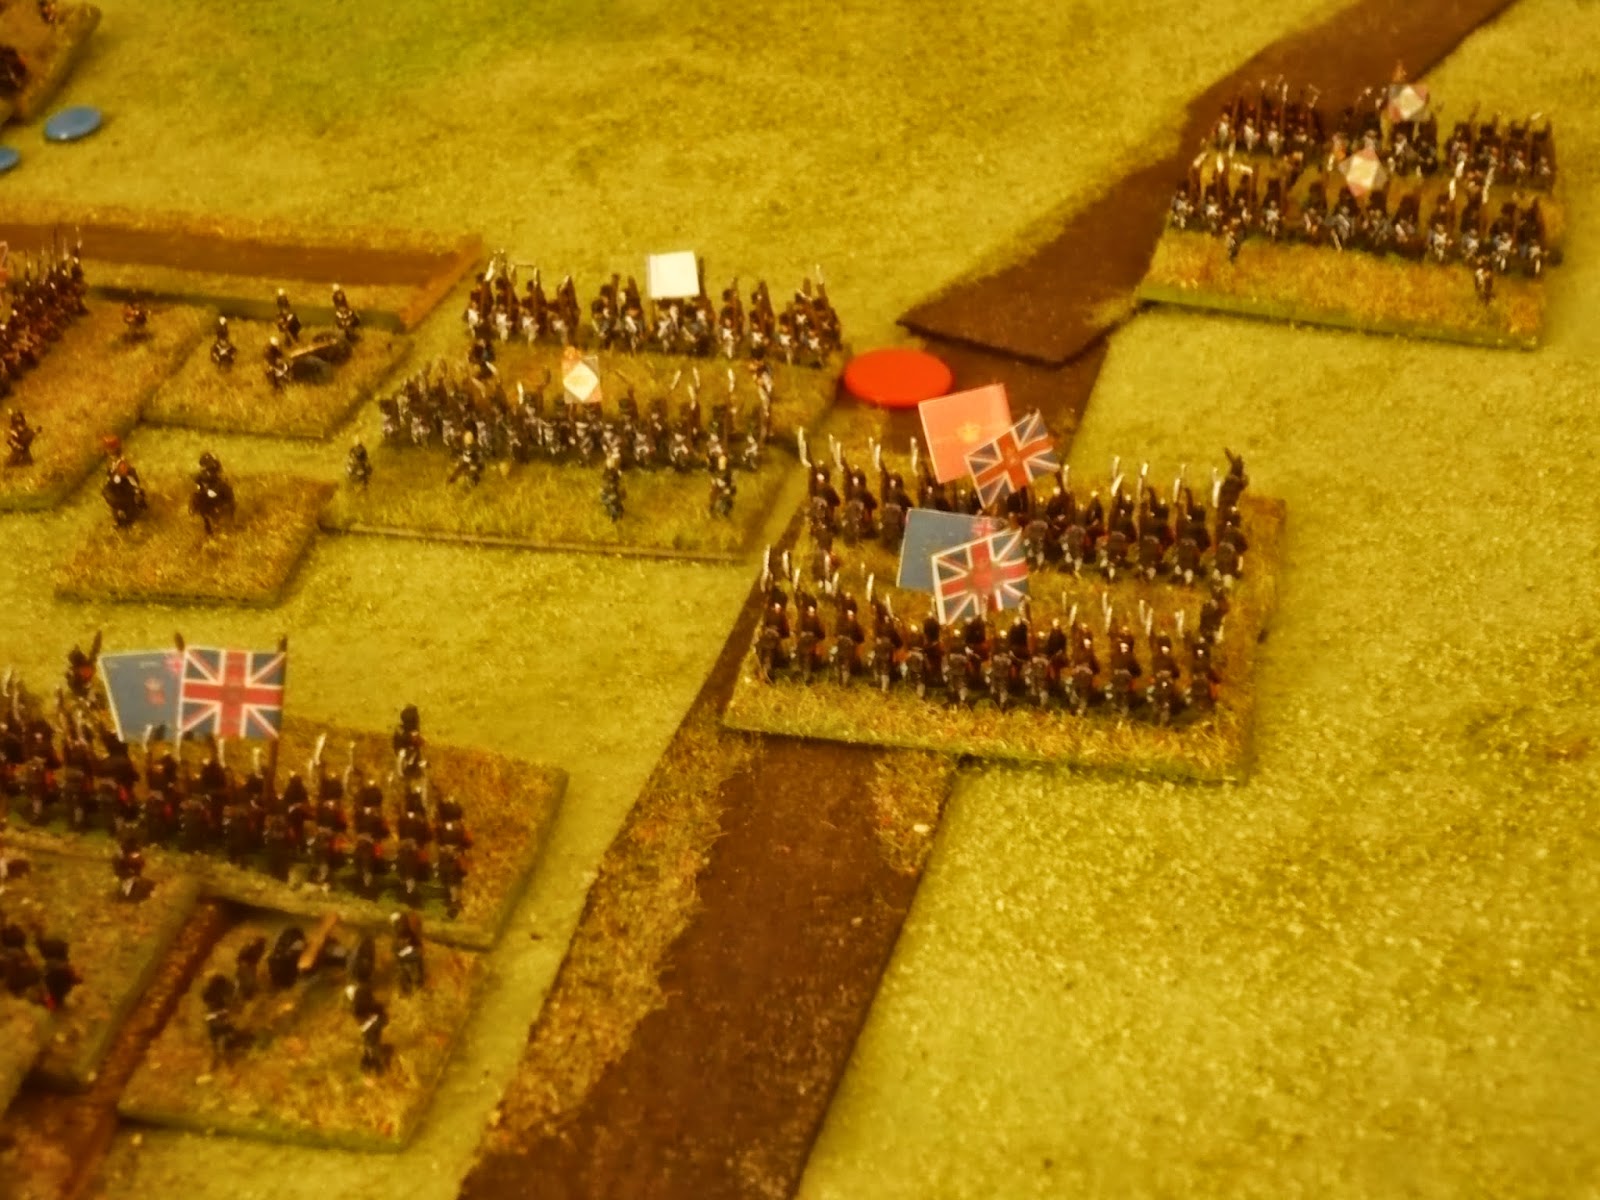
This perhaps doesn't look like a key moment, but this moment actually defined the whole battle.  Ney, at the head of Bisson's leading brigade, had been originally planned to deploy here, subject the Allied centre to a crushing artillery bombardment and then attack.  However, with Wellington's attention firmly pinned to his left, Ney decided to risk a hasty attack with the aim of splitting the Allied armies.  Baird has already brought up some of his reserves to face the threat.

Lefebvre's twist: rather than attack Venegas' main position, he swerves Sebastiani's troops to try and hit the join between Venegas' and Espana's troops. 

Back to the Allied Left: Anstruther's left-hand brigades resist Suchet's attack: note the red 'shaken' markers around the Imperial units...

And Lefebvre gets closer...

Close-up of Anstruther's position under pressure from Suchet (left) and Gazan (right).

A battle of two halves: Sebastiani's Division has broken Venegas' left-hand brigade and captured Espana's artillery; but Castanos has led a charge which has broken Leval's German Division and captured a large part of IV Corps' artillery!  Lefebvre's Corps is hors de combat, Castanos keeps a grip on his troops by the narrowest margin.


Ney has concentrated Bisson's two strong brigades and is ready to assault, the British make ready to receive.

Ney, sword in hand, forces one of the British brigades and its supporting artillery back...the Allied line is wavering. 

Same position, with a bit wider view - note the shaken British infantry in the wood.


A charge by Anstruther's troops on the left forces Suchet's troops back in considerable disorder after a very stiff fight: Suchet's troops retreat from the field.

Ney brings more troops up (from Maransin's Division) but the breakthrough remains elusive and Wellington has arrived to take control of the situation in person.

Mortier launches a surprise assault with Gazan, routing a brigade of British infantry and capturing half of Anstruther's guns: the remaining Anglo-Portuguese just will not be shifted from their ridge however and Gazan is forced to pull back with loss.

The position at the effective end of the battle.  One of Bisson's brigade has been broken by an attack in its flank after its last attempt to fight forward was repulsed.  With Lefebvre's Corps in tatters, Mortier's Corps only fit to defend and superior numbers convering on Ney, Ney declined to press home a further assault and withdrew.  Wellington and Castanos were content to harry rather than make a significant push for decisive victory and the remaining Imperials escaped without serious further loss.

Results:  The Allies lost about 3500 infantry, slighly more British than Spanish, and 24 guns in the battle, which were however recovered on the field, abandoned by the French.  The French lost around 9700 men (including over 5000 prisoners) and the same number of guns, which weren't however recovered.  Luckily for the French, their cavalry had not been engaged during the battle and the absence of the British cavalry reserve meant that they were not pursued effectively from the battlefield.

This victory looks like the end of the French attempt to catch and destroy Wellington in Spain: by the time units are rested and further formations arrive, Wellington and Castanos are likely to be clean away.

Game Notes:

 My conception of the battle from the French point of view was to demonstrate on both flanks while Ney' Corps advanced into the centre, set up a grand battery to pound the centre of the Allied position and then assault it with veteran troops whilst weakened.  Naturally if the Allies weakened their flanks to support the centre, Ney would then pin the Allies and Mortier and Lefebvre would attack instead.  I think this was a reasonably sound concept of operations...which I then proceded to abandon when Ney decided to attack on the hoof.  Mortier gave Ney the best chance by launching an attack with Suchet's decision which kept Wellington to far left and Ney, for a couple of turns, looked likely to punch a hole in the centre.  However, a mixture of Allied luck and skill gave them the victory.  The French seemed to do very well in individual combats, but roll very badly for outcome and morale roles, so even when it looked as if they were about to gain an advantage, it proved an illusion.  It was a really exciting game, lasting about 15 or so turns (so 5 hours of battle time).


Thursday 1 January 2015

A Review of 2014

So what happened in my heretical gaming in 2014?  Well, I had a look back at what I started the year trying to achieve: http://hereticalgaming.blogspot.co.uk/2014/01/plans-and-projects.html

(Last year's plans are in italics)

1.  My main project is my ongoing Peninsular War campaign.  I have all the troops I need for this, although I currently have to proxy Neapolitan and Dutch infantry, for example.  But I have the vast majority of what I need for it, so the main problem has been to find time between extensive work and family commitments, and some unfortunate bouts of sickness, to resume it.  Hope springs eternal however and I've managed to get it started again this weekend.

It didn't continue as far or as fast as I would have liked, endless doses of reality interfering as usual!  But it has progressed and it is still enjoyable, so a definite success.  The arrival of a 'playful' kitten in my house has necessitated a delay whilst I sorted out a new place for my campaign map (it had been permanently left on the floor in our box room). However, I've managed to transfer my campaign onto the "Tomb For An Empire" VASSAL module, so hopefully that will help.  It also means I can play through the campaign turns whilst I'm away from my gaming table and so always have the next battle ready to fight.  The Neapolitan infantry and some other odds and sods are part-painted, I'll be looking to finish them during this month.

2.  The next campaign I am lining up is a re-fight of Caesar's Conquest of Gaul and his Invasion of Britain.  I still have a few more chariots to construct and paint, but in the main the armies for this are done.  I shall use Polemos SPQR probably, although DBA and DBM are also possibilities.  The key thing to research and decide here is the boardgame to use as a basis for it.  I'm still looking, so any recommendations would be very useful here!

I've played a few games of Polemos SPQR and DBA...and I'm still undecided as to which one to use.  I've made no progress at all on choosing a boardgame.  I'm tempted to wait a few more months, see how I get on with VASSAL, and then that might influence my decision as to which boardgame to go for.  Almost all of the troops are painted for this: only a few more bases of chariots and a couple of Roman ballistae to go.

3. I'm strongly considering getting rid of all my 20mm and 15mm figures and concentrate only on 28mm (for hybrid games, mainly) and 6mm.  It will make storage and sharing terrain easier and will mean I'm only ever painting for massed effect or individual figures.

Done - at least as regards the 20mm stuff, every single bit has been sold or donated.  I've kept hold of the 15mm WW2 stuff for now.  I'm still thinking about what to do with that, there is a bit of me which thinks that 15mm is the best size for games of about 40-100 figures or so per side.

4.  I feel a strong to desire to thin out the rules and books I have.  I don't think I have a very large collection by wargaming standards, but I don't want to keep rules I'm pretty sure I'm never going to play (again).  Look out for some advertisements on TMP!

Done, by and large.  Lots of rules, old RPGs and books have gone to better homes now!  And I don't miss any of it.  There are still a couple I may yet get rid of, but I've done the lion's share.

5. Play some more WW2 games with the intention of finding the rule set or sets I really like.


I have found that I really still enjoy the old WRG rules.  And I played a really exciting PBEM game this year using them: http://hereticalgaming.blogspot.co.uk/2014/02/action-at-st-jean-fictional-ww2-scenario.html

6. Finish painting my two 6mm Wars of the Roses armies.

Done (although a couple of units were painted 'too' quickly, even for me and really need a little extra work).

7.  Decide whether to expand my token 6mm ECW forces.  And if so, decide whether to wait for Baccus to re-sculpt them.


I decided to do it and not to wait: I now have two respectable forces, entirely painted with the exception of a few bases of Cuirassiers.  These armies are now *done* - at least until Baccus get round to re-sculpting them, anyway.

8.  Decide whether to collect a 6mm Napoleonic Prussian army (the last of the major combatants I don't have).  On the plus side, it would be great to do a large Waterloo wargame in 2015 with all the 'correct' troops (and not use my Russians or Spanish as proxies for example).  On the negative side, isn't it that the kind of completist thinking which leads people to collect far more than they could ever game with regularly?  And also, the Prussians were the main Napoleonic range which Baccus hasn't re-sculpted yet.  I might kick myself if Baccus get round to doing re-sculpts for them in 2016-7, say.


I decided not to get the Prussians and will wait until the resculpts arrive.  For my Waterloo re-fight I think that I will just use the Allies and the French anyway and make Prussian arrival a rules mechanism (basically I'm going to exclude French units which mainly fought against the Prussians).  I actually think that this will lead to a more Waterloo-like game, as the optimal French strategy will then not be "immediate all-out charge".

9. Decide whether to do moderns or not.  I'm really interested in them, but feel perhaps I should wait until I'm happy with a WW2 set or two, so I know the kind of modern game that I'd like before starting to collect the figures.


I haven't decided yet, as the WW2 stuff is only 'largely done', rather than 'more-or-less finished'.

10. I'm aiming to be in  state of 'finished' by Christmas 2014.  I had aimed to be like that last year, but in the end 2013 ended up being so busy and disrupted it was never going to happen, so I've extended it by a year.  I have more or less decided that I want to stop collecting big armies by the time I'm 40 however - everything after that will be additions or for small games only.

My life is not my own - 2014 was nearly as disrupted as 2013.  I've extended by 'finished' deadline to summer 2015.  I think I will achieve this one, failing major life events gettting in the way.


And Other Stuff:

I ended up playing lots of X-Wing and Lord of the Rings: Card Game this year too.  My brother-in-law is really into the first (I got him it as a Christmas present a couple of years ago) and we have had some decent games of that.  I've enjoyed it so much I got my own copy for Christmas, so we can play some bigger games. Some of my family enjoy the Lord of the Rings card game since it can be played co-operatively, so that has been a bonus and we are all looking forward to playing more than that.

As usual, I wasted a decent chunk of time on TMP and after the infamous bust-up in the summer, on The Wargames Website too.

The Relief of Hostalrich - Cuesta's Triumph!


The Relief of Hostalrich , early January 1808

General Situation: The Spanish Army of the Centre under General Cuesta, transported by the Royal Navy in December to Tarragona, has advanced north along the coast to try and impede the operations of St-Cyr's VII Corps as it attempts to reduce the fortresses held by the Spanish in Northern Catalonia.  Ignoring Barcelona as too strong - despite its garrison of poor-quality Neapolitan infantry - Cuesta has taken the rather bolder option of marching to the relief of the fort at Hostalrich, held by only a couple of thousand men against Chabran's veteran French division.

The Forces:

Imperial Forces:

Chabran's Division of the French VII Corps (CinC General Chabran - Capable)
Chabran's Division: 6000 Infantry, 1000 Cavalry, 6 Guns

Spanish Forces:
Army of the Centre (CinC Gen Cuesta - Capable)
Zayas' Division: 4000 Infantry, 2000 Cavalry, 6 Guns
Morretti's Division: 5000 Infantry, 1000 Cavalry, 6 Guns

Spanish Totals: 9000 Infantry, 3000 Cavalry, 12 Guns

The Set-Up:


The Spanish of Moretti's Division at the bottom (Southwest) facing the French.  Zayas' Division was marching separately to reduce the logistic burden, so would enter the battle at a later moment*.  Until the arrival of the second Spanish Division, the numbers were more or less even on both sides, with the French having a distinct qualitative advantage: however, a bold attack might leave the French open to a devastating and irresistible Spanish attack when Zayas arrived on the field.  Chabran had a difficult decision to make initially: how aggressive to be?

Same position showing a slightly wider field.  Cuesta decided to concentrate on the right initially, with Zayas' units able to go to left or right upon their arrival, as required.

A closer view of the main infantry positions.  The French units to the right with the white flags are 'Trained' units, all the others being Veteran.  Most of the Spanish facing them were raw and so, when an opportunity arose, Chabran decided to attack!
 Chabran's Attack...


The high watermark of French success.  The French battalions have routed one Spanish battalion and the other raw Spaniards facing them are under severe pressure (red counters indicate 'shaken').  However, a Spanish flanking force is about to surround the advancing French if they fail to defeat the Spanish in front of them...

...And Defeat!

...which they fail, by the narrowest of margins to do!  Attacked on two sides, the French regiment surrenders and Chabran (centre of shot) only just escapes!  French reserves rush to plug the gap (top right).

...Meanwhile, on the Spanish right flank, the Spanish light cavalry enjoy the unusual experience of having achieved total victory over their French opposite numbers: the red shaken markers indicate where the French cavalry was before it routed!  This combat was epic: the intial clash, lasting around three phases (10 minutes) was indecisive, but the Spanish, although disordered, were slightly better off than the French chasseurs, launched another charge and this time broke the French brigade in short order.
The French Retreat

A shot indicating the final stages of the battle: the French withdrawal.  The French infantry did actually manage to successfully break contact without suffering further significant losses, despite the arrival of Zayas' division (left).  However, Zayas was able to preserve his 2000 Dragoons for the pursuit...
 Result:
A clear French defeat, although it is difficult to say if the French fought badly - they had a 2:1 chance of breaking one of Moretti's brigades and lost the 50:50 cavalry combat but lost out both times.  On the battlefield, Spanish casualties amounted to about 1200 infantry and 100 cavalry, whereas the French lost 1300 infantry and 750 cavalry.  However, although the French infantry withdrew from the immediate battlefield in good order, the fresh Spanish cavalry was able to successfully pursue the retreating French off the battlefield and take another 2000 prisoners from Chabran's infantry.  Chabran's division has thus lost around 50% of its effective strength and been forced to withdraw on the main body of VII Corps, and Hostalrich has been successfully relieved.

Game Notes:
The brigade morale check continues to be the single most crucial roll in these games: Moretti was really lucky to save his infantry brigades under Chabran's attack, but it is these tense dice rolls which are one of the best bits about gaming!  The campaign rules really reward a general for keeping some fresh cavalry and although the French rearguard did successfully disengage, it did not stay round long enough to engage the Spanish cavalry, which would have greatly eased their pursuit.  However, since the French cavalry had been driven off by this point, staying longer might have meant the destruction of the whole French force.  Mechanically, I need to re-examine the rules for moving backwards.  Infantry can move 1 base depth (i.e. 3cm) facing the enemy, or, for double the orders points, can effectively "reform" two base widths (i.e. 12 cm) back.  I think the author suggested only allowing "reform" moves if one element of a brigade remained stationary (or changing position, but some part of it must remain in its former position).

*The campaign rules seem to allow much reduced logistical impediments if troops are activated separately.  I'm not totally convinced by this, but I have played along with it.  However, I have ruled that such forces need to make a Commander's initiative test to arrive, and then only actually come onto the battlefield when a 6 is rolled on a D6, rolled every turn after the first.  This has worked well so far, providing an appropriate risk/reward for the decision.  It came off for the Spanish in this battle, but it cost the French badly in the bigger battles against the Allies in December.