Heretical Gaming is my blog about my gaming life, featuring small skirmishes and big battles from many historical periods (and some in the mythic past or the far future too). The focus is on battle reports using a wide variety of rules, with the occasional rules review, book review and odd musing about the gaming and history. Most of the battles use 6mm-sized figures and vehicles, but occasionally 15mm and 28mm figures appear too.

Thursday, 14 April 2016

The Battle of Mons Graupius: A Polemos SPQR re-fight

Background:
The battle of Mons Graupius took place around AD83 in Scotland between the Caledonians and the Imperial Romans: further details here.  This battle is one of the scenarios in the back of the Polemos SPQR rulebook and I have Late Republican Roman and British armies which I thought would be close enough, so I chose this battle for a rules comparison test, the idea being to re-fight the battle three times with three different rulesets. So, the first game using the Polemos SPQR ruleset itself.


Order of Battle:

The scenario gives the following forces:

Caledonians:
Calgacus (Poor general)
3 bases of Chariots (Raw/Elite)
3 bases of Light Horse (Raw)
11 bases of Tribal Foot (1 base Trained, remainder Raw)
3 bases of Skirmishers (Raw)

Romans:
Gnaeus Julius Agricola (Average general)
1 base of Boltshooters (Trained)
5 bases of Auxiliaries (Trained)
7 bases of Legionaries (Trained)
5 bases of Cavalry (2 bases Veteran, remainder Trained)

Set-Up:
Romans at the bottom (no prizes for guessing that!): Left - Cavalry Front - Auxiliary Infantry Rear - Legionaries Reserve - Cavalry Right - Artillery and Cavalry

Caledonians on the slopes of Mons Graupius behind: tribal infantry in the centre in three lines, whilst each wing has chariots at the front, followed by skirmishers and light horse

View from the Roman right

View from behind the Caledonian centre on the top of the hill down onto the Romans

Same position, wider perspective


And from the Caledonian left, on the steep slopes behind the chariots
 The Battle:
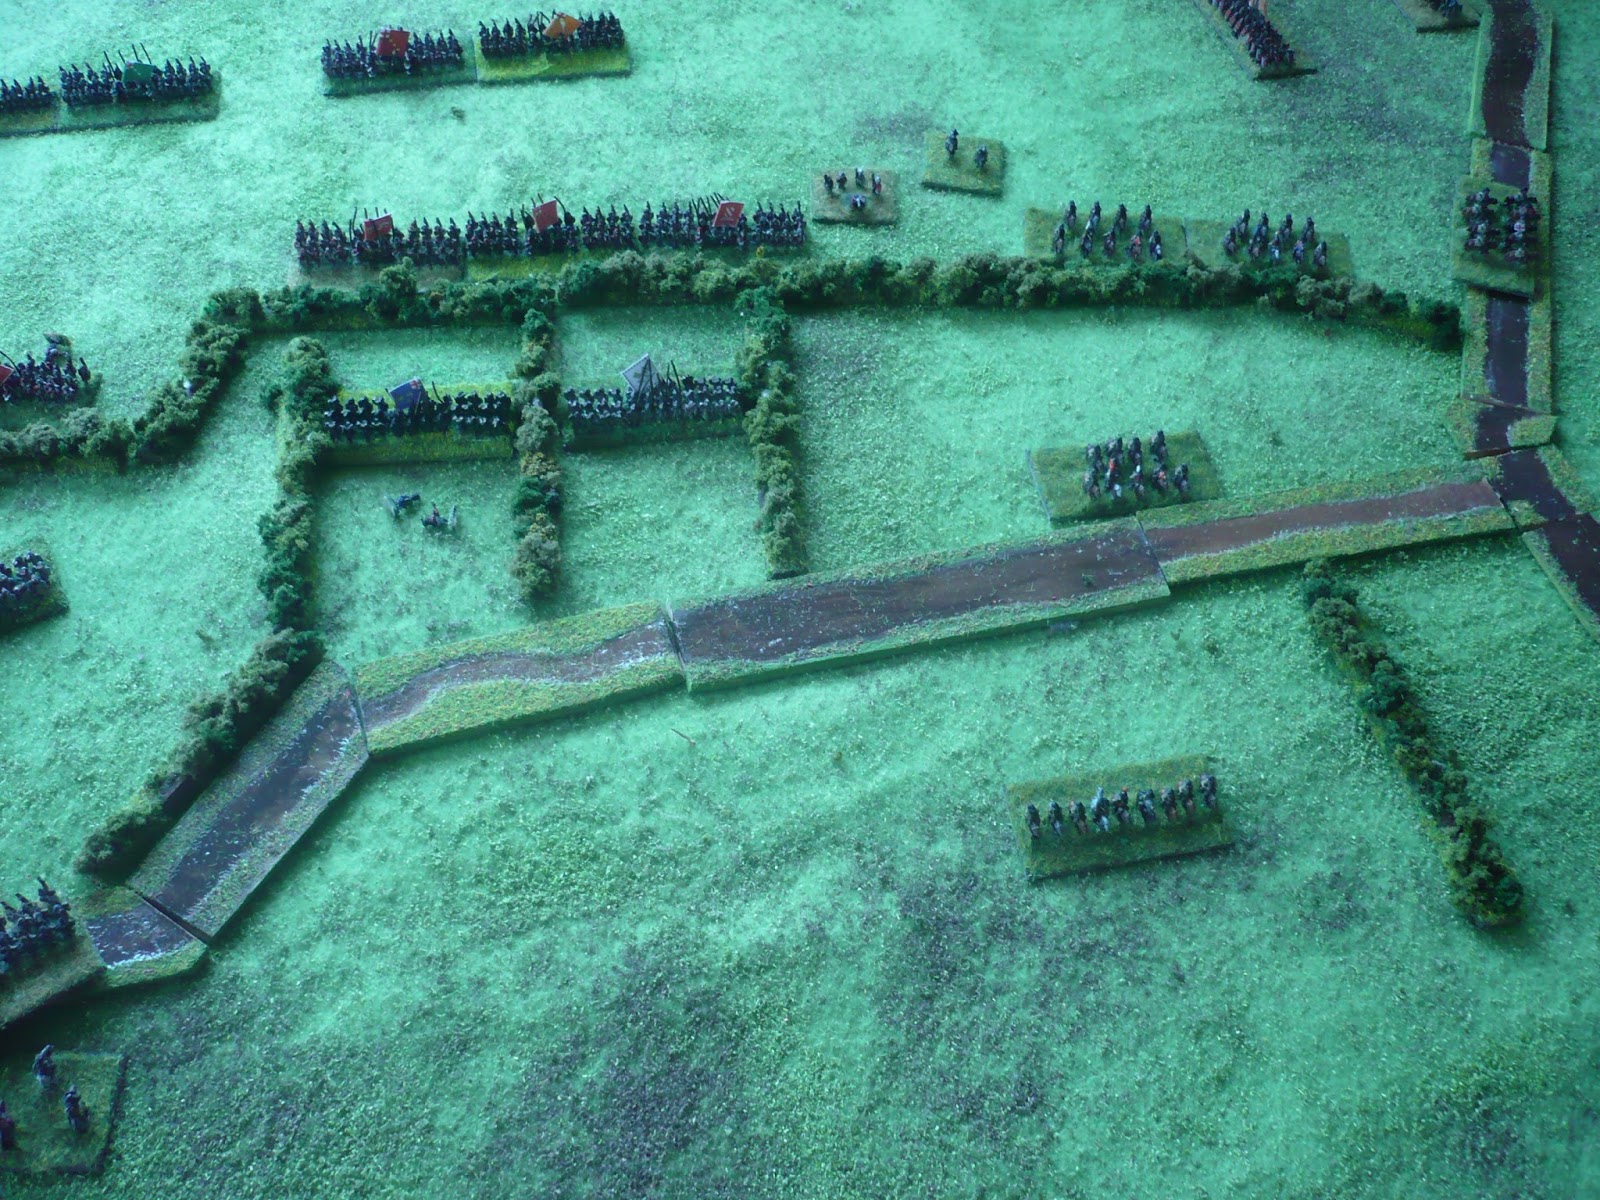
The Romans attack after an ineffectual artillery bombardment; they advance their flanking cavalry, and a unit of auxiliaries is assisting them on the left: the red markers indicate the shaken Caledonian chariots being pushed back

A closer detail of the Roman left: Roman cavalry and auxiliaries push into the Caledonian right flank

And Roman cavalry do the same on the right (the other cavalry unit on this flank had refused to charge!)

The Roman pressure continues and both Caledonian flanks start to wilt...

And collapse!  the Caledonians in flight on the Roman left wing!

And the same result on the right!  Roman cavalry pursue the routed Caledonian chariots

The Caledonians attack in the centre to try and restore the situation and relieve the pressure on their flanks

Closer in; the next photos weren't usable, but showed the Caledonian infantry making some progress and routing some of the Roman auxiliaries, but eventually the tied turned when the Roman legionaries got involved and the Caledonians were defeated and routed.  The Caledonian general was killed in this combat: disastrously, as the Caledonian second line never managed to get forward to support its fellows

The Roman left flank has cleared away its opponents and is threatening the flanks of the Caledonian second and third lines

The legionaries have bolstered the auxiliaries who have destroyed the tribesmen to their front: they are now advancing up the slope; the Caledonians collapsed at this point


The position on the Caledonian left at the end of the battle: although they suffered some losses, the Caledonians were largely victorious here: you can see one unit of Roman cavalry routing, the other unit was trapped whilst pursuing and destroyed.

Game Notes:
I'll cover the comparative aspects of the game later but in its own right it was a good game, relatively brief.  Manoeuvre is very hard in this game, it is more about timing and exercising (very limited!) control.  I set up the Caledonians according to the scenario map in the Polemos SPQR rulebook, but I would never use this deployment in a game with free set-up.  The Caledonians need to be in bigger, solid blocks especially their infantry.  The tempo point costs are just too great for the general to cope with using various lines like the Romans can.

Figures are from Baccus 6mm.  As mentioned at the top, the rules used were Polemos SPQR, there are some reviews here from:
Meeples & Miniatures
Wargaming for Grown Ups
Me

Friday, 8 April 2016

Peninsular War Campaign Summary - end of May 1809

Situation at the end of May 1809:

 Summary of Events:
Another month without any battles but with significant strategic moves,  Joseph initially moved eastwards towards Madrid hoping to scare off Elio's IV Army or even better, defeat him, before occupying the Madrid area and re-establishing a line of communication to Bayonne running through the passes towards Avila then Burgos and abandoning the Plasencia-Salamanca-Valladolid-Burgos line.  However, Elio withdrew a little and Wellington pursued.  The difficulties of the situation - particularly the devastation around Madrid - re-asserted themselves and Joseph has now committed to trying to force Wellington into retreat, then withdrawing into Leon before re-establishing his logistical network, training and reinforcing before resuming the invasion of southern Spain and Portugal.  Cuesta has brought his Army of the Centre northwards and will soon be able to support Wellington directly.

The key problem for Joseph is that he must keep his remaining troops concentrated to overmatch Wellington, but this robs him of any other offensive capability.  He is therefore instructing Moncey to continue the rebuilding of his III Corps from garrison troops in Northern Spain to provide him with that extra offensive capability.

In the East, the Armies of Valenica and Catalonia, having been reinforced from Andalusia have jointly threatened St-Cyr's positions around Valencia.  He has withdrawn to Castellon anda abandoned, for the time being, any thoughts of blockading Sagunto and Valencia.  St-Cyr is considering withdrawing to Tortosa to aid Junot in the final reduction of those fortresses before beginning a much larger invasion of Valencia.
Soult and Mahy remain watching each other in the passes of Galicia.

Imperial Order of Battle

 Army of Spain (Joseph): 4000 Infantry, 5000 Cavalry at Almaraz
Merlen's Bde: 1000 Cavalry at Burgos

I Corps (Suchet): 15000 Infantry, 3000 Cavalry, 36 guns at Almaraz
IV Corps (Lefebvre): 7000 Infantry, 2000 Cavalry, 36 guns at Almaraz
V Corps (Mortier): 9000 Infantry, 3000 Cavalry, 36 guns at Almaraz
VI Corps (Ney): 13000 Infantry, 1000 Cavalry, 36 guns at Almaraz

III Corps (Moncey): 11000 Infantry, 24 guns  at Zamora

II Corps (Soult): 16000 Infantry, 4000 Cavalry, 24 guns at Astorga
Merle's Div: 6000 Infantry west of Zamora

VII Corps (St-Cyr): 16000 Infantry, 2000 Cavalry, 36 guns at Castellon

VII Corps (Junot): 5000 Infantry, 1000 Cavalry, 24 guns at Gerona
Decaen's Div: 3000 Infantry at Tortosa
Travot's Div: 5000 Infantry at Tarragona
Chabot's and Souham's Divs: 9000 Infantry at Hostalrich
Habert's Div: 9000 Infantry at Hostalrich

Garrisons:
Rosas - 1000 Infantry
Figueras - 2000 Infantry
Gerona - 1000 Infantry
Barcelona - 1000 Infantry
Oropesa - 1000 Infantry
Burgos - 3000 Infantry
San Sebastian - 2000 Infantry
Pamplona - 4000 Infantry
Tudela - 1000 Infantry
Zaragoza - 7000 Infantry
Valladolid - 3000 Infantry
Bayonne - 5000 Infantry
Perpignan - 2000 Infantry

Allied Order of Battle

IV Army (Elio): 19000 Infantry, 4000 Cavalry, 12 Guns south of Toledo

Army of Andalusia (Castanos): 3000 Infantry, 2000 Cavalry, 12 Guns in Cadiz
Reding's Div: 2000 Infantry  in Seville

Army of the Centre (Cuesta): 8000 Infantry, 3000 Cavalry, 12 Guns west of Caceres

Army of Galicia (Mahy): 30000 Infantry, 24 guns at Lugo
Adorno's Div: 1000 Infantry at Porto

Army of Valencia (Cervellon): 7000 Infantry, 1000 Cavalry, 24 guns in Alicante
Woster's Div: 4000 Infantry at Sagunto
Rovira's Div: 4000 Infantry east of Murcia

Army of Catalonia (Sarsfield): 7000 Infantry, 12 guns south of Valencia

The Anglo-Portuguese Army (Wellington):  40000 Infantry, 7000 Cavalry, 84 guns east of Coria
Hamilton's Div: 6000 Infantry in Lisbon
Silveira: 8000 Militia East of Coria
Trant: 8000 Militia in Elvas
Miller: 8000 Militia in Almeida

Spanish Garrisons:
Seville - 6000 Infantry
Malaga - 2000 Infantry
Granada - 1000 Infantry
Ciudad Rodrigo - 2000 Infantry
Badajoz - 6000 Infantry
La Coruna - 2000 Infantry
Cartagena - 2000 Infantry
Valencia - 3000 Infantry
Tarragona - 3000 Infantry
Hostalrich - 1000 Infantry
Tortosa - 4000 Infantry

Anglo-Portuguese Garrisons:
Santarem - 2000 Infantry
Gibraltar - 6000 Infantry
Almeida - 1000 Infantry
Lisbon - 2000 Infantry


Saturday, 2 April 2016

Polemos ECW: Battle of Edgehill AAR

Inspired by this recent battle report of a refight of the battle of Edgehill 1642(for the DBR rules).   After reading up on the battle though, I decided to use an alternative terrain and deployment.  It is based on the Foard/Pannett archaeology and there is a map here

Polemos ECW, the ECW rules produced by Baccus 6mm, normally uses a figure scale of 1 figure = 12.5 men (or so).  To enable me to play it on my existing table with my existing collection, I adjusted the scale so 1 figure = 20 men (i.e, a base of foot would represent 720 men rather than 500, a base of horse would represent 180 troopers rather than 125) and allowed 1 base width to represent about 110 yards.  I supposed that this change would be small enough to allow me to play the rules as written, without doing undue violence to ranges and movement distances and so on.

The Polemos ECW rules don't have a scenario for Edgehill as such, but do have an army generator which gives suitable details.  Adapting this slightly, I used the following orders of battle:

THE ROYALISTS:

C-in-C: Charles I (Bad)

Left Wing:
Commander: Lord Wilmot (Good)
1 base of Trained Dragoons
1 base of Artillery
1 brigade of 2 bases of Trained Horse (S i.e. uses Swedish order and tactics)
1 brigade of 1 base of Trained/Elite Horse (S)
1 brigade of 2 bases of Raw Horse (S)
1 brigade of 1 base of Veteran Horse (S)

Centre:
Commander: Earl of Lindsey (Bad)
2 brigades of 3 bases of Trained Foot (M i.e. equal mixture of shot and pike)
1 brigade of 4 bases of Raw Foot (M)
1 brigade of 3 bases of Raw Foot (M)
3 bases of Artillery

Right Wing:
Commander: Prince Rupert (Good)
2 brigades of 2 bases of Raw/Elite Horse (S)
2 brigades of 2 bases of Raw Horse (S)
1 base of Artillery

PARLIAMENT:

C-in-C:   Earl of Essex (Bad - commands centre directly)

Left Wing:
Commander: Sir James Ramsey (Bad)
1 brigade of 2 bases of Trained Horse (D i.e. uses Dutch order and tactics)
1 brigade of 1 base of Trained Horse (D)
1 brigade of 2 bases of Raw Horse (D)
1 brigade of 1 base of Raw Horse (D)
1 base of Raw Dragoons

Centre:
1 brigade of 6 bases of Trained Foot (SH i.e. shot-heavy)
1 brigade of 5 bases of Raw Foot (SH)
1 brigade of 6 bases of Raw Foot (SH)
3 bases of Artillery
1 brigade of 1 base of Trained Cuirassiers (D)

Right Wing:
Commander: Earl of Bedford (Bad)
1 brigade of 2 bases of Trained Horse (D i.e. uses Dutch order and tactics)
1 brigade of 1 base of Trained Horse (D)
1 brigade of 2 bases of Raw Horse (D)
1 brigade of 1 base of Raw Horse (D)
1 base of Trained Dragoons

 The Battlefield & Deployment:


Royalists at the bottom; Parliamentarians at the top.  The sides are divided by a small ditch, whilst the Parliamentary left wing was arrayed behind some hedges

Closer shot of the centre; the sides separated by a small ditch

The Royalist right / Parliamentary left; a good view of the Parliamentary troops lining the hedges; with another small ditch running perpendicular to the battle lines

And a closer shot of the same

And the Parliamentary infantry in the centre
The Battle - The Royalist Left

Both sides advanced and honours are about even in the initial clash: the left-hand Royalist cavalry troop routed its opponent in short order (and captured the Earl of Bedford to boot!) but was then routed immediately when hit by Parliamentary supports: Royalist cavalry is at its most vulnerable just after it is victorious in the Polemos rules.  The remaining Royalist cavalry has been checked.

Same position, different shot

The Royalists have regrouped and are trying again; the Royalist artillery has managed to repulse the Parliamentary troopers trying to cross the ditch

Further losses to both sides; but the Royalists have managed again to get a foothold on the far side of the ditch - their troopers are again wavering however, and the remaining Parliamentary Horse is advancing...

Same shot, but notice to the left that the Parliamentary troopers have finally forced the Royalist artillery back; also note the infantry clash getting underway to the right of the shot

Renewed fire from the Royalist dragoons and artillery drive the roundheads back over the ditch; the Royalists seem to have gained the upper hand in the cavalry fight here and the Parliamentary infantry is trying to hold them off

The Battle - The Royalist Right

Under Prince Rupert, could there be any other choice but for him to lead the Royalist Horse into the charge?  The Parliamentary horse has been thrown back from part of the hedge, but at other places they have bravely resisted and sent the cavaliers scurrying back


Determined resistance then pushes all the Royalist troopers back!  Prince Rupert reforms them for another go.

In goes the charge!  The roundheads are routed

But the Parliamentarian reserves trot forward and contact the Royalists - and Prince Rupert is taken!

The Parliamentary dragoons are routed but then the Parliamentary troopers break the remainder of the Royalist first line; the other Royalists still cannot gain the hedge

The Battle - The Infantry Centre

The initial clashes weren't recorded, but this is the position as the infantry fight hots up: the leading Royalist infantry (blue and white flags) decline to trade fire with their better-armed opponents and plunge into the centre of their opponents line, scattering a battalia as they take the ditch

Same position, different shot

Royalist infantry try to get to grips with their opponents over the ditch and through the hedgerows

Both sides take losses and have units routing; but overall the Royalists have pushed the Parliamentarians back to the hedge in the centre; the right-wing Parliamentary foot are still holding advanced positions near the ditch

Mixed fortunes: a Parliamentary infantry bases is routed (near the artillery on the left) but two Royalist battalia have been routed; this was the limit of the Royalist advance

The End of the Fight on the Left


The last Royalist cavalry advances over the ditch

One of the Royalist cavalry units routs some Parliamentary troopers (top-left) and goes off in a wild pursuit; the raw Parliamentary infantry successfully holds off the Royalist troopers with its continuous accurate musketry: some of the Royalist cavalry is becoming increasingly shaken by the hail of musket balls
 
 Collapse of the Royalist Right

Bereft of Prince Rupert's inspirational leadership, the Royalist cavalry is in increasing disorder, pushed back over the hedge and the ditch

The Parliamentary troopers celebrate a decisive victory - all the Royalist cavalry has been outfought and is in rout

The overall position on the right; Parliament has triumphed decisively on this flank
 Finale:
The remaining Royalist cavalry on the left was finished off by the Parliamentary musketeers; despite the routing of more Parliamentary infantry in the centre, Royalist morale collapsed at this point and forbade advancing to contact for all but elite troops; as the Royalists no longer had any, this spelled defeat and the end of the battle

Royalist infantry towards the right are in the middle of their last ditch effort to break through the defensive line on the hedge

Same position

The Royalist left, denuded of troops as the Parliamentary cavalry have finally captured the guns and driven off the Dragoons in the hedged enclosure: Royalist morale collapsed at this moment
 
Game Notes:
An interesting and hard-fought encounter.  In general the rules coped well and gave a quick game, but the abiding weakness of Polemos rules remains - the moves and combat outcomes keep on generating situations where it is hard to know immediately how to resolve them; I can normally work out what should happen or come to a reasonable compromise - and these situations are becoming fewer as I internalize the rules - but they will always exist I imagine, partly as the bases interact with the terrain in odd ways, partly because the rules don't use the "conform" mechanics of DBx, which add complexity, but remove the possibility of uncertainty.  The guts of the game - tempo system and the combat system - continue to work well and give believable outcomes.

The game was fought on a 5' x 3' table.  It lasted about two-and-a-half hours of playing time.  Figures were from the Baccus 6mm ECW range.
 

Friday, 1 April 2016

Peninsular War Campaign Summary - end of April 1809

Situation at the end of April 1809:


Summary of Events:

There were no battles this month, the major offensive movement was turned back by logistical difficulties and a poor strategic situation alone.

Portugal:
King Joseph, after gathering all his additional forces (essentially the divisions directly subordinate to the Army of Spain) and re-organizing his battered Corps, launched another invasion of Portugal along the route to the North of the Tagus.  However, Wellington this time withdrew slightly to Santarem, leaving only a small British garrison in the castle of Abrantes.  Joseph calculated that his supply line through this devastated region and the time taken to subdue this garrison would cost him more time and casualties than he could afford and quickly withdrew to his start positions around Coria.

Leon:
Soult remained in the area around Zamora, in order to cover Astorga against any advance from Mahy and to provide succour to the Army of Spain if it should be forced to retreat from Portugal.  Moncey's III Corps, stripped of most of its troops and guns, has been sent North to replenish its strength from the garrisons in Leon and Castile.  Only a token remnant remains of the old III Corps which has marched the length and breadth of Spain in the last 10 months!

Castile and Andalusia:
Elio's IV Army has advanced North and is now at Toledo, firmly establishing control of the Madrid area and threatening both Joseph's rear and the entire French line of communication back to France.   Castanos' Army of Andalusia and Sarsfield's Army of Catalonia are still re-fitting in the area.

Valencia:
St-Cyr's VII Corps has continued to advance southwards, reaching Castellon and establishing a logistic base there.  Cervellon's Army of Valencia, reinforced with troops from the Cadiz garrison, has been returned to Valencia and has established strong garrisons in that city and in the fortress of Sagunto.

Aragon and Catalonia:
Junot has received a welcome reinforcement of German infantry to bolster his forces, whilst his infantry divsions maintain their blockades of Hostalrich, Tarragona and Tortosa.  Junot intends to establish a stronger supply network in order to carry out regular sieges and secure the area more quickly: Tarragona in particular may hold out a long time against a mere blockade.

Outlook:
King Joseph is on the horns of a real dilemma.  It will be a difficult to invade Portugal and defeat Wellington because the area between Coria and Lisbon is so denuded of supplies.  At the same time, his rear and his communications with France are being threatened by the advance of the 25,000 men of Elio's IV Army.  However, if he detaches sufficient troops to deal with this threat, he will probably be attacked and defeated by Wellington's Anglo-Portuguese army.  It may be that a withdrawal towards Salamanca is his only option in the short-term, in order to combine with Soult's II Corps  and re-establish a firmer logistical footing.