Heretical Gaming is my blog about my gaming life, featuring small skirmishes and big battles from many historical periods (and some in the mythic past or the far future too). The focus is on battle reports using a wide variety of rules, with the occasional rules review, book review and odd musing about the gaming and history. Most of the battles use 6mm-sized figures and vehicles, but occasionally 15mm and 28mm figures appear too.

Saturday, 11 March 2017

Nuts! Normandy Campaign Mission 05: Attack on Lac d'Iseult

Pressing home their advantage, our plucky Tommies from the Tyneside Scottish, have some scoff, a brew and a fag, pull-through their weapons, bomb up and mount up for the next attack...


This mission is very similar to the previous one, an attack through the countryside to try and penetrate the weakening German defences around a small pond in some parkland.  The German force is down to morale level 1 now, so another successful mission might just seal victory...

The Tyneside Scottish have a more-or-less full platoon, although with a couple more Rep 3 replacements newly-joined since the casualties suffered in the last mission.

The Mission:


The battlefield.  Mainly woods and hills, with a big pond/minute lake in the corner.  The British are advancing from the btottom of the board as viewed.


1 Section, the Pl Sgt and the 2" mortar team advance gingerly into the dead ground

Note the potetial enemy forces (PEFs): one near the hedge by the house, one right in the centre, one top-right (also in the open)

Contact!  British LMGs from 1 Section (bottom left, on the hill) and 2 Section (by the lake) open fire on the German MG42 caught in the open - it is despatched in short order.

2 Section's view of the German MG42 pair.  You can see them, honest!

Position cleared, note the German PEFs starting to appear closer.


The Pl Sgt, a Bren gun team and the 2" mortar team adopt a position atop one of the hills.  They spy another set of Germans - a full section - in the open (just seen between the two woods)

The eagle's eye view:  British Pl Sgt's group on top of the hill, the Pl Comd leading 3 Section into the woods (extreme right); the Germans caught in the open are about to get plastered
The British LMG and 2" mortar open up: the Germans are suppressed and have no answer, the MG42 silenced in the first seconds

The Germans lose six casualties in a few moments: the survivors break and run (top-right)

And 3 Section and the Pl Comd eliminate the rest as they emerge through the woods before they can make good their escape.  However, at this point, more stray artillery hits the British!  One man is killed and two are injured from 2 Section.

More bad luck!  A wandering German patrol comes in to the British rear.

The German patrol's view: nothing seen

The German section adopts covered positions; the British Pl Comd decides to ignore them

Without much further incident, the majority of the British Pl is able to exit the German-side of the battlefield.  Victory!
Game Notes: The British were very fortunate with the position of the German PEFs in this one, as they were able to catch both of them (the other was a 'false alarm') in the open and hit them with superior firepower.  I was able to use the additional THW mortar rules and they seemed to work fine; the 2" mortar on the hill was very effective indeed!  Even when the unexpected German reinforcements came up, they luckily arrived in such a place as they could be ignored safely.  Mirroring reality very well, every single casualty in this game was caused by artillery, mortar or machinegun fire.
And that about wraps up this campaign, as the Germans' campaign morale is now 0.  However, the main objective of this series of games was to teach myself the basic mechanics in a fun way before I start thinking about how to adapt them more fully to my ways of thinking and to look at creating some more involved scenarios.  The rules have been everything I imagined they would be and more.  I will try and write a more full review when I have played a couple more times and at least had a proper go with some armour/anti-tank interactions but I really like this game.  The games are quick and simple to pick up, but very involving to play.  I only wish I'd had this game at 12 - 14: I would have absolutely loved it!
As in all the other games in the series, I used Baccus 6mm, Adler and GHQ figures, Leven Miniatures' buildings, Nuts! Final Edition rules on a 2'x2' board.  I hope that this short campaign has been interesting and maybe useful for those who play or who are considering playing this ruleset.


ECW Refight Battle 01: The Battle of Cricket St. Thomas, September 1642

General Situation: The early manoeuvring in the Southwest has come to an abrupt end.  Hopton, commander of the Royalist forces in the area, has deemed himself storng enough to attack the local Parliamentarian stronghold of  Lyme, as he has heard that his opposite number, the Earl of Bedford has retired towards Sherborne.  However, local intelligence informed Bedford of Hopton's intentions and movements, so he has reversed his movements to intercept the Royalists.  Bedford comes across Hopton on the line of march and orders the attack...

The Armies:

Royalists:
Hopton (Good): 4000 Foot (2 Veteran Foot (M) bases, 6 Raw Foot bases (M) ), 4 Guns (2 Arty bases)
Hertford (Poor): 750 Horse (6 Veteran Horse (Sw) bases)

n.b. M - 1:1 pike:shot ratio; Sw - Swedish tactics

Parliamentarians:
Bedford (Poor): 4000 Foot (2 Veteran Foot (SH) bases, 6 Raw Foot bases (SH) ), 4 Guns (2 Arty bases), 1500 Horse (10 Raw Horse (D) bases, 1 Raw Dragoon base)

n.b. SH - 1:2 pike:shot ratio; D - Dutch tactics

The Battle:

The Royalists defend the bottom, Parliament advances from the top.  The Earl of Bedford has decided to mass his horse on his right (top-left) to try and overpower the Royalist left-flank, whilst holding off the Royalist right with infantry.

Looking along the line from the Royalist left/Parliamentary right.  Will Royalist skill overcome Parliamentary numbers?

Foot and guns in the centre, facing each other across the streams.

View from the Royalist reserve through the centre

Undaunted by the numerical disparity, the Royalist cavalry charge into the Parliamentary horse.

Hopton, seeing that the Parliamentary left flank is refused and defensive, moves his right wing to attack

The cavalry melee on the Royalist left-flank:  the veteran Royalist troopers push their raw opponents backs

The ebb-and-flow of combat: two bases of Parliamentary horse get pushed back (they are all double-ranked); but in the centre it is the Royalist troopers getting the worse of it

Looking along the line as both sides break their opponents!

The Royalist cavalry have pursued forward in disorder, but the Earl of Bedford is preparing to lead his second line into the fray

Same position, but wider shot: note that the Parliamentary cavalry's first-line is preparing to being crossing the stream into the flank of the Royalist infantry

Roundhead infantry splash forward through the stream; but note the Royalist right is nearly ready to engage the infantry holding the Parliamentary left

Bedford routs the remaining Royalist troopers - his right wing has triumphed

The foot exchange musketry, but the Royalist horse declines to charge!

The foot begin to get to grips in the centre; superior Parliamentary firepower is discomfiting the Royalist foot

The Royalist foot close in and rout their Roundhead opponents on the right; the Royalist cavalry are then (finally) persuaded to trot into the fray

The Marquis of Hertford quickly turns a battalia of foot about to confront the victorious Parliamentary cavalry

Crunch time in the centre as the foot approach push of pike

...as the Royalist cavalry break the remaining Parliamentary foot on the far side of the stream.  In true Royalist style, they then pursued their defeated opponents off the battlefield and didn't return in time to achieve anything useful!!

The battle in the centre goes this way and that, with neither side gaining a clear advantage...eventually two bases of each side are broken
 ghg


Realizing the game is up, Hopton breaks out forward across the stream to avoid the flanking Parliamentary cavalry, abandoning his remaining foot and guns

As Parliamentary horse and foot close in from all sides, the remaining Royalists surrender, including the Marquis of Hertford.

Position at the end of the battle.
 Game Result:
A clear win for the Earl of Bedford and Parliament.  Both sides "won" the flank where they were strongest, but the Parliamentary forces were able to exploit this by turning the flank of the centre more quickly.  Typically, the wildness of the Royalist cavalry's pursuit did not help!  Overall, losses were very high:
Royalists: c.560 killed and injured, 2100 captured inc. the Marquis of Hertford, 4 guns
Parliamentarians: c. 560 killed and injured

Marquis of Hertford


Game Notes:
As ever, the Polemos ECW rules gave a good, believable game.

I have no serious quibbles, although I think that some of the modifiers are quite big (i.e have a  very large influence on an opposed D6 roll, the basic combat mechanic).  Shooting is normally ineffective, artillery fire almost always so. I'm not certain that the (admittedly very difficult) balance between musketry and pike action is quite right, but this is a very debatable point.  My review of these rules is here. The main area I still have queries with is the army-level morale mechanism, which I have mentioned before.  The solitaire mechanism I use is here.

Figures from Baccus 6mm.  The table is 5'x3'. I think the building was from Timecast.

The English Civil War - The Refight!

Over the last week, I have begin my long-awaited refight of the English Civil War.  This title, rather than the more typical modern name of The War of the Three Kingdoms, is chosen advisedly since this campaign will, in some ways regrettably, focus on the fighting in England and Wales.  This is because this is the focus of the board game I am using as the engine for my campaign: Charles Vasey's The King's War, published by Clash of Arms Games.


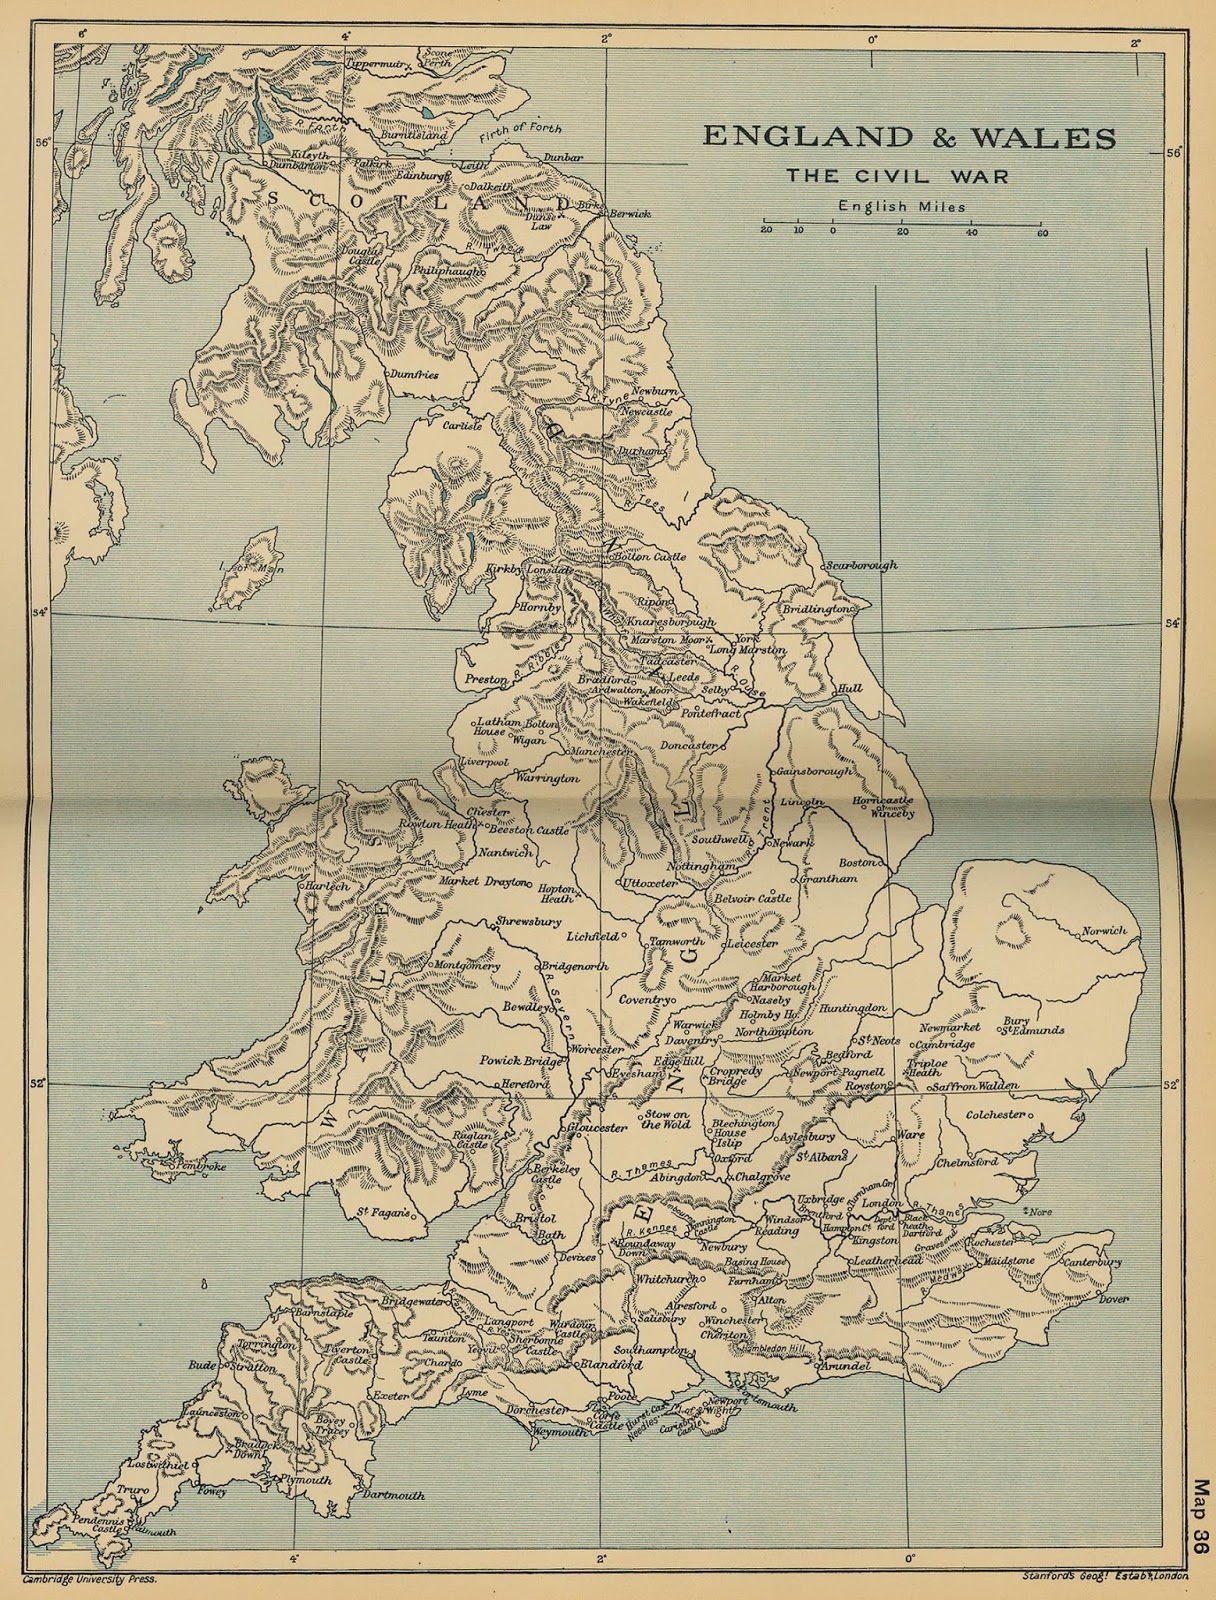
I am still working on how I am going to display the movements of the campaign: the board from the game itself isn't really suitable, and there is no vassal module.  I found this nice map:


But I haven't worked out yet how to display the forces and movements prettily and clearly.  So until I manage it, I will just give text updates of the dispositions and movements.

I will use the Polemos ECW rules published by Baccus 6mm for the tactical actions.


One point to bear in mind is that I am  very much expecting there to be ling periods of hiatus in this campaign.  This is partly because real-life will intervene this year but also because, although I have fair-sized ECW armies, I don't think they will cope with the really big clashes of Newbury / Marston Moor size.  However, I am putting off buying new figures until Baccus release their new ECW sculpts.

THE STARTING POSITION:

The  King's Army:

Newcastle: 2000 Foot
York: 750 Horse
Newark: 1000 Foot
Nottingham: King Charles I with 2250 Horse, 4000 Foot
Oxford: Byron with 750 Horse
Portsmouth: Goring with a small garrison
Bridgewater: Hopton with 750 Horse, 2000 Foot
Shrewsbury: 1500 Horse, 5000 Foot
Prseton: Derby with 1000 Foot

Parliament's Army:

Hull: 1000 Foot
Airedale:  Fernando Fairfax with 750 Horse, 1000 Foot
Northampton: Essex with 3750 Horse, 10000 Foot
London: 1000 Foot
Portsmouth: Waller with 750 Horse, 2000 Foot (besieging Porsmouth)
Wells: Bedford with 750 Horse, 4000 Foot
Bristol: 1000 Foot

n.b. I haven't included subordinate commanders, for the sake of clarity.

August 1642:
King Charles moved from Nottingham to Shrewsbury, detaching Prince Maurice to head North and seize Selby and Prince Rupert to seize Nantwich.  Hopton concentrated on training his force.  Fairfax seized Airedale, whilst Essex and Bedford concentrated on training their recruits.  Waller made good progress in the siege of Portsmouth.


Saturday, 4 March 2017

Lacquered Coffins - Initial Thoughts

I recently bought the latest set of WW2 air rules from Ostfront Publishing, called Lacquered Coffins and I thought I would share a few initial impressions.

The game is quite a traditional WW2 air wargame (I am most familiar with the Fighting Wings! Series, Bag the Hun and the Mike Spick rules, although I have played others) but it is very stripped down.  It has relatively few plane characteristics, relatively coarse grading of altitude and speed and doesn't appear to worry too much about doctrinal tactical differences and so on. The advantage of doing all this of course is that the game rattles along really quickly and doesn't get bogged down in very marginal differences, or trying to recreate all the precise details of WW2 air combat.  It is all a very easy read and kept mercifully brief.
There are plenty of sample aircraft given, rules for pilot quality, rules for ground and naval attacks and so on too.  There are also some samples missions and a points system and some game aid counters to print out if you wish.  So there is a lot for me to still explore and this is just a first toe in the water.
The basic way it works is to move straight ahead and then do a manoeuvre.  Some tricky manoeuvres mandate a test against pilot quality.  These manoeuvres alter the speed and altitude of the aircraft for the next turn. Some manoeuvres are forbidden to certain classes of aircraft.  Speed and altitude is recorded by a number (the authors suggest using a small die for each placed on the base of a model, but I used rosters without difficulty).  Firing is a die roll for each weapon firing, modified by one of a small number of modifiers.  Damage is recorded very simply, it doesn't employ the detailed "critical hit" systems on many discrete parts of the aircraft as other games do.

The First Test Game

Apologies for the mat...anyway, Do17s flying in formation bottom left, a vicof Hurricanes approaches from top right.
A close-up of the Dorniers


A close-up of the Hurricanes

Spitfires at 10 o'clock!! No, it isn't, it's Hurricanes.  Nevermind, both sides get ready to open up...in the exchange of fire, one of the Hurricanes is hit by the defensive fire.  The Hurricanes' lmgs are useless for this kind of long-range attack...

The Hurricanes turn in behind and fire, causing light damage; except the left-hand pilot who messes up (fails his attack roll) and ends up lower and slower than his comrades

The left-hand Hurricane falls behind but the remaining two have each got a Dornier firmly in their sights...both cause sufficient damage to spell doom for their adversaries, both by killing the pilots

Still avoiding the defensive fire, the Hurricanes despatch the left-hand Dornier too!
 Game Notes:


 Played on a 5'x3' table (apologies again for the tablecloth!) with aircraft from Tumbling Dice, the game is pretty fast and easy to learn, but the simplifications don't seem to detract too much from the experience.  The use of a protractor  for turning rather than hexes was a bonus.  The rules are laid out in a pretty logical form and are easy to refer back to.  As I mentioned above, there are relatively few characteristics, but there are a couple of special abilities to differentiate different aircraft: for instance, the Hurricane is classed as a "fast climber" (even for a 1940s fighter) whilst the Do17 is classed as a "slow climber" even for an early-war bomber. And so on.
A few things I did notice:
Turning aircraft get to move slightly further than other aircraft if I am doing this correctly (I fully admit I may not be).  So a fighter doing shallow weaves would end up moving faster than an aircraft going straight.
It seemed much easier to kill the pilot than to destroy an aircraft.
The game seemed much more deadly than others I have played (although the game can end very suddenly, so I guess that would limit the number of kills quite drastically)
The Hurricane (early war) is classed as having a 4 x cannon armament rather than the more typical 8 x lmg armament.
One thing which was a little odd is that the sequence of play is hidden away on p.16!  It is an IGOUGO game basically (with some exceptions), but this seemed to work okay.
A very promising start, I'm looking forward to having a few more goes of this.