The first scenario in the Too Fat Lardies'
Taking the Gembloux Gap pint-sized campaign set during the early stages of the 1940 campaign in the Low Countries and France is 'Palm-Off At Perbais', as infantry elements of 3 Rifle Regiment from 3 Panzer Division attempt to break into the defensive position of the French 110 Infantry Regiment, belonging to 1 Motorized Division. Other scenarios in the campaign feature the feared German panzers but in this scenario, due to earlier losses, the German commander is holding back their armour and relying instead on infantry and artillery to achieve the breakthrough.
I was once again using the "Farquhar Variant", a development of the WRG 1950-75 2nd Edition rules to cover the WW2 period.
The Forces:
The French (reinforced Infantry platoon)
1 x Rifle command group
1 x Rifle grenadier group
3 x Rifle+LMG groups
3 x Rifle groups
1 x 75mm howitzer
1 x Panhard armoured car
The Germans (reinforced Rifle platoon)
1 x SMG command group
6 x Rifle groups
3 x GPMG teams
1 x 50mm light mortar team
The Germans receive additional reinforcements from their list which are randomly generated - more on this in the Game Notes at the end.
1 x PAK37 and tractor
1 x MG42 (SF role)
1 x Pioneer Demolitions group
2 x Rifle groups
1 x LMG team
1 x SMG command group (the Company commander)
1 x 50mm light mortar team
1 x bombardment from 4 x 105mm howitzer
1 x attack from 2 x Stuka with 1 x 550lb bomb each
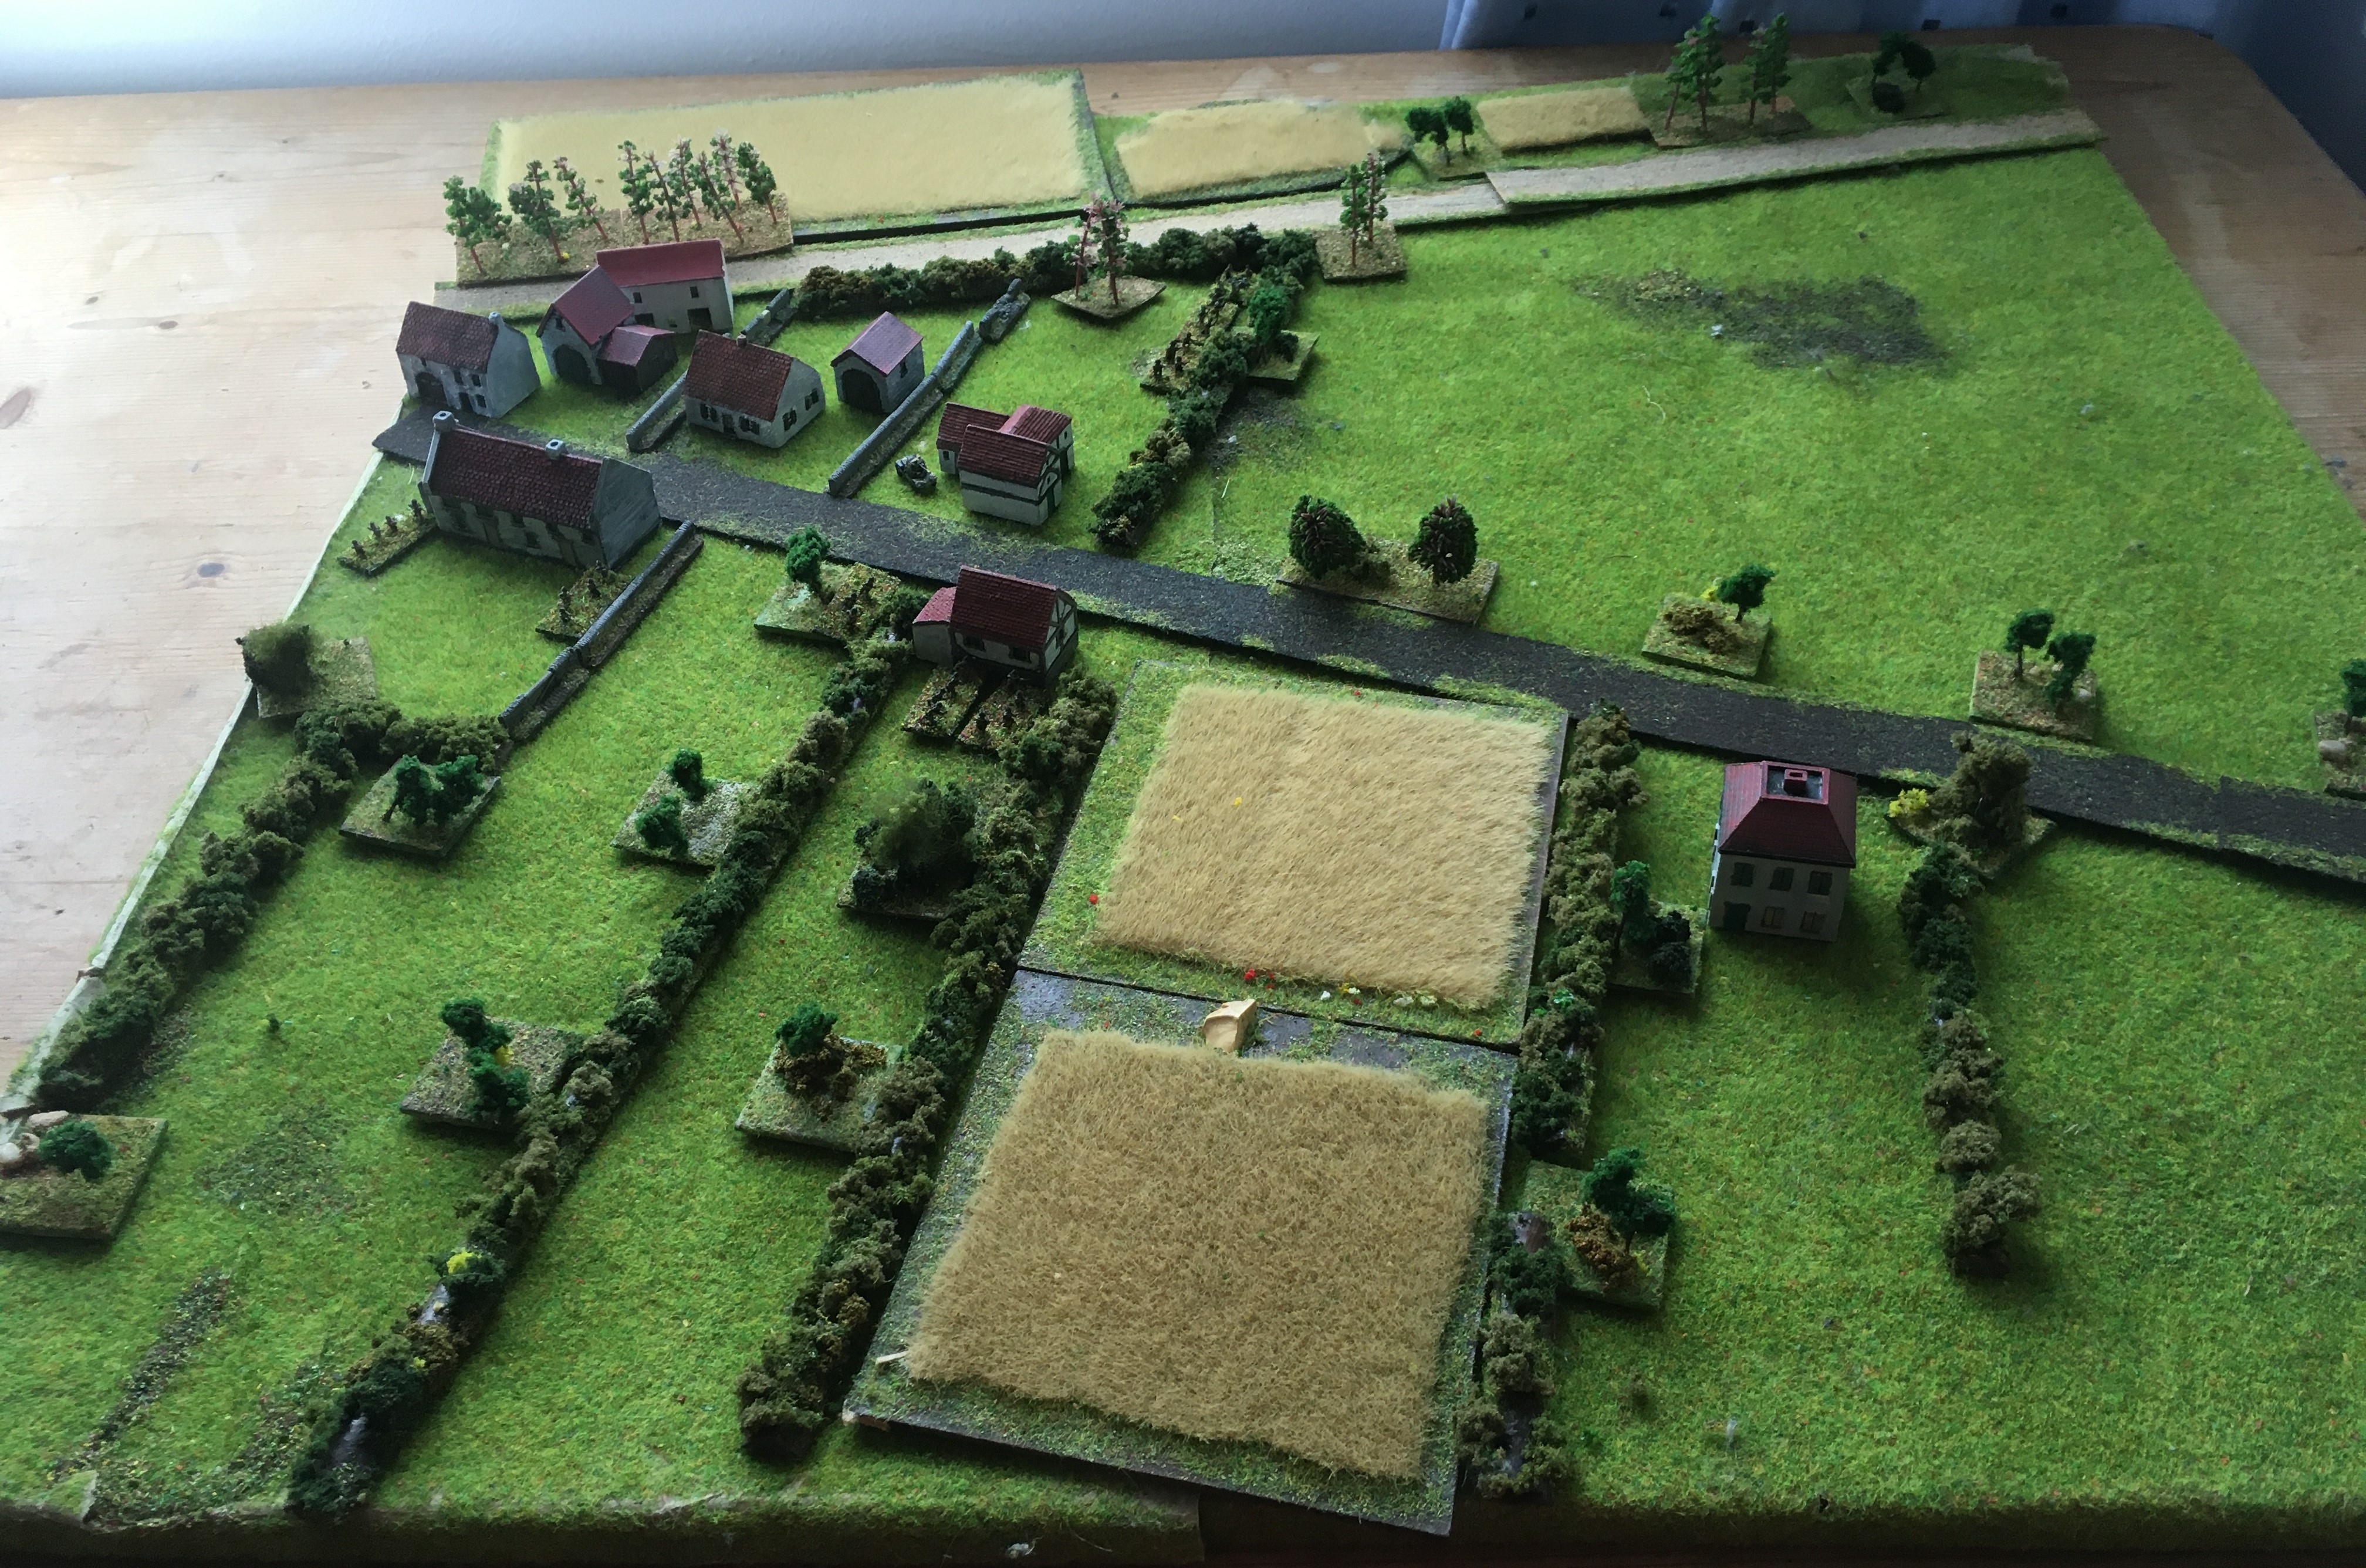
The Set-Up:
 |
| The Germans are approaching from the right (East); the French are holding the area around the village |
 |
| The leading French section by the house (done for illustrative purposes, half of the section - or combat group, if you must - is actually in the building); the French platoon commander is behind the next hedgerow and the Panhard is across the road, whilst the second section is behind the stone wall (top-left) |
 |
| The second section (in reserve); again, this is illustrative, half the French section is in the building (which I am sure you all recognize!) |
 |
| The last section is on the far flank, protecting the 75mm howitzer (okay it is a 25mm ATG, but y'know, details!) |
 |
| And the Panhard, hiding out of sight in the centre of the village. |
 |
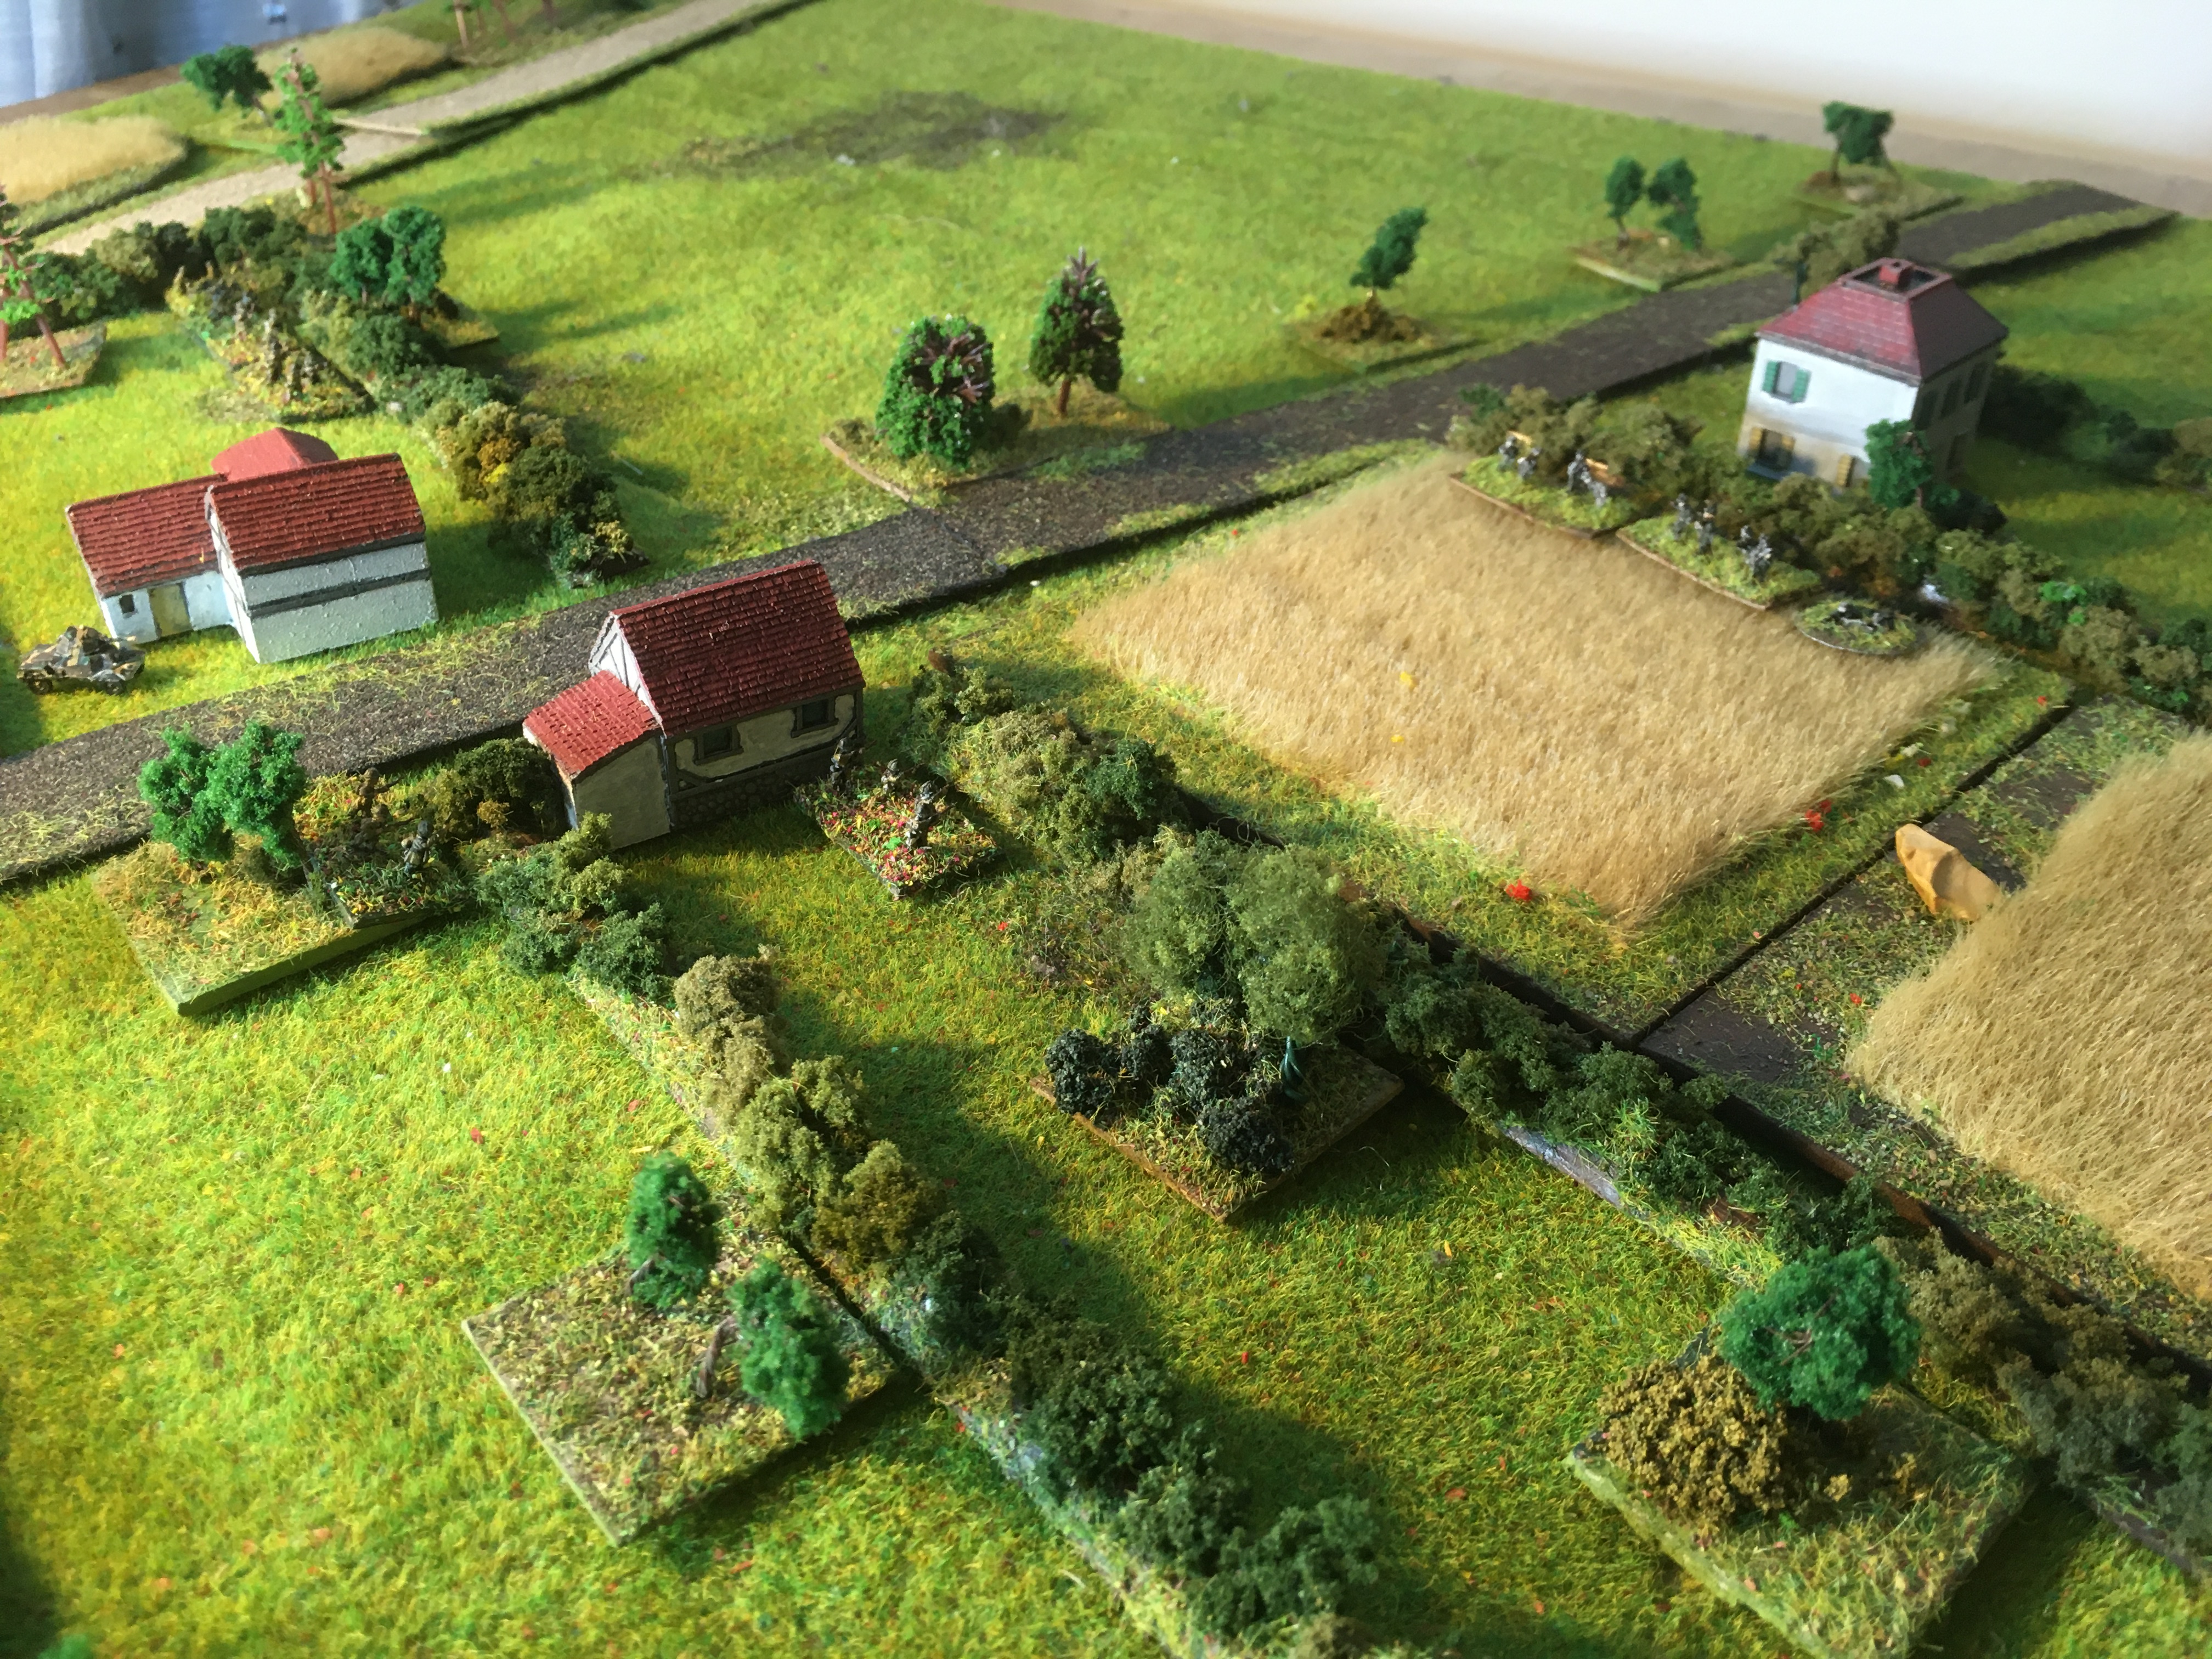
| The scene from a different angle |
 |
| And again |
The Battle:
 |
| The action begins when the French spot the leading German infantry squad moving through the wheatfield |
 |
| Half the Germans fall in the first few moments |
 |
| The German artillery strike impacts around the village: the French rifle group in the first occupied building (centre) become casualties and several other French soldiers are suppressed |
 |
| The lead German section gamely tried to fight it out, but their LMG team is put out of action |
 |
| A German MG42 team arrives... |
 |
| ...but is quickly eliminated by fire from the howitzer and the French LMG gunner |
 |
| The German company commander has turned up and is now occupying the building; and a pioneer team arrive in support. |
 |
| The surviving Germans are regrouping around the building, whilst the Pioneers attempt to work around the flank |
 |
| The pioneers cross the hedges whilst the Germans by the trees and in the building give cover |
 |
| The Pioneers have managed to get across the wheatfields |
 |
| But they are quickly eliminated by some very accurate fire from the French in the village |
 |
| The Germans around the building and hedge maintain fire upon the leading German positions |
 |
| The German fire eventually finds its mark and eliminate the other half of the lead French section |
 |
| A German air strike arrives! (forgive the Bf109s, I haven't painted up any Stukas yet - the positions of the aircraft show the intended point of release) |
 |
| One Stuka misses, hitting the edge of the village rather than the centre |
 |
| The other aircraft misses and drops off to the right |
 |
| Half of the French section is put out of action in the explosion |
 |
| The other aircraft's bombs overshoot but unfortunately for the French, the building to the left is hit (marked by smoke) and another few Frenchmen become casualties. |
 |
| A German anti-tank gun arrives and sets up... |
 |
| ...but the French howitzer group and French infantry have acquired it quickly... |
 |
| It too is eliminated in short order |
 |
| More German infantry arrive to restart the attack |
 |
| The attack develops and the German infantry again get across the hedge... |
 |
| ...but are again driven back with loss by the French riflemen |
 |
| Yet another attack is made: this time the Germans bring up a light mortar |
 |
| However, the Germans are suppressed by fire and then surrender as the Panhard approaches |
 |
| The position at the end of the engagement: although more reinforcements could arrive, German morale has become so shaky that there is more-or-less no chance of progressing an attack here. |
Game Notes:
The game went reasonably well and it was nice to get a TFL scenario to the table, as ever. The result seemed like a relatively easy German victory, although it is a bit misleading because of the effectiveness of the German indirect weapons, the French lost a decent chunk of their force. In total, the Germans lost 6 men killed, 12 men wounded and 6 unwounded prisoners, in addition to an abandoned Pak37 and mover; whilst the French lost 5 men killed and 11 wounded. Unluckily for the French, all the casualties were amongst their 'core' troops, whilst most of the German losses were amongst the platoon's attached supports.
This scenario gave me a chance to use some of the rules at the dustier end of the rulebook like the air and bombardment rules, both of which worked fine. The way the scenario and solo rules interact pose a very minor issue with what type of bombardment is available to the Germans but I resolved that as being automatically in favour of the Germans (i.e. they could choose whichever option seemed best). The infantry and heavy weapons rules continue to work fine, although there is an interesting conundrum regarding the French infantry: John and Too Fat Lardies seem to think of the French LMG as being the equivalent of the Bren, Phil Barker and Leon of Adler are more in the camp that it should be treated as a BAR(!). My figures (being Adler) are currently based with the latter option in mind...In similar vein, the Barker and Clarke treatments of the French rifle grenadiers are very different too. This has quite a cumulative effect on the effectiveness of a French infantry platoon: the TFL version is a good deal more effective than the Barker version. Against the former, the Germans would have had an even thinner time. A bit more playing experience has reinforced my belief that the introduction of dice rolling to acquire targets and allowing suppressed elements to return fire do create quite a different dynamic in the game, but with a small but noticeable cost in time through extra dice-rolling and checks, compared to WRG 1925-50 1st edition.
But the main thing to discuss is that the Threat Generation System, whose virtues I have mentioned in many previous games, just didn't work that well here. Given the ground, there is only one quadrant of the battlefield that is really worth using for the Germans, everything else is just too open. So where usually randomness is more true to the WW2 experience and produces more exciting games, here it just decided which of the Germans was going to have a chance and which were going to be, in all likelihood, quickly gunned down in the open. With the lightly-armed British paratroopers in the previous campaign, it wasn't too bad: against an opponent with even a dusting of heavy weapons, it wasn't going to work. This seems to be mainly a problem when I am actively playing the defenders, the randomness of a defence seems to help and hinder the attackers more equally. I think that the TGS is in need of a little further development to make it more suitable for these games. More anon.
As a related issue, although I still haven't figured out all the interactions, it is worth mentioning that for all the good games that they have generated over the years for me, these pint-sized campaign scenarios aren't really designed for a ruleset like WRG 1925-50 or this development from it. It isn't so much to do with number of figures as size of battlefield: a TFL scenario covers 240m x 160m - which is 24cm x 16cm on a normal WRG ground scale, and 7.5 times smaller than the recommended game size. So this seems to effect how observation and time interaction is supposed to work, I think.
Anyhow, all good fun and I am looking forward to the Germans next attempt to get forward. The Germans were mainly Baccus 6mm, whilst the French infantry are from Adler and the vehicles and crew are from Heroics and Ros. The aircraft are from Plastic Soldier Company. Buildings are mainly from Leven in this one (I think).
:strip_icc()/pic5163498.png)


The table looks lovely, the 6mm buildings give a real sense of a village. I remember reading about the Threat Generation System in one of the wargame mags and did wonder about its limitations, simply because of the pure randomness element, though I know your experiences have been very positive.
ReplyDeleteThanks Norm. The TGS is really good but it is fair to say that (as written) it works better in some contexts than others. I have done a bit of work on it - perhaps it is time for me to publish the Advanced TGS?!?!?
DeleteGreat looking table. I was surprised when you said at the end it was 6mm. I thought it was 15mm. 😊
ReplyDeleteThanks very much Ben! Far too kind.
DeleteA really great report. The table setup looks really good for its small size. What size table did you play on? I know you mention the scenario scales down to 24cmx16cm but you table looks bigger than half a sheet of paper :-) Although, to be fair I have played 6mm games with slightly less forces on a A4 sheet of paper!
ReplyDeleteFor my own rules, I seem to move every year or so between rolling for observations and defined ranges. The 1960-1975 were definitely too complicated but I do really like some sort of observation random factor and so vacillate between speed/playability and my opinion that some randomisation in spotting is important for captured the feel of WW2 combat.
It also seems a combination of factors led to the TFL scenario not quite work as expected but form the post-game notes it looks like you have plans to address this and look forward to seeing if/when they are successful.
Thanks Shaun! The table is 60cm x 60cm and with the ground scale I was using, that ended up being 300m x 300m, so rather bigger than the TFL scenario design (but probably within safety limits).
DeleteI am entirely with you on veering between wanting a random factor and not! WRG 1925-50 1ed definitely had a "key range" feel about the whole thing, because the observation ranges and the effectiveness bands were the most important determiners of combat outcomes.
Yes, I definitely have plans to address them, I have already been doing some work on that.
What a fine looking game! Interesting post game thoughts too. I've yet to try the TGS as I have the article, but never remember to give it a go. Yet another thing to give a go!
ReplyDeleteThanks Steve. It is a really decent system but it seems to work a bit better in some contexts than others...maybe an extended post to cover it all.
DeleteWe've found that a number of CoC scenarios are not very balanced and it can lead to tough games, when the attacker has to advance across open ground with very limited fire support. I've played a few games using TGS and IABSM, and TGS needs to have a reasonable amount of scenery on the table to work well.Maybe its a matter of adding a few scatter pieces just to give them more things to "deploy" in or behind.
ReplyDeleteThanks for those interesting comments Kieran - I don't disagree with any of that. I think that most CoC scenarios being on essentially flat tables doesn't help here either, but mainly it is probably a consequence of not playing the patrol phase and using jumping off points. I have used these a couple of times and then switched to WRG for the main action...perhaps I need to revisit that.
DeleteJump off points and the whole patrol phase is a brilliant part of CoC, but placing jump off points can be tricky without a lot of terrain. Sometime you end up with them clumped together or in less than ideal places, which can make arriving units very vulnerable. In some scenarios thats ok, but others can really influence the outcome of the game.
DeleteAs you say. I don't think I have played enough CoC to know whether it is as much of a problem in CoC itself as it is in these WRG-based rules.
Delete