The last battle in this mini-series of games using Bob Cordery's
The Portable Wargame adapted a somewhat larger original scenario. Again, a fight set in summer 1941 on the Eastern Front has been transposed to 1940 on the Western Front. In this action, the German Corps is attempting to trap and destroy the remnants of the British line-of-communications troops.
The structure of this scenario is that the two German infantry divisions attack from opposite side of the battlefield and then slightly later the German Panzer division arrives to assist. 714 Infantry Div will attack from the West, the approach defended by 21 (Westmoreland) Division. Shortly after, 790 Infantry Div attacks from the East, which is defended by 84 (Cumbrian) Division. 101 Panzer Division will follow 714 Infantry Division. The remnants of 'Bobforce' are in reserve in the Northeast.
The forces:
Germany
714 Infantry Division:
Command & Staff (Good)
7140 Infantry Regiment (3 SP, Average)
7141 Infantry Regiment (3 SP, Average)
7142 Infantry Regiment (4 SP, Average)
714 Artillery Regiment (2 SP, Average)
714 Anti-Tank Battalion (2 SP, Average)
Breakpoint: 5 SPs
790 Infantry Division:
Command & Staff (Average)
7900 Infantry Regiment (4 SP, Average)
7901 Infantry Regiment (4 SP, Average)
7902 Infantry Regiment (4 SP, Average)
790 Artillery Regiment (2 SP, Average)
790 Anti-Tank Battalion (2 SP, Average)
Breakpoint: 6 SPs
101 Panzer Division
Command and Staff (Good)
101 Panzer Regiment (3 SP, Average)
102 Panzer Regiment (3 SP, Average)
101 Panzer Grenadier Regiment (4 SP, Average)
101 Artillery Regiment (2 SP, Average)
101 Recce Regiment (2 SP, Average)
101 Anti-Tank Battalion (2 SP, Average)
Breakpoint: 6 SPs
British Forces:
21 (Westmoreland) Division:
210 Infantry Brigade (4 SP, Poor)
211 Infantry Brigade (4 SP, Average)
212 Infantry Brigade (4 SP, Poor)
21 Regt RA (2 SP, Average)
212 Regt RHA (AT) (2 SP, Average)
Breakpoint: 6 SPs
84 (Cumbrian) Division:
Command & Staff (Average)
84 Infantry Brigade (4 SP, Average)
85 Infantry Brigade (4 SP, Average)
132 Infantry Brigade (4 SP, Average)
8 Regt RA (2 SP, Average)
48 Regt RHA (AT) (2 SP, Average)
14th Lancers (1 SP, Average)
Breakpoint: 6 SPs
'Bobforce':
Command and Staff (Average)
1st Tank Brigade (3 SP, Average)
2nd Tank Brigade (3 SP, Poor)
Reconnaissance Force (2 SP, Average)
The Set-Up:
 |
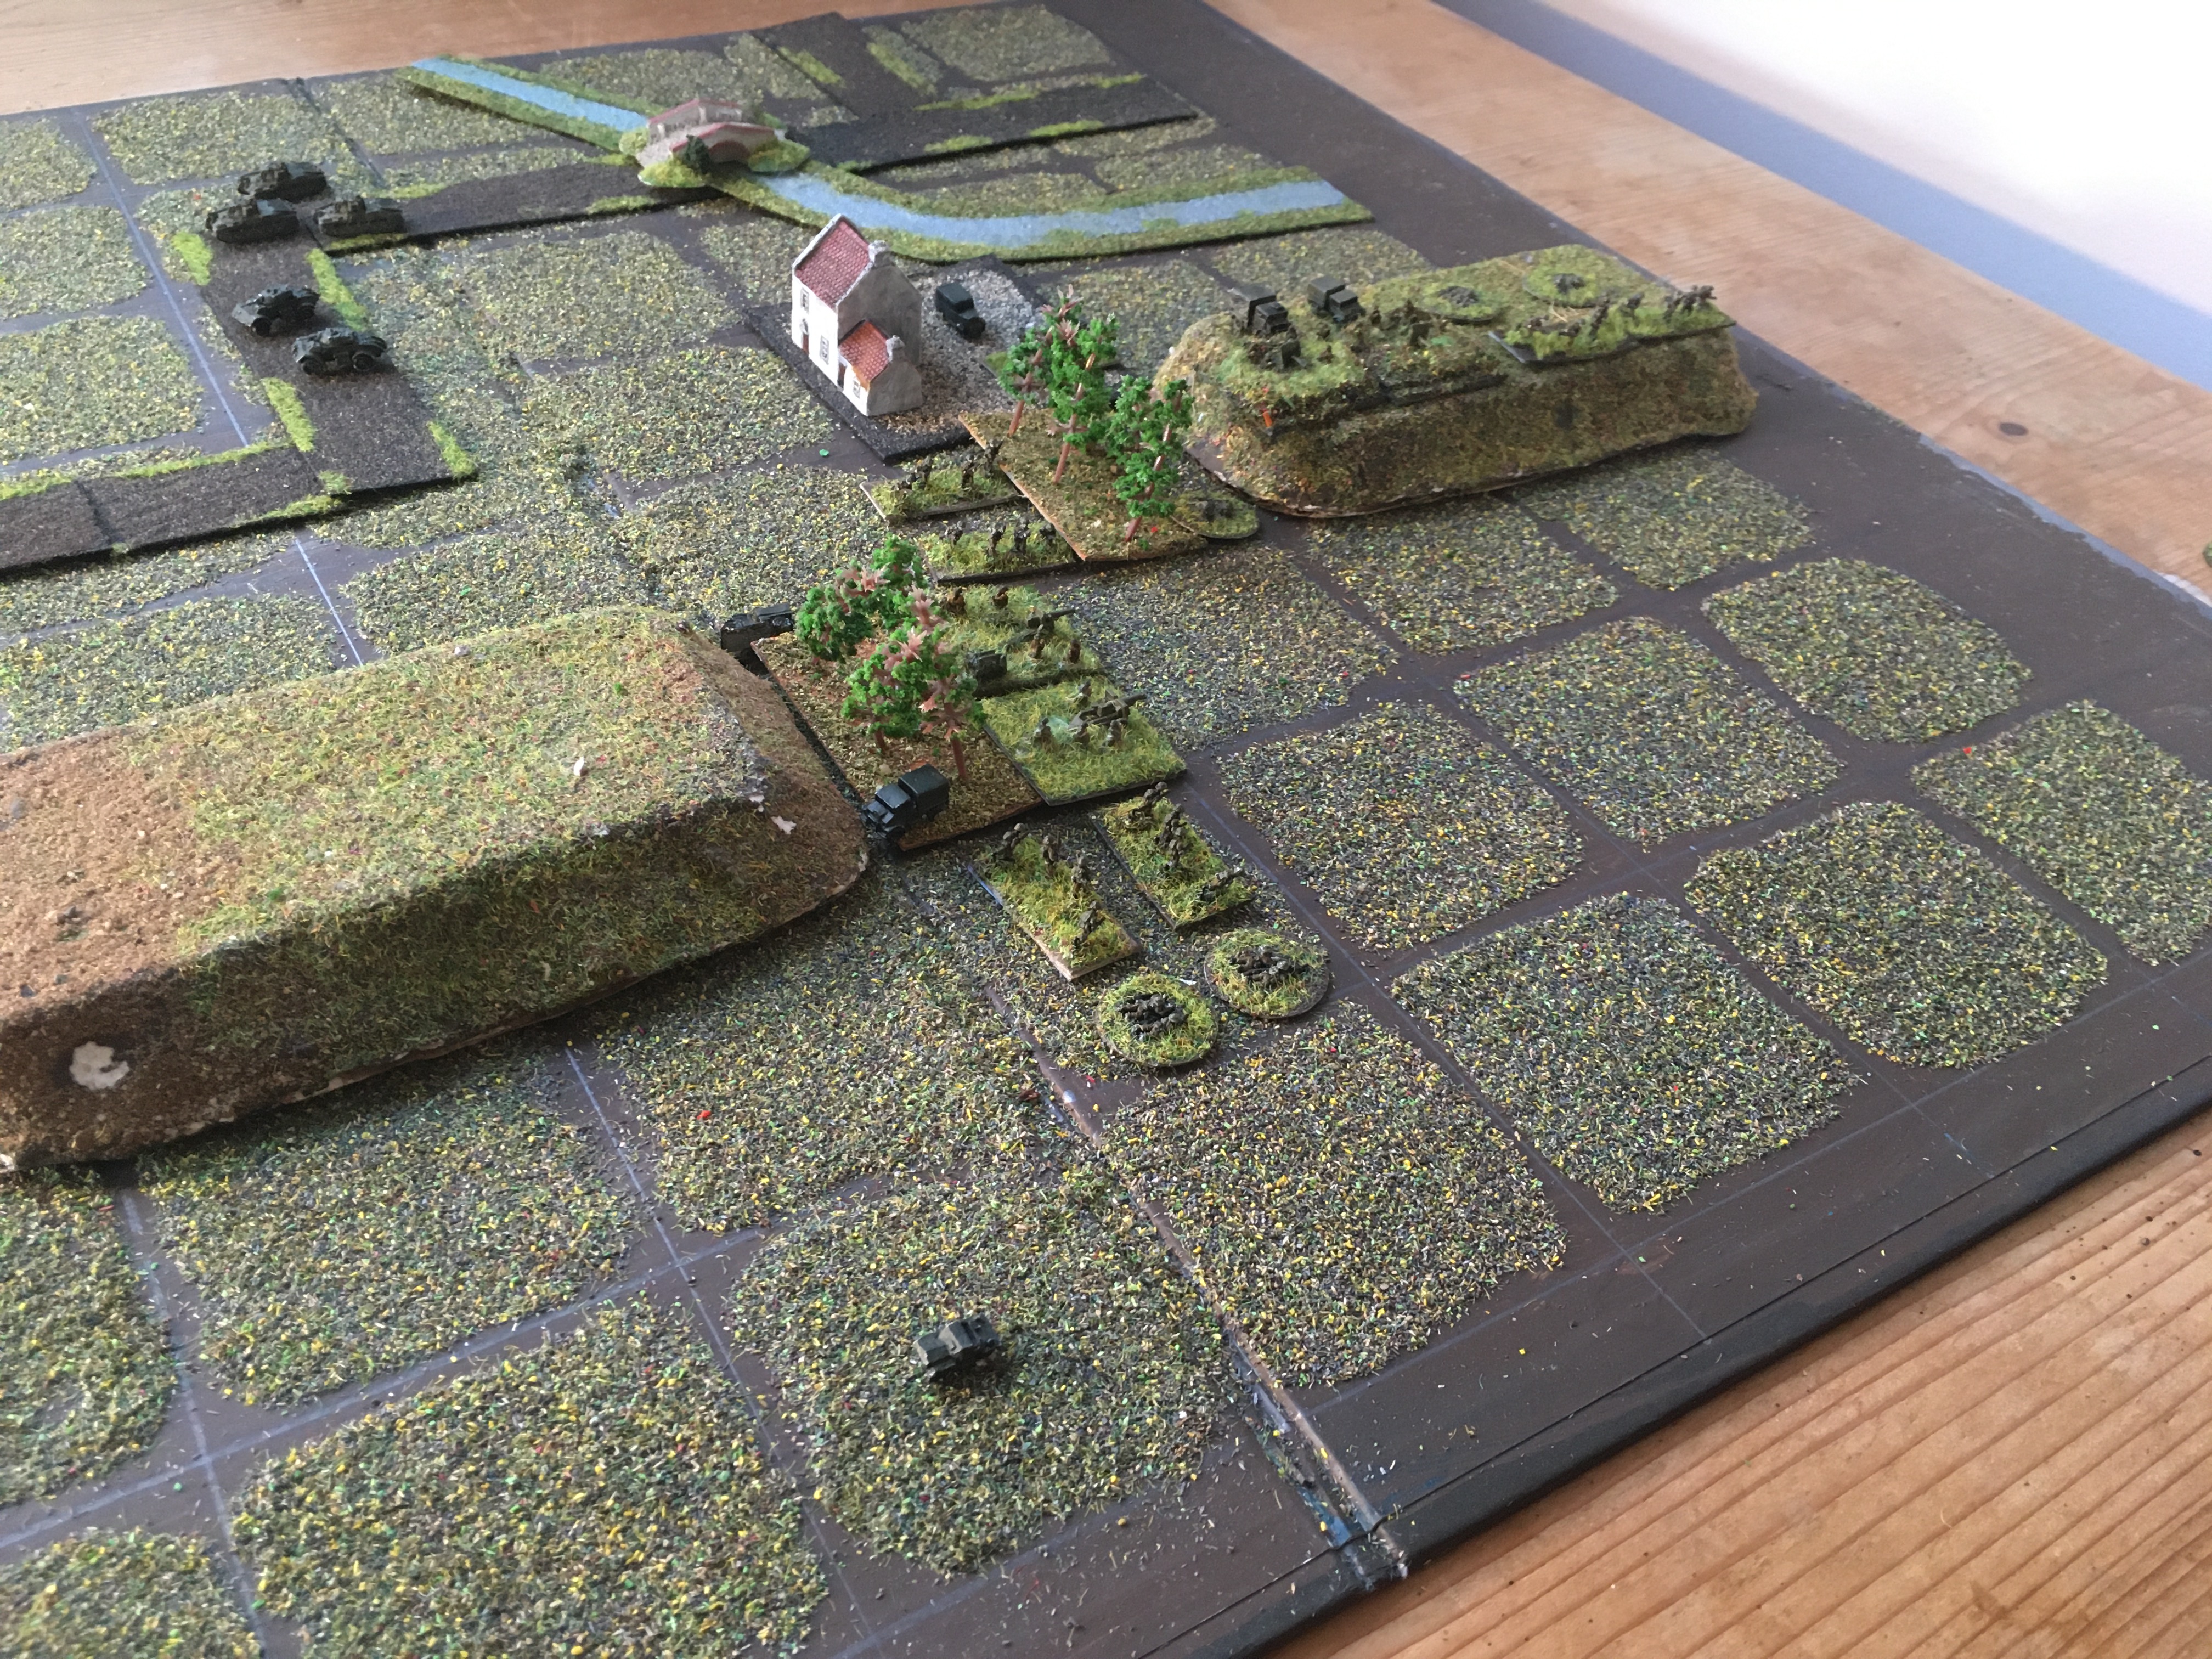
21 Div to the West (left), 84 Div to the East (right), 'Bobforce' in reserve in the North-East (top-right)
|
 |
A closer look at 21 Div.
|
 |
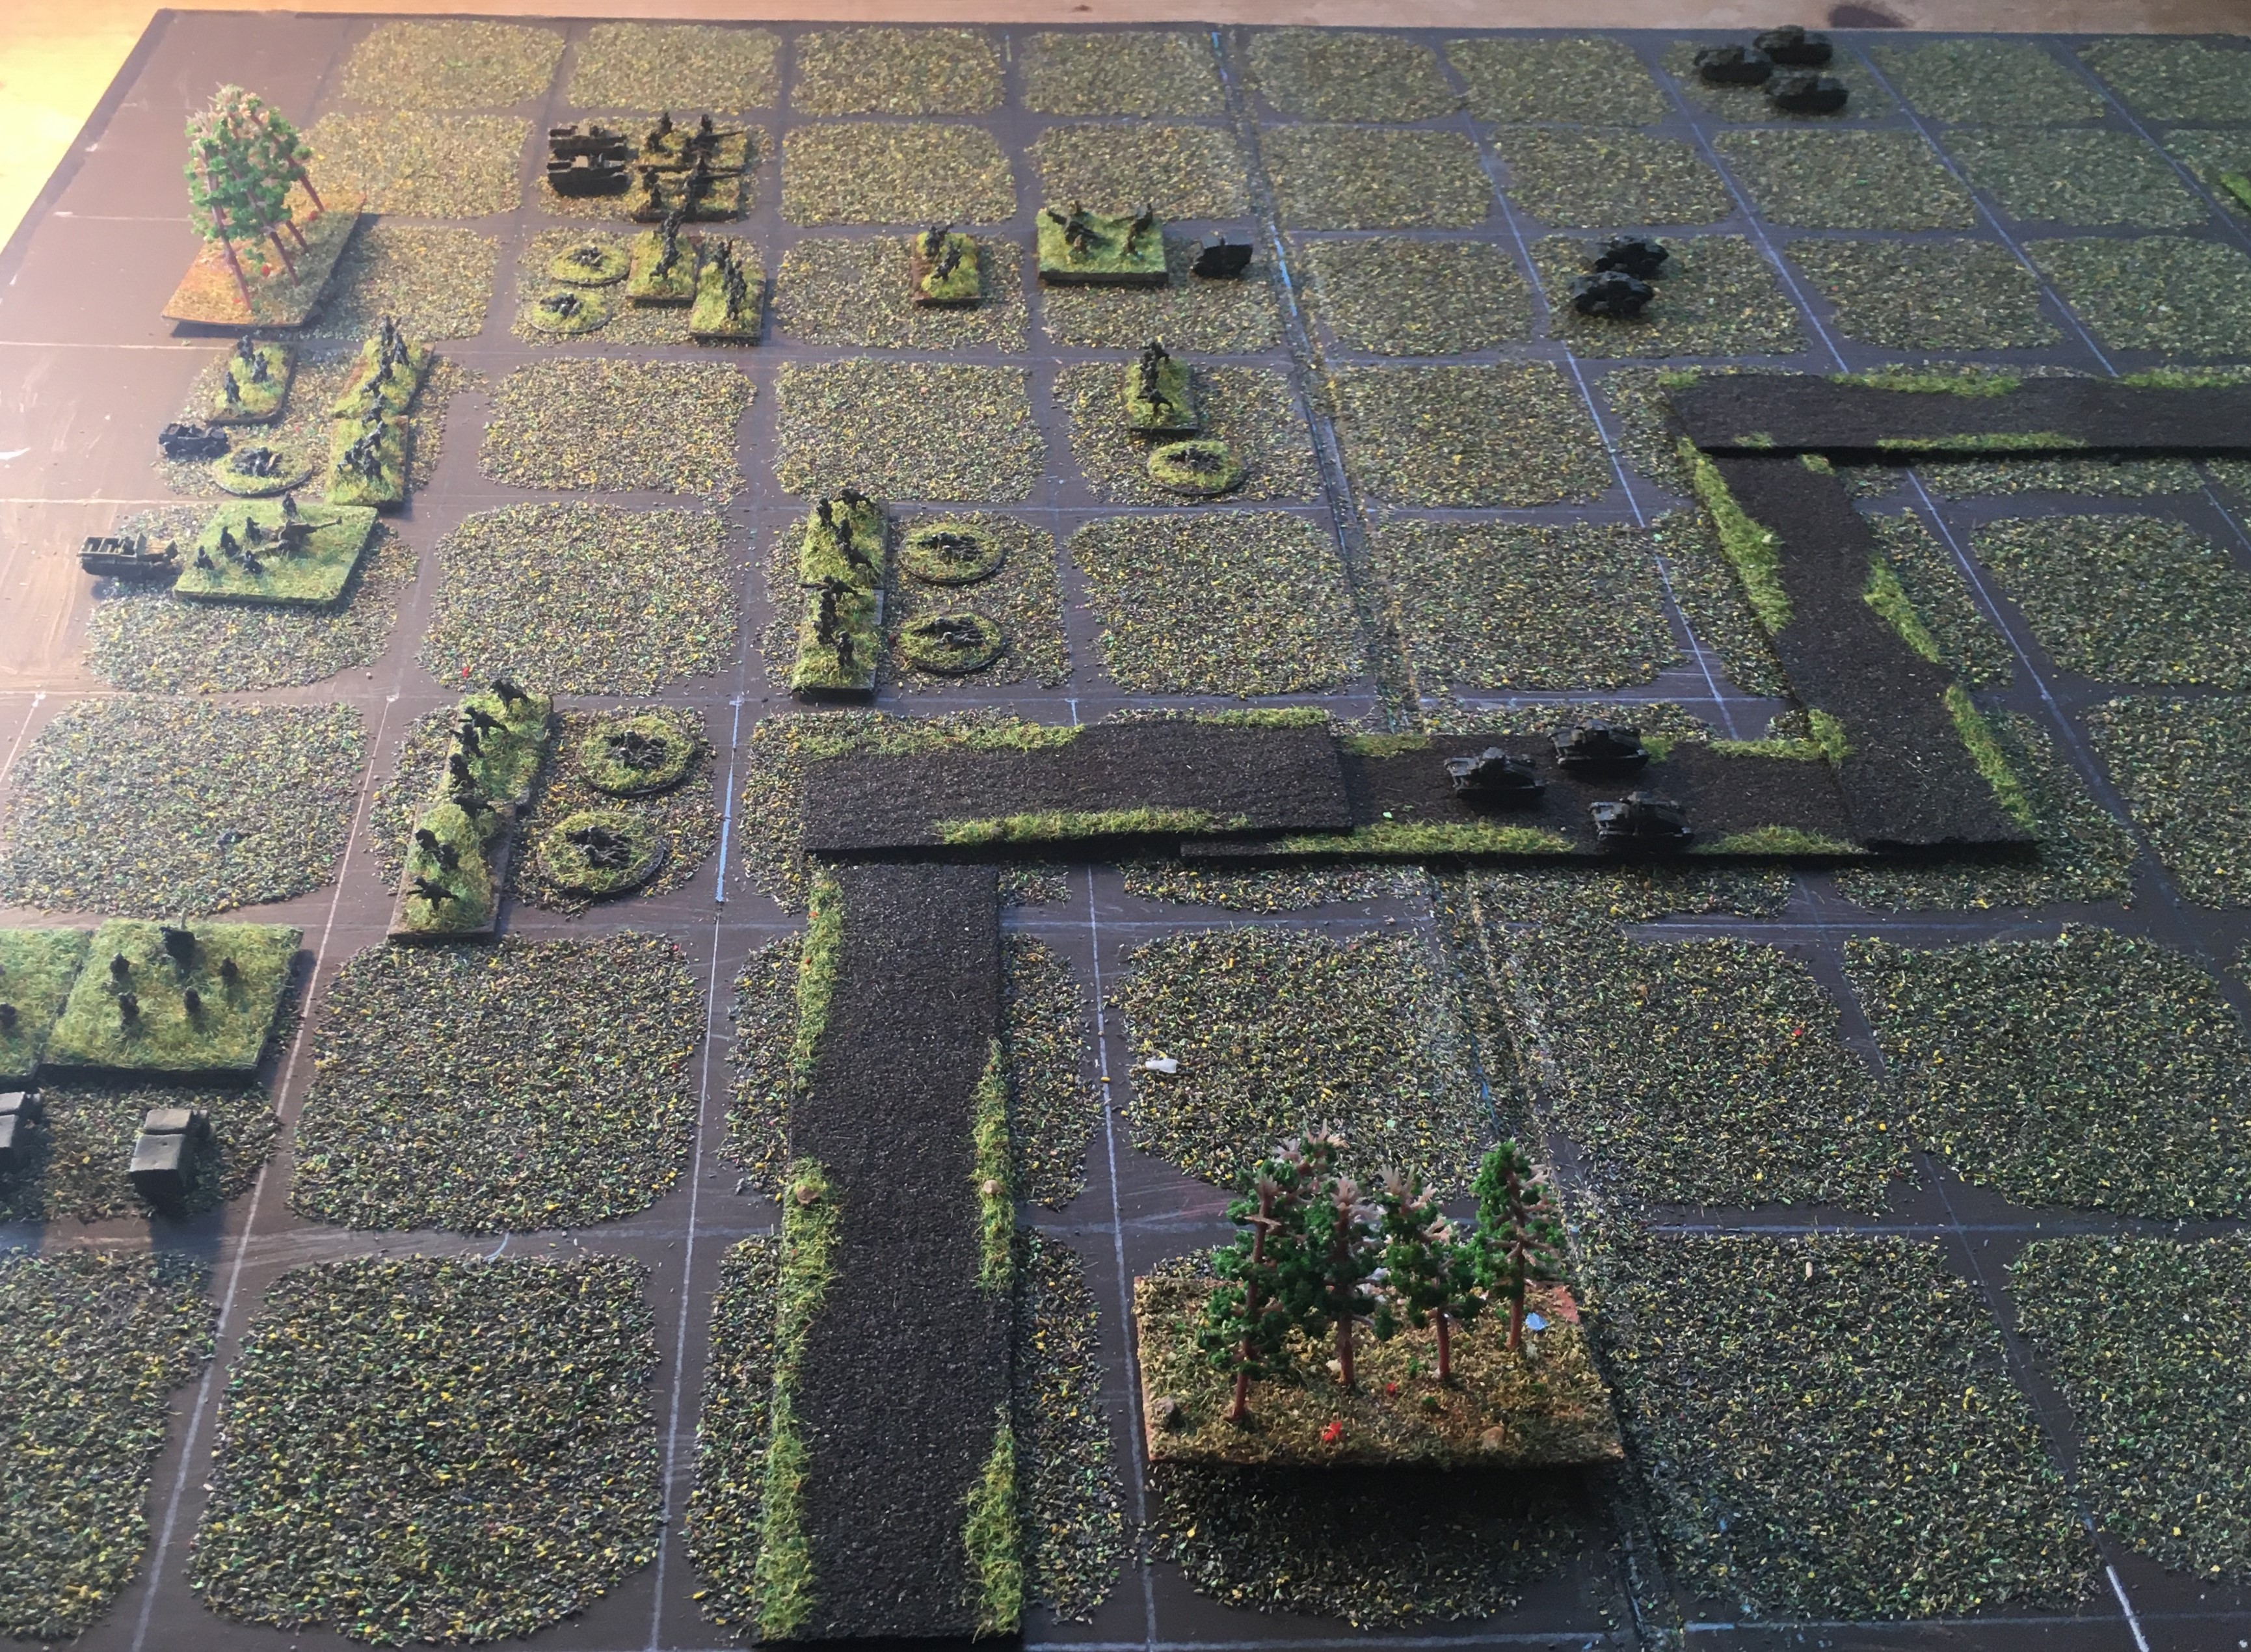
And at 84 Div. I haven't gone back and checked so I couldn't remember if 84 Div were expecting an attack from the East...so for these purposes, I decided they weren't.
|
 |
and lastly, the remnants of Bobforce on both sides of the bridge
|
The Battle:
 |
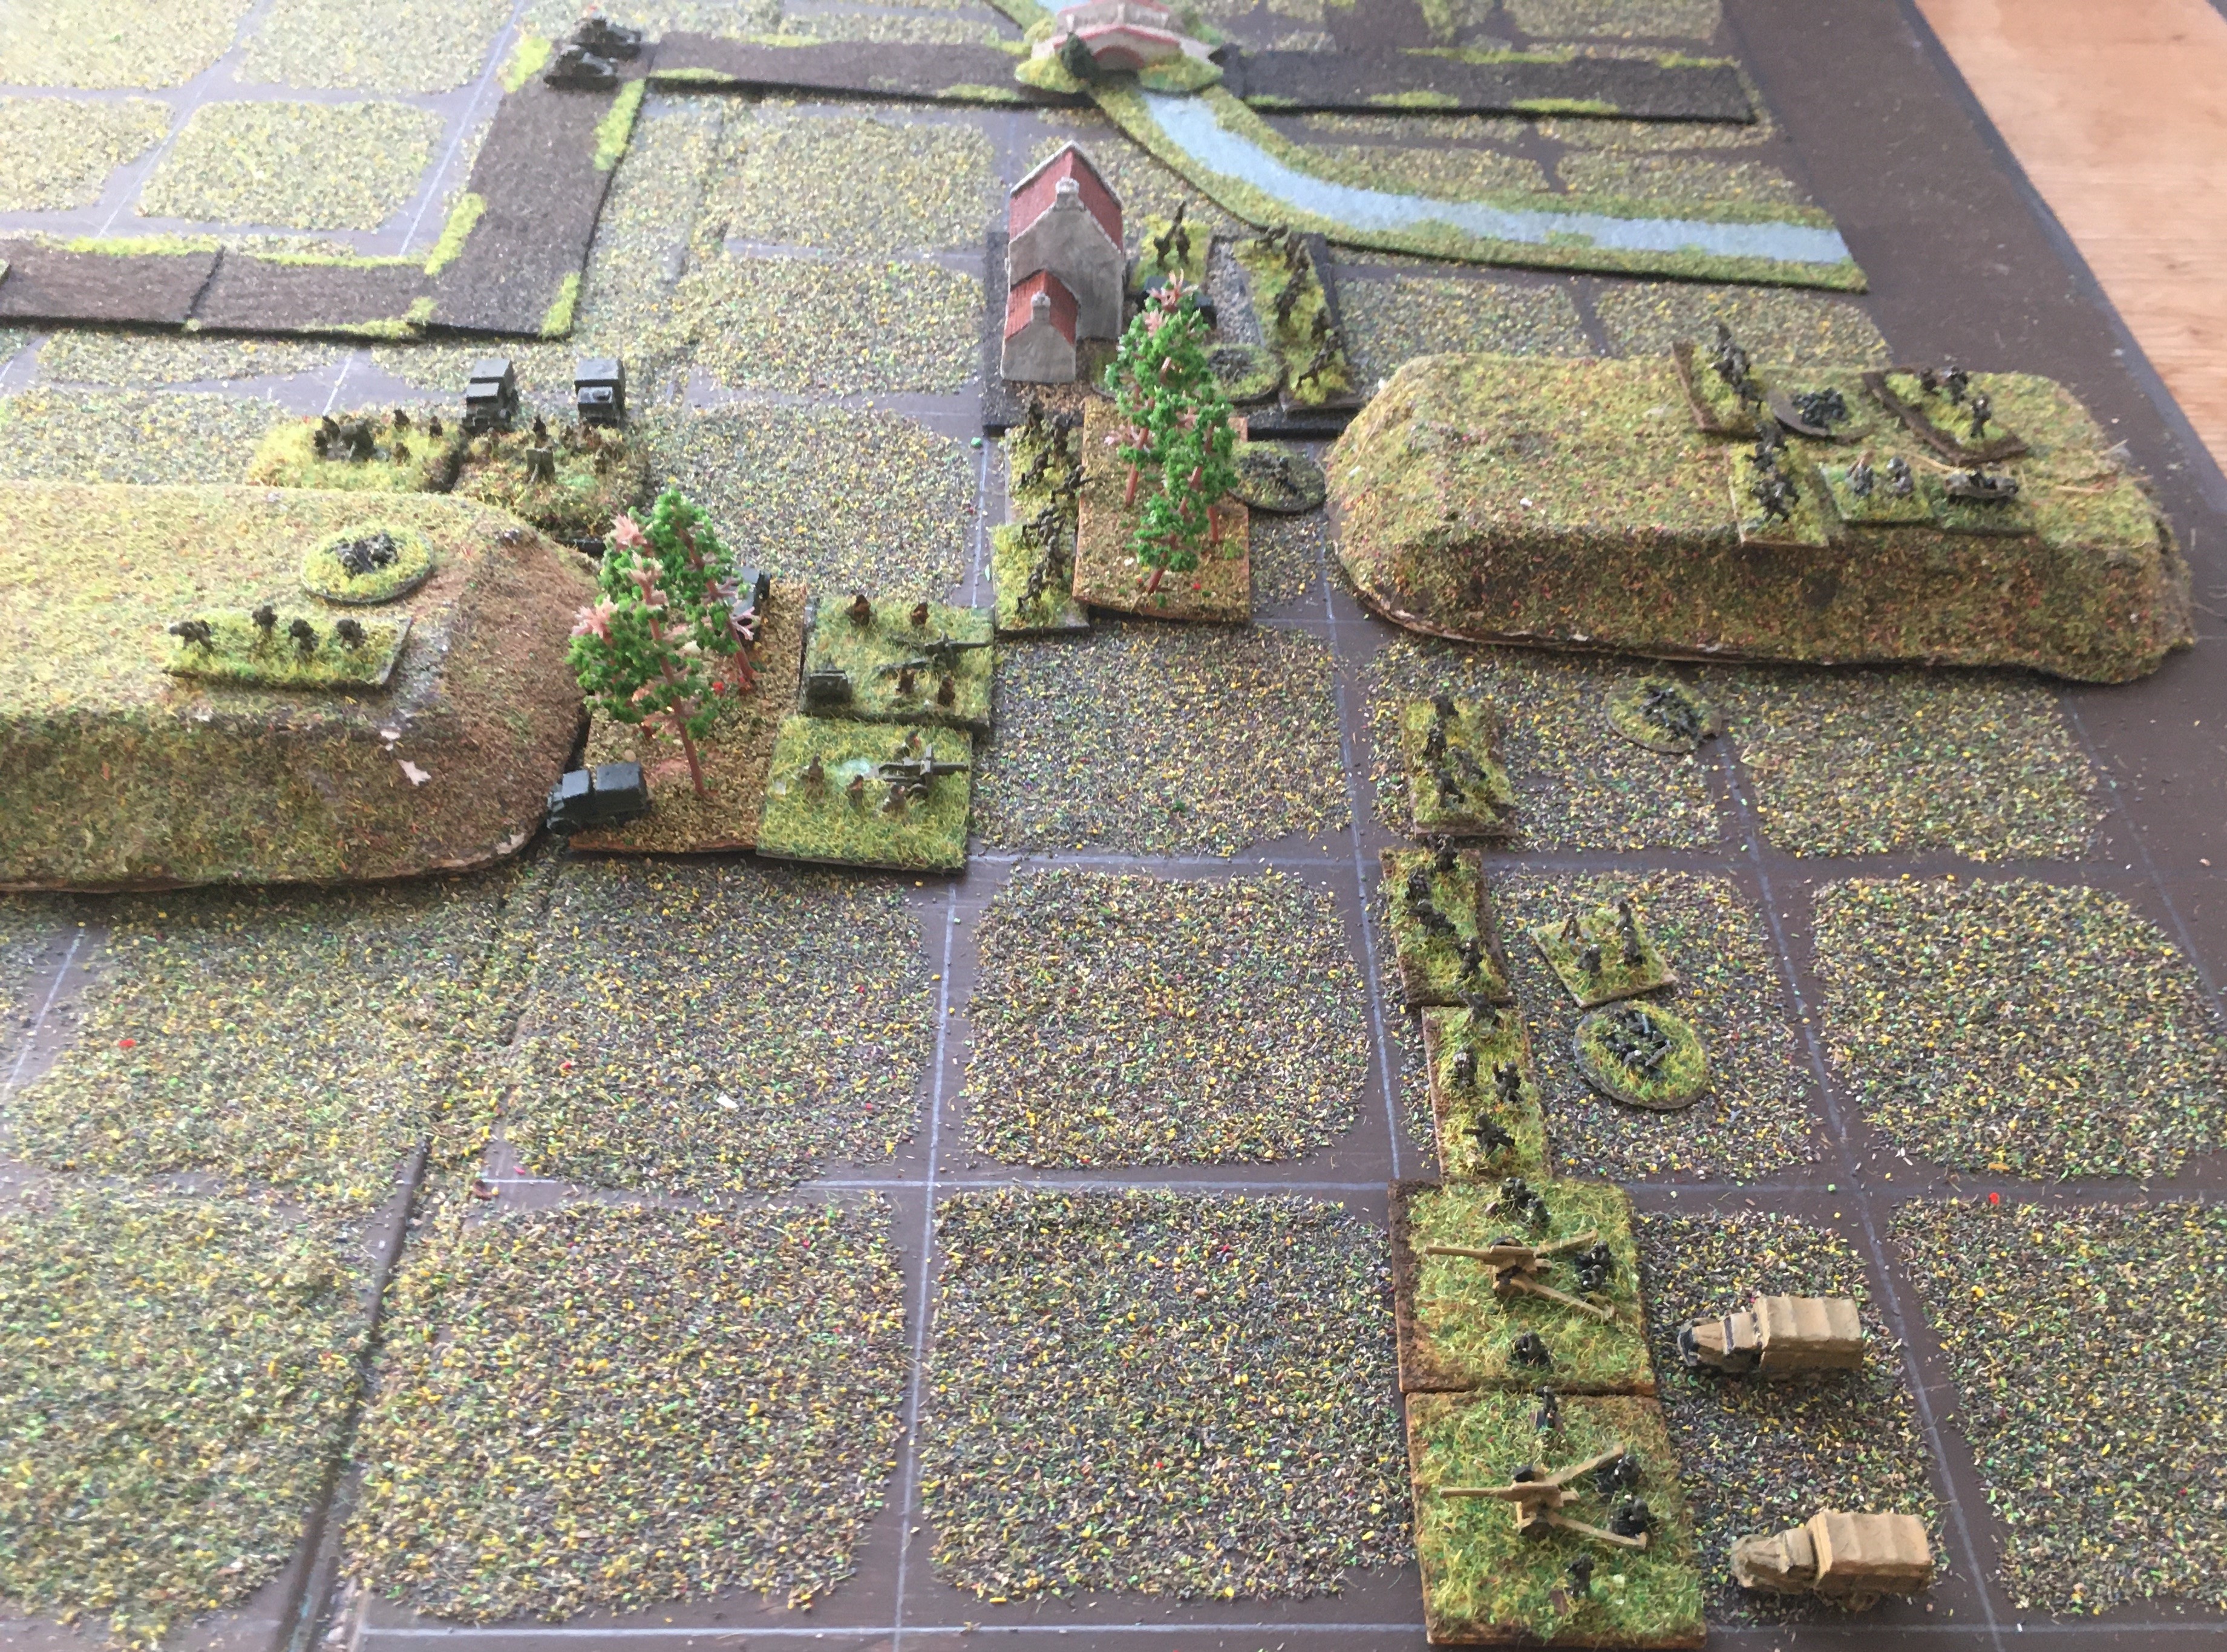
714 Infantry Div attacks, concentrating on the right flank of 21 Div; the anti-tank guns set-up to deter any counter-attack from Bobforce
|
 |
The flanking British brigade has lost half its strength very quickly, but the rest of the Division has managed to get into some kind of line
|
 |
84 Div redeploys to face the actual threat direction
|
 |
Bobforce moves down the road to put itself into a central position
|
 |
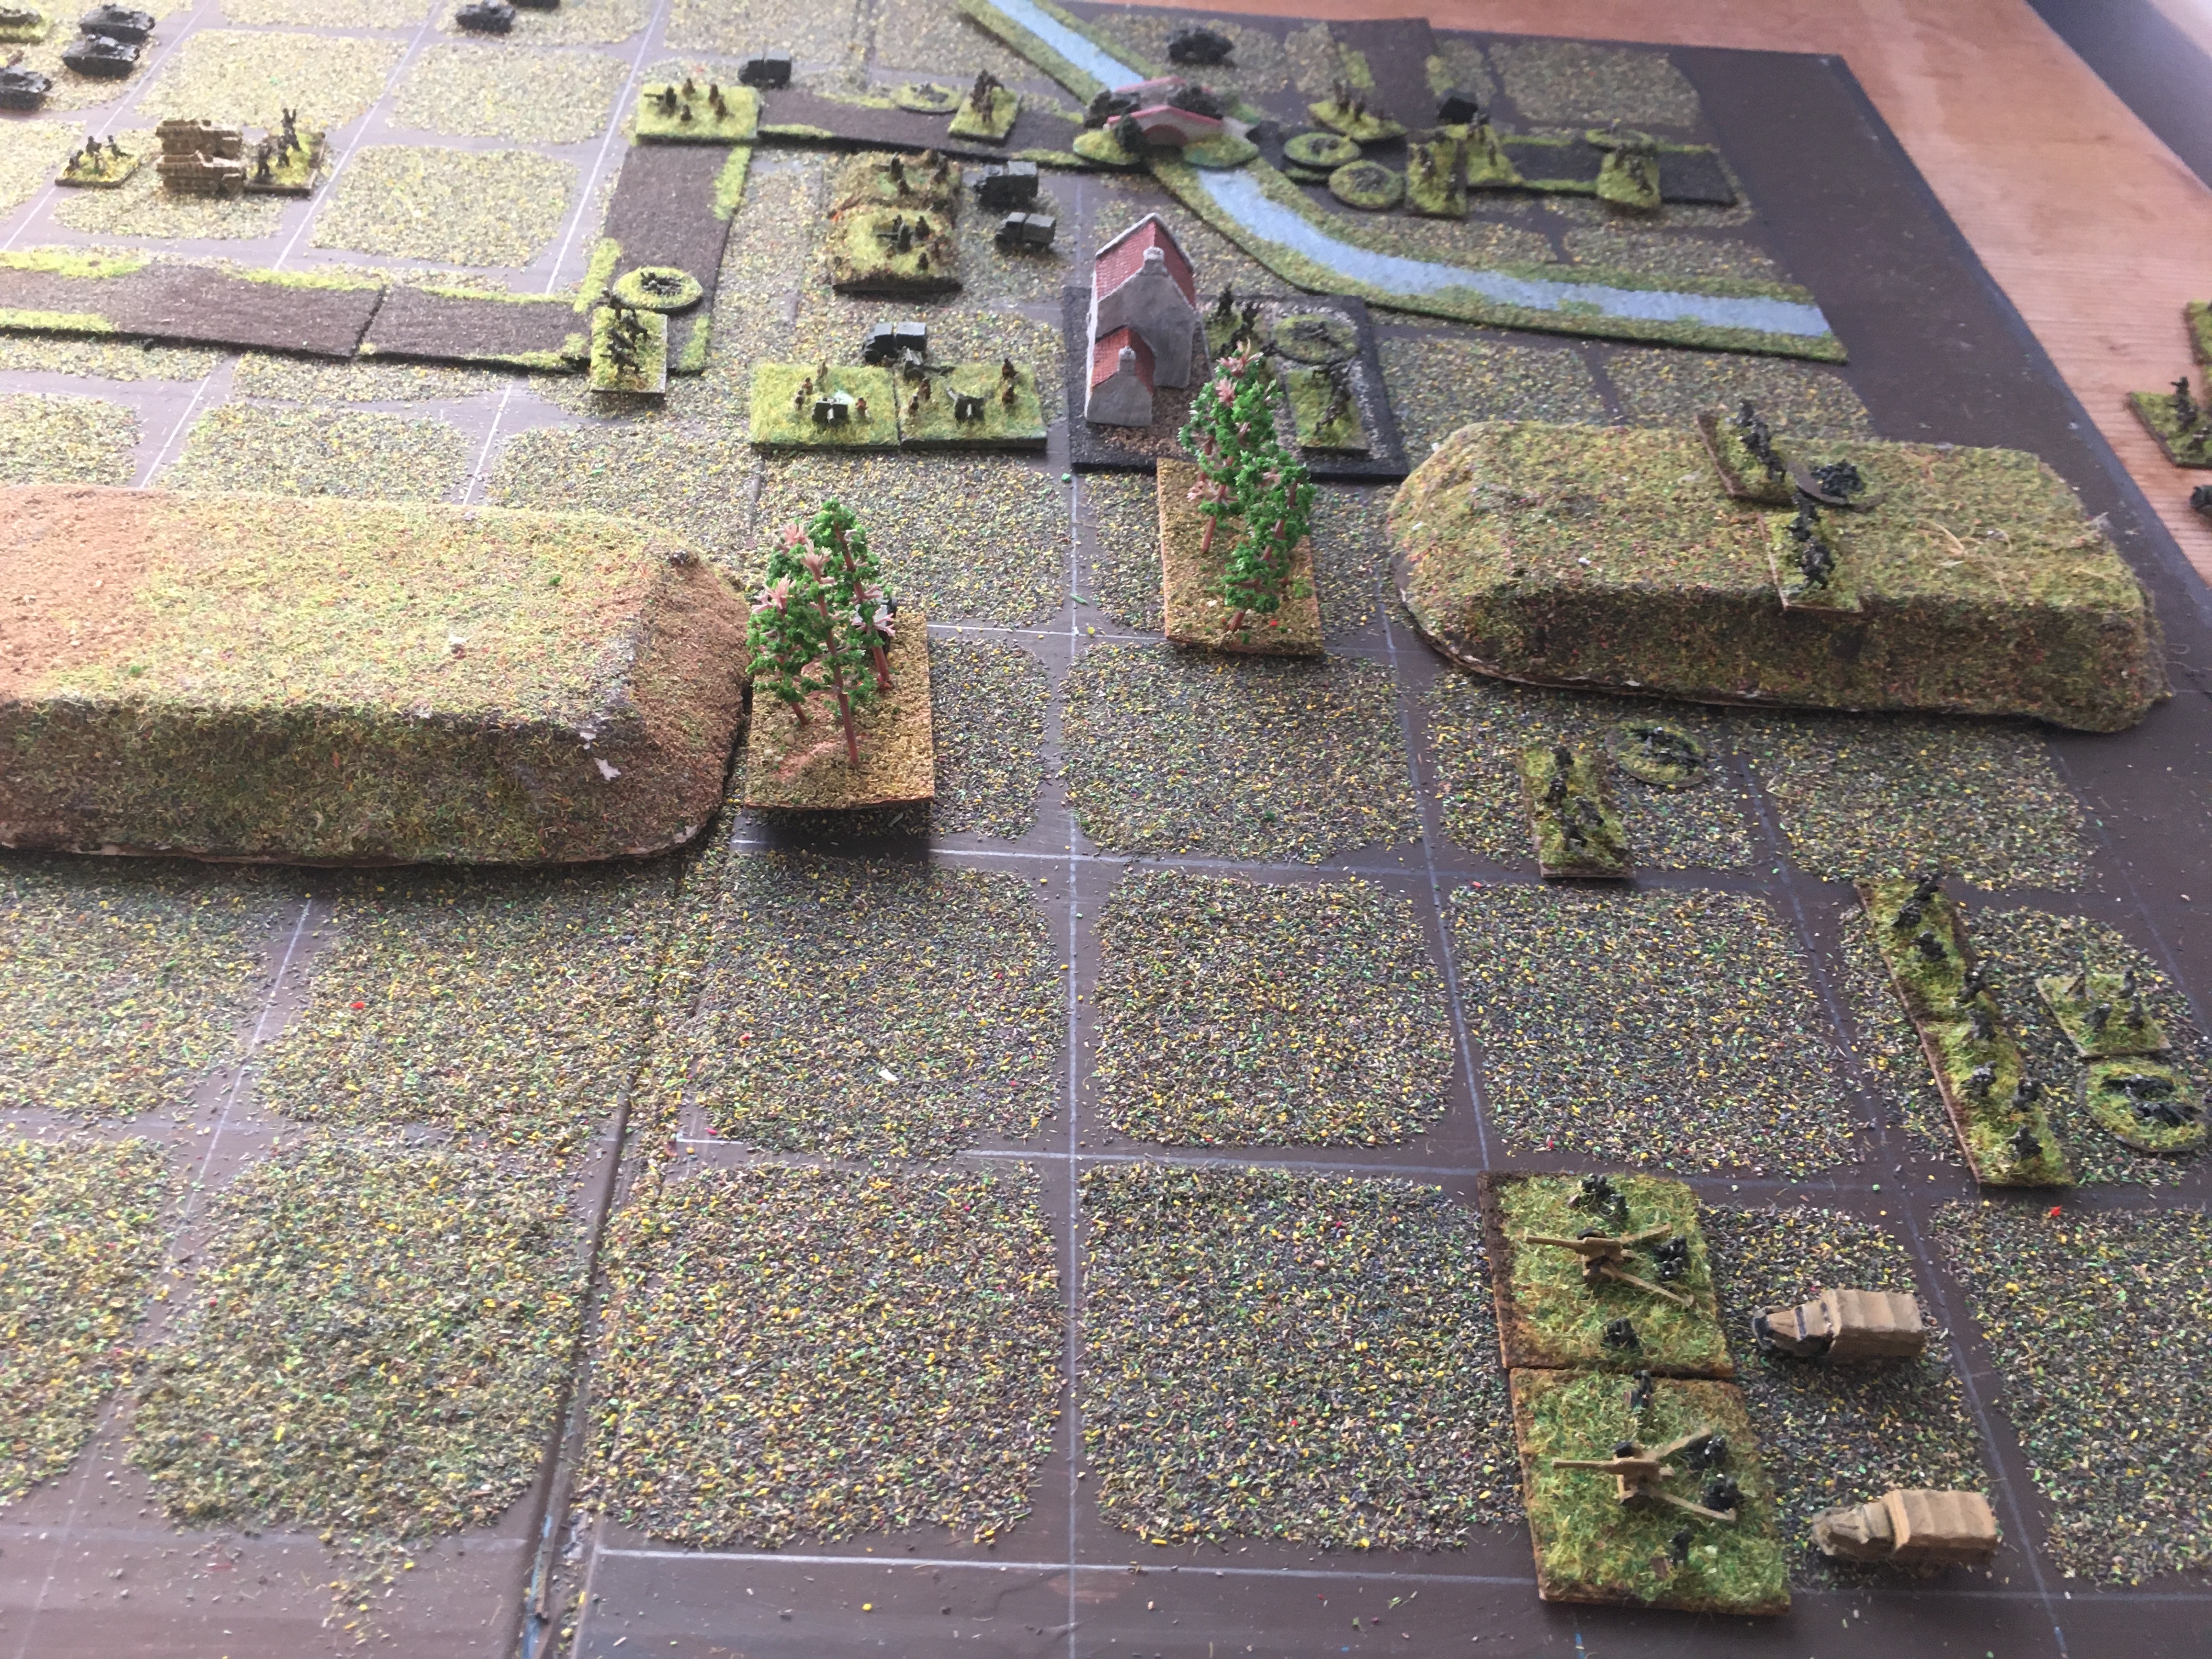
790 Infantry Div attacks! Its brilliant attack on the hill quickly forces the British infantry back into the woods and village, but it has suffered some losses amongst its anti-tank guns (bottom)
|
 |
The remorseless German attack from the West has caused heavy casualties amongst the British infantry and artillery and the whole division is 'just' still in the fight. Some good shooting is starting to wear down the Germans too in this sector.
|
 |
Heavy British fire from 84 Div is stopping the advance of 790 Infantry Div off its startline
|
 |
21 Div has held-on and has now been partly relieved by Bobforce, whose arrival has stopped 714 Div cold, with heavy losses.
|
 |
84 Div and 790 Inf Div are engaged in a slugging match, in which the Germans are slowly pushing forward, and casualties are slowly mounting
|
 |
714 Inf Div is overmatched now and is being slowly ground down by the British infantry and tanks
|
 |
The thin khaki line has stopped the Germans, but its own losses have mounted now
|
 |
714 Inf Div is down to its last remnants, but 21 Div has now lost its offensive power too
|
 |
101 Panzer Division arrives and starts to turn the tide, immediately causing losses amongt the British armour
|
 |
German firepower starts to rapidly ground down the remnants of 21 Div
|
 |
21 Div's survivors are in full retreat, covered by Bobforce which has also suffered quite heavily
|
 |
84 Div has given a little ground, but at the expense of some German losses
|
 |
However, hearing of the arrival of 101 Panzer, it begins a phased withdrawal with its Right retreating behind its Left: the lack of mobile German forces here makes it very hard to prevent this, if the mounting German losses hadn't installed some caution anyway
|
 |
21 Div retreats along the road
|
 |
790 Inf Div has essentially been stopped and is unable to pursue: its losses have been just too heavy
|
 |
A closer look at the British rearguard
|
 |
It is close, but the British troops have managed to reach the bridge
|
 |
The German attack has caused further losses, but in the main has been driven back by the rearguards as they cross the bridge
|
 |
84 Div continues its phased withdrawal
|
 |
| The position at the end of the battle. The Germans have just triumphed - only 101 Panzer Division is capable of any further offensive action - but the remnants of three British divisions have managed to safely escape towards the Dunkirk pocket... |
Game Notes: The original scenario also took place on an 8x8 gridded board which would have been a very crowded battlefield indeed. This 13x8 battlefield seemed to match the forces a little better and produced a marvellous game. The rules are such that withdrawals are emminently doable and fun parts of the game and so suit campaigns admirably: the 'bitter end' isn't bitter in this game, it is actually really fun. I don't think I encountered any additional issues with the game rules per se although I did learn a few things about how best to do 'game management' with larger forces, which should make it go a bit more smoothly for me next time.
I used the basic rules without really adding the optional extras given for more random activation and to be honest, I didn't necessarily feel that I missed much without them, although perhaps that will change after repeeated plays. I can really see these rules as being perfect for playing through an entire campaign in a day or two, like one could use DBA for. In any case, I played three games of this today and I could have easily stretched that to six I think, in the right circumstances, or perhaps even more.
Infantry by Baccus, guns and crews are a mixture of Baccus and Heroics & Ros, vehicles a mixture of Heroics & Ros and GHQ, buildings by Leven.
:strip_icc()/pic4565469.jpg)


A very impressive battle report.
ReplyDeleteI totally agree about your comments about the rules being suitable for fighting a mini-campaign in a day; that was one of the motivations for writing the rules.
All the best,
Bob
Yes, very much so; I have begun to ponder a little on some suitable scenarios and adaptations.
DeleteThe British forces have valiantly withstood the assault of the Hitlerite hordes and now retire safely to join the army at Dunkirk. We trust the nation recognises the need to recoup & rebuild our forces before once again bringing the fight to the Jerries and ensuring herr Hitler “learns his lesson”. 😉
ReplyDeleteCheers,
Geoff
Yes, pretty much this. The British Corps, although forced to retreat, can feel generally satisfied that they have done their duty pretty well. It might be said of both sides actually.
DeleteI've really enjoyed this series. You've got me thinking about playing some WWI with Portable Wargame to see how it goes. What did you decide about close combat being mandatory or optional? I am in the optional camp, but I have read some thought-provoking justifications from those who make it mandatory and now I'm less convinced. If you check out the Portable Wargame facebook group and search for "close combat", there are quite a few conversations about it.
ReplyDeleteGlad you liked it, John. At the moment I am tempted to make it mandatory and more than that, has to move into close combat directly ahead if that is an option (i.e. if there is an enemy straight ahead and one/or more to the flanks, then the attacker cannot attack the one on the flanks)
DeleteReally nice 3 games here JWH! As you say perfect for a day worth of campaign games, should one so wish. I still struggle with getting my head around WWII games played at this level, but that just me and my preference for battalion level ones.
ReplyDeleteThanks Steve. My problem, admittedly a pretty 1st world problem, is that there is literally no level of command level by land, sea or air for WW2 that isn't full of interest to me for gaming! I think that the only saving grace of that is there is less pressure/temptation to force actions which properly belong at one level into another...
Delete