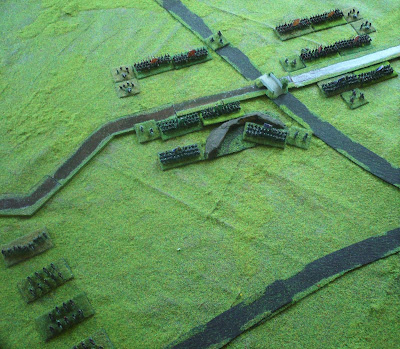
The forces involved are as follows:
Scots Covenanters
1 C-in-C and 3 generals
4 bases Trained infantry (Pike-Heavy)
4 bases Raw infantry (Pike-Heavy)
4 bases Frame guns
3 bases Trained Horse (Dutch tactics)
1 base Trained Dragoons
Royalists
1 C-in-C and 2 generals
4 bases Raw infantry (mixed)
2 bases Trained infantry (mixed)
1 base artillery
4 bases Trained horse (Swedish tactics)
The Deployment
 |
| A closer view of the bridge: the infantry square off, with the Covenanter cavalry in the rear (top-left) |
 |
| A closer-view from behind the Royalist infantry |
 |
| The Royalist infantry and artillery occupying the fort |
 |
| The same situation, looking North along the stream |
 |
| The collapse happened very quickly, bringing a promising battle to a premature end! Note the Scottish cavalry has deployed to intercept the Royalist infantry marching up... |
A game simultaneously exciting and disappointing. The combat was intense and exciting whilst it lasted, with the raw Royalist infantry performing better than might have been expected against better and more numerous troops. Only one battalia was routed but this led to the demoralisation of the whole army.
Game Notes:
The battle was taken from the scenario in the Polemos ECW book, modified for a slightly smaller table. This was simple enough to do with a slight re-orientation of the field to include all the major features. The only change I made was to rule that the Royalist Cavalry, whose appearance is dependent on a die roll, would appear two turns after the successful roll, to compensate for the slightly shorter distance it would have to travel.
The Polemos ECW rules give a believable restriction of command effort and scope and the individual combats all had plausible results. But the army morale...
There is no intermediate stage between unit morale and army morale in Polemos ECW: "brigades" and "wings" do not have separate morale. So with small armies, there is a distinct possibility of an instant death result - which is more or less what happened here. This seems to be entirely realistic however, reflecting closely the original combat...
Played solitaire on a 5'x3' table, using Polemos ECW rules and Baccus 6mm figures. All the terrain was home-made except the bridge. The game didn't seem to take too much time up! I plan on having another go at this later today, life permitting...
For anyone coming new to this, the way I use the Polemos ECW rules solo is described at the bottom of this post here.


No comments:
Post a Comment