Heretical Gaming is my blog about my gaming life, featuring small skirmishes and big battles from many historical periods (and some in the mythic past or the far future too). The focus is on battle reports using a wide variety of rules, with the occasional rules review, book review and odd musing about the gaming and history. Most of the battles use 6mm-sized figures and vehicles, but occasionally 15mm and 28mm figures appear too.

Sunday, 7 May 2017

Polemos General de Division: Refight of Ferrey at Salamanca 1812

I fancied a small, easy Napoleonic action to get me back into the swing of playing Polemos General de Division.  I decided to use Dave Brown's Salamanca scenario, featuring the fight of Ferrey's Division to hold off the advancing allies after the battle was pretty much lost.  It was published back in Battlegames 12.  If you would like to read what really happened, look here.


Dave Brown later wrote an article in Battlegames 23 about how much he dislikes rulesets like Polemos for being over-simple.  However, it is a very good small scenario and this is heretical gaming after all and here we positively delight in such things...

Orders of Battle:

Dave Brown gives excellent orders of battle for his General de Brigade rules in the article.  However, these rules use units with different strengths and separate skirmisher units, so we must use something slightly different for Polemos, as we take into account strength across the force and reduce or augment the number of bases if one side or other has weaker units numerically.  My compromise here is:

The Allies: 

6th Division (Gen Clinton - Capable)
Hinde's Bde: 1 x Veteran SK1, 2 x Trained SK1
Hulse's Bde: 1 x Veteran SK1, 1 x Trained SK1
Artillery: 1x9lb Ft Bty
Ellis' Bde: 1 x Veteran SK2, 1 x Veteran SK1 + 1x9lb Ft Bty
Rezende's Bde: 1 x Trained SK1, 2 x Second Line SK1
Anson's Bde: 2 x Trained Lt Cav (one of which can be Trained/Elite)

Ellis and Rezende arrive at the end of turn two, Anson at the end of turn four.

The Imperials:

3rd Division (Gen Ferrey - Capable)
Menne's Bde: 1 x Veteran SK2, 1 x Trained SK2, 2 x Second Line SK1
Bochaud's Bde: 2 x Trained SK1, 2 x Second Line SK1
Artillery: 1 x 8lb Ft Bty, 1 x 4lb Ft Bty

The "second-line" rating is taken from General de Brigade.  I would suggest keeping this rating by making them the same as "Raw" troops in General de Division but only using a -1 modifire instead of -2, where this is applicable (the combat results table, in other words).  Otherwise teat them as trained or raw, to taste. I'd ignore the special scenario rules in the published article, not because they are bad ideas, but because the Polemos rules incorporate the ideas anyway.

The Set-Up:

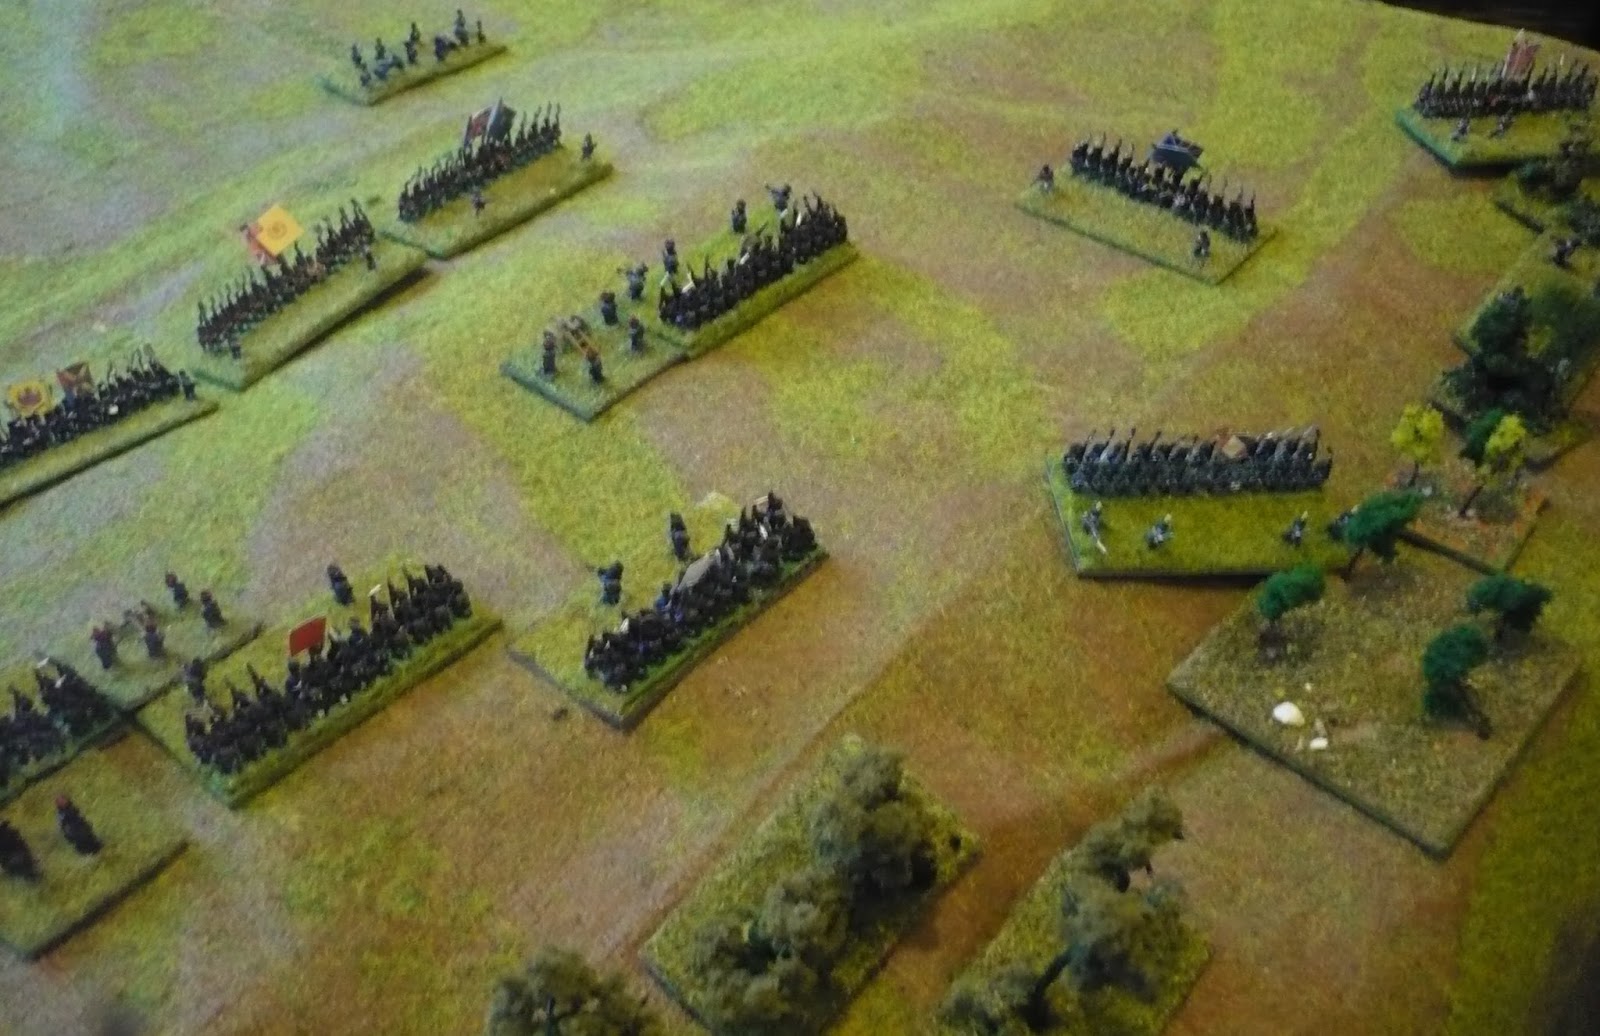
View from high above the French lines.  The French occupy the slope, open on the forward side, wooded to the rear.  Cole's Division approaches from the far side (North).

View from the East, French to the left, Allies to the right.  The clump of trees at the top of this shot mark the edge of the world for this scenario.

Hinde's Bde to the left, Hulse's Bde to the right (eagle-eyed readers will notice that I accidentally brought the British cavalry on at the beginning! I removed them before the action got started...)


And another view of the French.  Menne's Bde is to the left as viewed, Bochaud's to the right.  The 8lbers are supporting Menne.

And a final view down the slope (note that the British cavalry have gone now!)

A final shot of the set-up.

 The Battle:

After a couple of turns getting his artillery into place, Cole orders the advance.  The Fusiler brigade is bottom-right, nearest the table edge.  The British artillery shot well and forced the right-hand French infantry battalion back, but then French artillery counter-battery fire forced the British guns back out of range!

The British develop their attack.  They have brought more guns into play (bottom-right) and again forced the French infantry on the left flank to retire.  The smoke indicates disorder in the French battery.  The French light battery (top-left) has shot very well and caused considerable disorder to the British right-flanking move (note the red shaken markers)

Same position, but from behind the French centre

The British infantry continue their forward advance.  The British on the right-flank have reformed

Same position, different shot

The British fusiliers charge! Huzzah!

Another view - note the shaken French light infantrymen to the left

And the wider view


The Fusiliers are entirely successful!  One French infantry battalion routs, the other reforms in the woods

As soon as the pressure was applied to the French right, the British increased it to the French left.  There were a couple of pictures missing, but essentially the British had moved into a long range firefight to try and either disorder the French or tempt the French into charging.  Anyway, the Portuguese charged and have outflanked the French left, but Ferrey has directed the fire of his infantry well and pushed back some of the Portuguese attackers in great disorder.

Ferrey has led a charge and pushed back some of the Allied centre, but the French left is in severe danger

However, the Fusiliers have defeated another French unit on the right and the game is up! Menne's Brigade collapses, which leads to the remainder of the French force becoming disheartened and withdrawing

The French face around against the outflanking fusiliers, but the game is up...

Position at the end of the battle
 
 Game Notes:
A quick, fun scenarion but one with plenty of interest.  Polemos makes attacking uphill relatively difficult, but also proposes a relatively large advantage for Veteran over Raw troops.  So the key to this battle was the effectiveness of the British artillery in hurting the French infantry on the right, which enabled the Fusiliers to successfully attack the weaker French units.  This pressure enable the British to apply pressure to pin the French units to the front and thus achieve success on the other flank too.

I felt that the "second-line" rules worked very well and I am going to incorporate them further.  I am also thinking of reducing the "Veteran" advantage to a maximum of +1 too.

This scenario was played over a 4'x3' board, using Baccus 6mm figures.  Rules used were Polemos General de Division.
 

Wednesday, 12 April 2017

The Battle of Sempach 1386: A DBA Re-Fight

Inspired by Wally Hearl's article in Miniature Wargames 14 about the Battle of Semlach, I had a go at re-creating it in miniature using the DBA rules. 


It is quite an interesting battle, pitching the infantry-based Swiss force against a more typical Imperial Austrian force; most unusually, it was a genuine encounter battle, with both armies deploying and fighing off the line of march.

The article doesn't provide a map, so I scoured the internet for something appropriate.  This one was the best:

From this interesting site. It had to be supplemented with some aerial reconnaissance from Google.


For the orders of battle, I used the DBA lists, with one important modification:

Austrians (Medieval German IV/13b):
3 x Knights (3Kn), 2 x Blades (Dismounted Knights) (4Bd), 1 x Crossbowmen (4Cb), 2 x Militia Spearmen (Sp), 2 x Mercenaries (4Bd), 2 x Archers (Ps)

Swiss (Early Swiss IV/41):
9 x Halberdiers (4Bd), 3 x Crossbowmen (Ps)

Those familiar with the lists will note the changes to the Austrian list.  There isn't usually an option to use dismounted knights, but this is reportedly what was done at Sempach.  The article's author seemed to indicate that the intention was to use the dismounted knights as pikemen (!) but Blades is the usual choice for dismounted knights.  However, Spearmen might have also been a good choice.

The engagement involved both sides' vanguards clashing before the respective main bodies arrived.  To simulate this, all troops were considered to start off-table and had to be moved using PIPs onto the road.  For the first four turns only the vanguards could be used, as follows:

Austrians: 2 x Dismounted Knights (4Bd), 2 x Archers (Ps)
Swiss: 1 x Crossbowmen (Ps), 3 x Halberdiers (4Bd)

The Battle:

The view on the road to Sempach from Hildisrieden.  The Swiss approach from Sempach, the Austrians from Hildisrieden.

a different angle

The Swiss, handicapped by low PIP rolls, are still in column on the road as the Austrian archers approach.

Another angle

The Swiss halberdiers deploy, preparing to charge.  The Austrian dismounted knights approach

The Austrian skirmishers delay the Swiss advance

Austrian crossbowmen flee from the blades of the advancing Swiss...

The Austrian knights engage the flank of the Swiss first line; the Swiss main body is just coming up

A close-up of the clash of lines

Surprisingly, the Halberdiers win and push forward

But the Austrian knights are able to turn the tables and destroy the purusing Halberdiers

The dismounted Austrian knights push forward (top left); Duke Leopold himself leads his knights into the charge (bottom-centre)

The Austrian knights crush the Swiss, whilst the second line engages the dismounted knights

The leading knights move up to support their dismounted brethren; more knights engage the remnants of the Swiss first line, supported by some Austrian skirmishing crossbowmen

The knights crush the remainder of the Halberdiers in the Swiss vanguard...

The Swiss second line in a large clash - Swiss skirmishers are now working along the edge of the forest...

Duke Leopold leads his knights to victory once again!  The Swiss army collapses...

A closer view of the hero of the hour, leading his knights to victory!

Game Notes:

A complete reversal of the historical outcome, in which the Swiss main body was able to flank and destroy the Austrian vanguard and its supporting knights, with Leopold falling in the midst of his men!  The keys to the Austrian victory here were:

Very poor initial PIP rolls on the Swiss side - they were never able to control the pace of the battle
The flanking Swiss halberdiers in the first line advancing after forcing a recoil into a more difficult situation where they were outflanked on both sides and destroyed
As the line wasn't properly formed, there were continuously flanks left for the mounted knights to exploit.
The quick kill ability of the knights against blades (blades without bow support are a much better proposition for mounted knights).

I do wonder if the game might play very differently using Neil Thomas' Ancient & Medieval rules, with their emphasis on attrition.  This might give less force to the impetus-based quick kills of the Austrian mounted knights.

The game was interesting and exciting, and took little time to set up and play.  The board was 3'x2'.  Again, I used my 6mm Baccus Wars of the Roses figures as suitable proxies for both sides.

Lacquered Combat: Attack on the Emden 04 Sep 39

For my next game of Lacquered Coffins, I wrote a small air-sea scenario based on the first such attacks of World War 2 in the West.  The details are taken from an excellent book, Christopher Shores' Fledgling Eagles, which deals with all of the air fighting over the North Sea, France and Norway before the actual invasion of France in May 1940.


I actually wrote 3 scenarios, from which I selected the second for this game - but I present all of them here.


04 September 1939

Scenario 01:

Time: 1755
Mission: Blenheim bombers of 110 Sqn are to attack the German cruiser Admiral Scheer.

Forces:

British: 5 x Blenheim IV bombers (led by Flt Lt Doran)

Germans: 1 x Cruiser; shore-based AA, (1 x Do18 Flying Boat – optional)

The British set up at the far end of the table, at any permissible speed and altitude (historically I think it would be SPD 4, ALT 1).  The German cruiser (the Admiral Scheer) is set up at the near end of the table.  After the British leave the table on the near side, they then fly back up the table at the same point they left (this simulates the AA fire suffered leaving the target).  The German cruiser counts as heavily-defended by AA.  The table edge marks the port defences (i.e. measure AA range from the table edge, this counts as medium-defended)

Optional Rules:  The British bombs were very unreliable in this attack.  Roll a D6 for every bomb 1-3 indicates that the bomb failed to function correctly, 4-6 indicates that the bomb explodes as it should.


 As soon as all the British bombers have left the table, set up another table with the surviving bombers on the near side, then the German flying boat (SPD 2, ALT 1) on the far side.  The German flying boat escapes if it reaches the near side.

 
Scenario 02:

Time: 1800
Mission: Blenheim bombers of 107 Sqn are to attack the German light cruiser Emden.

Forces:

British: 5 x Blenheim IV bombers (led by Flt Lt Barton)

Germans: 1 x Lt. Cruiser; shore-based AA; 2 x Bf109E;

The British set up at the far end of the table, at any permissible SPD and ALT (see comment in scenario 01).  The German cruiser is set up at the near end of the table.  After the British leave the table on the near side, they then fly back up the table at the same point they left (this simulates the AA fire suffered leaving the target).  The German cruiser counts as heavily-defended by AA.  The table edge marks the port defences (i.e. measure AA range from the table edge, this counts as medium-defended)As soon as the British bombers are set-up to leave the target, place the two Bf109E at any desired altitude and speed at any corner of the table.

n.b.  The Bf109Es should have LMGs rather than MGs.

Optional Rules:  The British bombs were very unreliable in this attack.  Roll a D6 for every bomb 1-3 indicates that the bomb failed to function correctly, 4-6 indicates that the bomb explodes as it should.


Scenario 03:

Time: 1805
Mission: Wellington bombers of 9 Sqn are to attack the German battle cruisers Scharnhorst and Gneisenau.

Forces:

British: 3 x Wellington I bombers (led by Sqn Ldr Lamb)

Germans: 2 x Battle Cruisers; shore-based AA; 2 x Bf109E

The British set up at the far end of the table, at any permissible SPD and ALT.  The German cruiser is set up at the near end of the table.  After the British leave the table on the near side, they then fly back up the table at the same point they left (this simulates the AA fire suffered leaving the target).  The German battlee cruisers count as heavily-defended by AA.  The table edge marks the port defences (i.e. measure AA range from the table edge, this counts as medium-defended)  As soon as the British bombers are set-up to leave the target on the return trip, place the two Bf109E at any desired altitude and speed at any corner of the table.

Optional Rules:  The British bombs were very unreliable in this attack.  Roll a D6 for every bomb 1-3 indicates that the bomb failed to function correctly, 4-6 indicates that the bomb explodes as it should.

The Game:

Flt Lt WF Barton in Blenheim IV N6184 leads the 107 Sqn formation.
The German Light Cruiser Emden

Just to show the distance

The British light bombers have adopted a line astern formation ready to attack.  The pilot of the second aircraft has already been injured by flak.

Bombs away!  All the British aircraft survive, although the third and fifth aircraft have been damaged now by flak.

Emden blows up in a very satisfying fashion! (but see game notes)

As outlined in the scenario rules, the British bombers then flew back across the table in the following turn.  They return at the place and in the same formation as they left (in this case linear); they shook back out into a V formation, but two Emils from II/JG77 are moving in to intercept

In short order, the Germans shoot down two bombers!

The Germans move towards the remaining Blenheims...

But lucky defensive fire puts the two Emils into the sea!  The remaining Blenheims (one with a wounded Pilot, the remaining two with damage) retreat.

 Game Notes:

The real Emden
 A good fun, quick game.  Lacquered combat is very easy to play!  It is like a Neil Thomas set of rules: it is the distilled essence of the various complicated games made into a very simple, impressionistic game, which, broadly speaking, gets to the same place with some obvious shortcuts, but much less faff...

However, I do think there is a specific problem with damage calibration: the game is just too deadly I think, weapons are just a little too effective.  I need to play about with this some more, but my impression is that effective damage was more random than this and hits harder to obtain.  After my first game, I changed the order of fire, so I do bombers' defensive fire before the attacking fighter.  This did make a difference here, probably another Blenheim would have been shot down and one of the Emils would have survived.  I am thinking of introducing a house rule so that any aircraft with only a single damage point remaining must break off its attacks and return home and is only permitted to attack fighters from this point (to allow a damaged fighter to defend itself).  I think that this might create a more realistic level of commitment from the fighter pilots.  To be fair, I haven't been using the points system given in the game: perhaps that would encourage more caution.

I didn't use the bombing optional rule I suggested, but I did roll it out, just to see what would have happened.  Pleasingly, this would have given a result more close to that historically achieved (although in real life one of the damaged aircraft actually crashed into the Emden, which caused rather more damage than the bombs did (which missed by 12 yards).  Incidentally, in the real attack four of the aircraft were destroyed, the remaining aircraft lost touch with its formation and returned home without attacking.  There is an argument for increasing the level of the land-based flak defences to heavy to reflect the inferno that the unfortunate 107 Sqn flew into.


II/JG 77 gained the first Luftwaffe victories in the West on this day (1 Blenheim, 2 Wellingtons):


Aircraft are from Tumbling Dice, the mat is a fleece cloth from Boyes (£1.99).  The blue is more Carribean than North Sea, mind...