Heretical Gaming is my blog about my gaming life, featuring small skirmishes and big battles from many historical periods (and some in the mythic past or the far future too). The focus is on battle reports using a wide variety of rules, with the occasional rules review, book review and odd musing about the gaming and history. Most of the battles use 6mm-sized figures and vehicles, but occasionally 15mm and 28mm figures appear too.
Showing posts with label KG von Luck Campaign. Show all posts

Tuesday, 25 January 2022

Kampfgruppe von Luck Scenario 003b: Advancing Again Down the Corridor of Death...

In this next battle (the sixth) in the Kampfgruppe von Luck campaign, the Germans are once again attacking down the "Corridor of Death" into Le Bas de Ranville.  Because of delays (i.e. defeats in earlier attacks) this is a 'must win' battle for the Germans, or they will lose the campaign: they won't have sufficient time left to clear the Paras remaining positions, even if they wiped out the defending Paras.


The Forces:

12 Para is fielding its second platoon again, which is close to full strength.  KG von Luck has amalgamated its 1st and 2nd platoons into one full strength platoon, with a couple of left over elements going to 3 platoon (most notably, the platoon commander).

British Para Platoon:
HQ: 1 x Rifle Comd group, 1 x 2" mortar team
1 Section: 2 x Rifle group, 1 x LMG group
2 Section: 2 x Rifle groups, 1 x LMG group
3 Section: 1 x Rifle group, 1 x LMG group, 1 x sniper team

The platoon was reinforced with a FOO, with a section of 3" mortars on call and a PIAT team.  It was also supplied with Gammon bombs.
 
German Panzer Grenadier Platoon: 
HQ: 1 x Rifle Comd group, 1 x Panzerschrek team
Squad 1: 1 x Rifle group, 2 x LMG groups
Squad 2: 1 x Rifle group, 2 x LMG groups
Squad 3: 1 x Rifle group, 2 x LMG groups
 
Possible attachments:
1 x Rifle Comd group (the Company Commander); 1 x Car; 1 x Panzerschrek team; 1 x Unix P107(f) SPW half-track; 1 x Sniper team; 1 x Forward Observer, controlling 81mm mortar battery; 1 x MG42 HMG team; 1 x Werfer strike; 1 x Panzer Grenadier squad; 1 x Pak 40 auf S307(f); 1 x 15cm sFH13 auf Lorraine Schlepper (f)
 
This is the 4th (Composite) Platoon of the combined 8th-7th Kompanie force. 

Once again, the rules are that unpublished set, with strong inspiration from the WRG 1950-1985 Modern Rules 2nd edition, which have been discussed on previous battle reports.

 
I won't repeat the Set-Up information, since it was pretty much the same as in the first battle (since most of the Paras weren't even seen by any of the surviving/escaping Germans, there wasn't much need to  reposition, except in minor details).

The Battle:

 
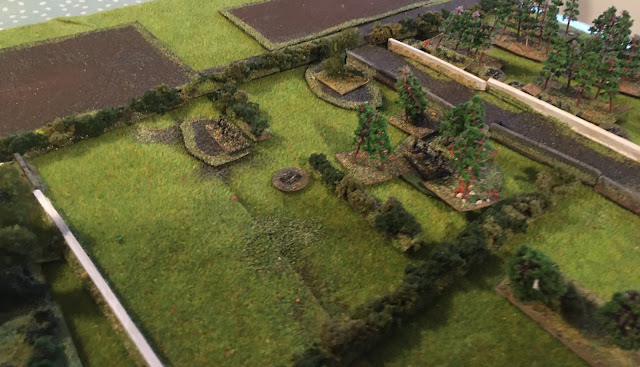
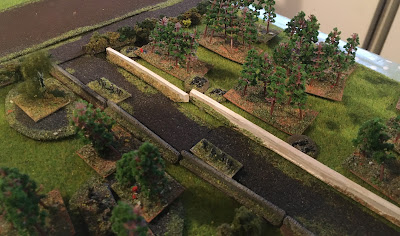
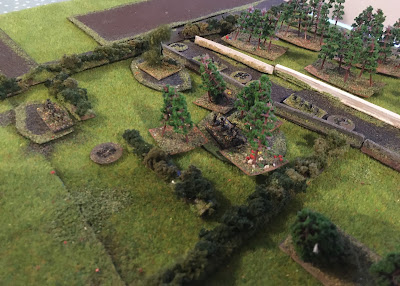
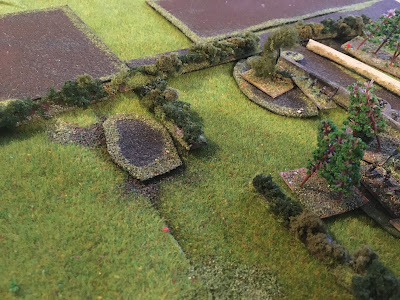
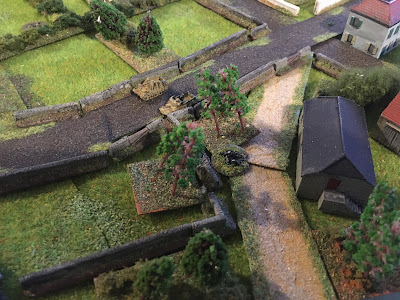
We join the action as a couple of German squads have approached the orchard wall again (top-right), again facing the (slightly re-constituted 1 Section); this time 1 Section's LMG team has withdrawn to the line of hedgerows (centre) rather than contest the road at grenade range

"In every war, there comes a time when Private Snodgrass must advance to his front..."; what is true for Private Snodgrass is as true for Landers Schmidt and Braun, so several Grenadiers scramble forward, covered by their squad MG42s...

They breathe again - nothing happens.  The MG42s come up to support them.

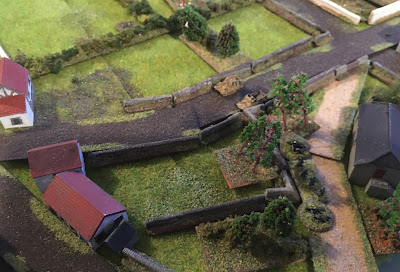
A large group of Germans arrives: a full squad with a car and a Unix P107(f) SPW half-track (right); a Pak 40 auf S307(f) and a 15cm sFH13 auf Lorraine Schlepper (f) accompany them (on the road)

This group advances slowly forward

Meanwhile, the Panzer Grenadiers on the other flank resume their advance...

And yet again, Stens rattle and Lee-Enfields bang, and several Grenadiers go down.

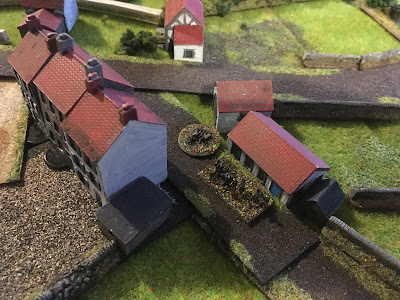
Seeing, perhaps just sensing, movement in the one-storey buildings, the German SP guns open fire: the Paras reckon discretion is the better part of valour having survived the initial attacks, and pull back to the next line of houses

The Paras have no exclusive rights to close quarter marksmanship; despite being dug-in, 6 Para go down to the hail of Mauser, Machine-Pistol and MG 42 fire - only the four Paras in the trees (right) remain from 1 Section

Again, more Paras (this time the FOO team) attract the attention of the German SP guns - but again, the Paras are more scared than scarred and quickly pull out of sight (centre)

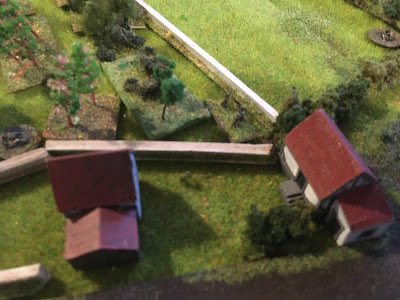
The Germans continue to advance down the road and through the barns nearby - at this point it is worth noting that after these two initial groups were deployed, not a single additional German has turned up, or will turn up (i.e. the deck has now been exhausted); the Germans will have to win with what they have, or not at all

Getting lucky, the Paras from 2 Section (in the buildings just out of shot to the left) spot the Panzer Grenadiers moving by barn and the wall (centre-right)

In a few moment, 6 of these Panzer Grenadiers fall to Bren and rifle fire

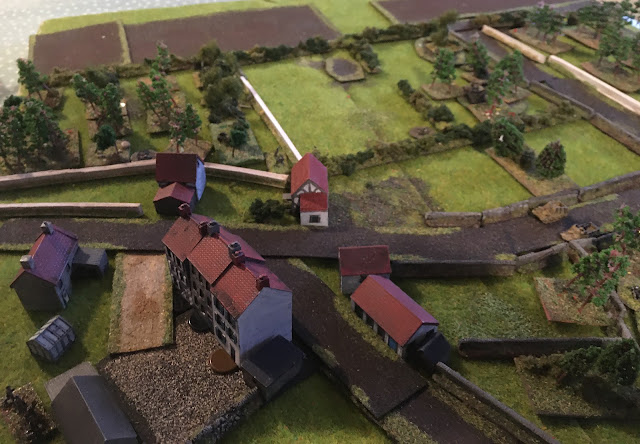
A wider shot: the 150mm SP gun fires into one of the buildings from where the devastating small arms fire came (the big white building central, end of terrace) and collapses it - although the riflemen escape (bottom-left, the Bren team perished)

The Paras in the trees are still holding on, and giving better than they are getting - they have shot a further six Grenadiers in the last five minutes

At that point, German morale collapses and a retreat is ordered: Le Bas de Ranville has been held by 12 Para.


Game Results:

The Paras suffered 8 casualties in this action.  The Germans suffered twice as many.  It was another clear victory for the Paras, and victory in this action has given them victory in the campaign.

Game Notes:

More good fun, especially as it was quite see-saw; the Paras were lucky that the 150mm crew proved to be ace at spotting hidden movement but terrible at getting their shots to actually kill - it could have been a lot worse.  The Paras of 1 Sect were obviously pivotal, mixing good tactics with considerable heroism and luck - and being both dug-in and hard to spot were very helpful.  There were two really good sequences of infantry actions, once by the Panzer Grenadiers to elminate most of 1 Section, and once by the Paras in the buildings, who opened fire at slightly longer range than would normally be sensible, but they were really just trying to get a 'slow' reaction from the Panzer Grenadiers.  As it was, the old WRG standby of if in doubt, roll a few sixes came out and their shooting was brilliant/very lucky and really swung the battle.  It was the Paras of 1 Sect who finally finished off the Germans, but eliminating those two bases from an unacquired position was key.

The infantry combat has been very different from that in my usual set of rules for these actions, WRG 1st edition.  This is because 'suppression' in 1st edition is absolute, whereas in 2nd edition it is partial - troops can still do stuff, but less well.  At close ranges, this still does allow good or lucky infantrymen to strike back.  I am still thinking over the history of it: some of my favourite works on the period have made the point that fire superiority is a tangible thing: one heard the MG42 or the Bren, but very rarely both together.  Still thinking about this one.

Although it didn't necessarily work out for them in these last two battles, I have taken care to use fire-and-movement tactics for the Panzer Grenadiers more as the campaign has gone on, I think that it has made things a bit fairer.  Going forward though, I think I need to change the way that I build activation decks for these games: 'core' troops from the non-player side need to be guaranteed to turn up in each game.  In further campaigns, I will add these cards to the deck after all the possible support elements have been randomized.  That should increase the level of challenge somewhat.  For those unfamiliar with the Too Fat Lardies' scenarios, each game is based on a 'core platoon' with support chosen from a restricted points list.  Each side will have a varying amount of support per game.  The way the activation deck works for my solo game  is to have every possible option in and a random number of them will actually arrive.  What the effect of this is is to make scenarios where the non-active player didn't have many points generally harder (since the non-active player would be more likely to generate support in excess of what the designers had assigned), whereas missions where the non-active player gets lots of support in the scenario become, conversely, easier.

Anyway, all good fun, and a good work out for both rules and campaign.  I will definitely replay this campaign at some point, perhaps from the German side.  I want to get myself the proper 21st Panzer Division toys before that though! I will be looking to get a somewhat bigger game to the table soon, to give the armour sections of the rules more of a workout.

Figures by Baccus 6mm, vehicles by Heroics and Ros.  Buildings by Leven and Timecast.


Monday, 24 January 2022

Kampfgruppe von Luck Campaign Scenario 003

The fighting in the Kampfgruppe von Luck pint-sized campaign has now moved on into Le Bas de Ranville itself, as the Panzer Grenadiers of 21st Panzer Division attempt to build on their momentum and roll through 12 Para's defences.


The Forces:

Both 12 Para and KG von Luck field fresh platoons for this battle, as the troops from previous battles are now exhausted, if not dead, wounded or prisoners.

The British forces are based around a fresh platoon from 12 Para. 
 
British Para Platoon:
HQ: 1 x Rifle Comd group, 1 x PIAT team, 1 x 2" mortar team, 1 x sniper team
1 Section: 2 x Rifle groups, 1 x LMG group
2 Section: 2 x Rifle groups, 1 x LMG group
3 Section: 1 x Rifle group, 2 x LMG groups, 1 x sniper team

The platoon was reinforced with a FOO, with a section of 3" mortars on call.  It was also supplied with Gammon bombs.
 
German Panzer Grenadier Platoon: 
HQ: 1 x Rifle Comd group, 1 x Panzerschrek team
Squad 1: 1 x Rifle group, 2 x LMG groups
Squad 2: 1 x Rifle group, 2 x LMG groups
Squad 3: 1 x Rifle group, 2 x LMG groups
 
Possible attachments:
1 x Rifle Comd group (the Company Commander); 1 x Car; 1 x Panzerschrek team; 1 x Unix P107(f) SPW half-track; 1 x Sniper team; 1 x Forward Observer, controlling 81mm mortar battery; 1 x MG42 HMG team; 1 x Werfer strike; 1 x Panzer Grenadier squad; 1 x Pak 40 auf S307(f); 1 x 15cm sFH13 auf Lorraine Schlepper (f)
 

This is the 3rd Platoon of the combined 8th-7th Kompanie force. 

Once again, the rules are that unpublished set, with strong inspiration from the WRG 1950-1985 Modern Rules 2nd edition, which have been discussed on previous battle reports.


The Set-Up:

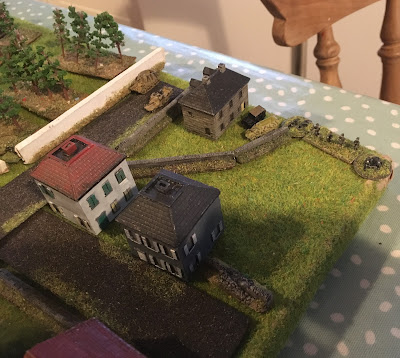
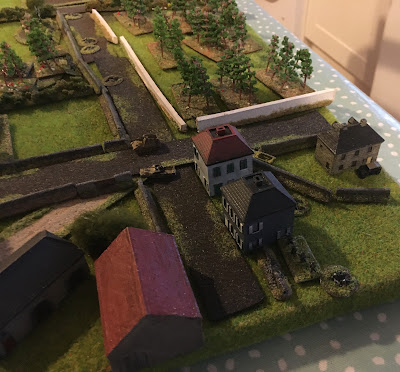
To make things a bit easier to follow, I have shown the set-up with all the Paras outside of the buildings (having a quick brew and fag?!?) before the action starts, although most of these elements were inside buildings when the action began.

3 Section is defending the rear line of buildings, with the sniper forward; 2 Section has the forward line of buildings, with some riflemen in reserve in the end 2-storey middle building.

The Platoon commander is in the building on the left, with the 2" mortar team just outside on the other side of the white wall; the PIAT team are outside the building on the right, with the FOO and his team at the apex of the white walls; the Platoon sniper is hidden further along that wall; some of 1 Section can be seen by the hedges and trees (top-right)

Another view

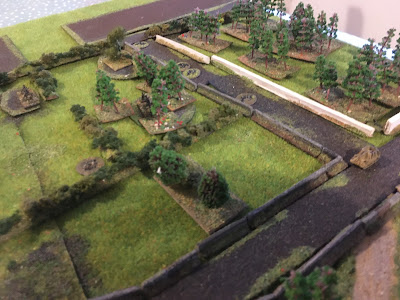
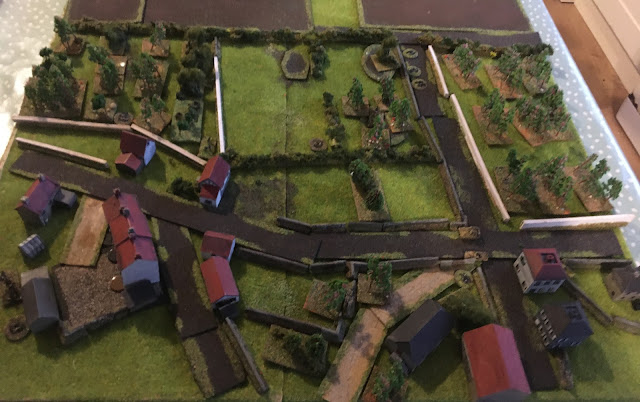
And a wider view; the hedgeline 3/4 of the way up marks the 'edge of the inhabitable world' in the manner of a video game, by the way; more discussion of this in the game notes.  The ploughed fields beyond are purely decorative.

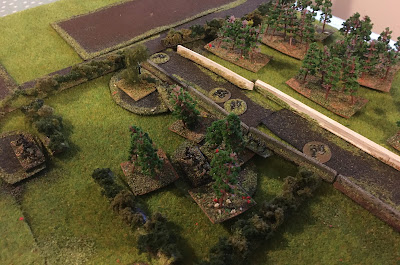
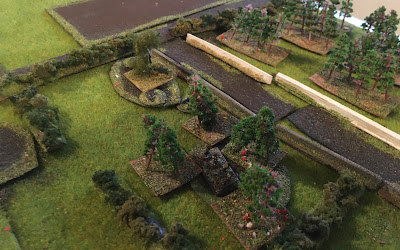
1 Section has its Bren on the flank (top); some of its riflemen behind the hedges (left) and others in a small patch of wood (centre-right); this section is dug-in.


And one more table-wide view, just for luck.

The Battle:

A German section enters the orchard

3 Pl Commander enters at the front too


The Germans cautiously advance forward through the orchards, the Platoon commander one bound behind

All the rank is at the front for this one.  The Kompanie Commander arrives along with another Panzer Grenadier squad

Covered by both the MG42s, some grenadiers get over the wall and into the road

The Grenadiers reach the stone wall...

When the chatter of a Bren opens up enfilading from the flank (centre-left, you can 'just' see a bit of them by the tree) and the Panzer Grenadiers are cut down in an instant

Locating their target, the MG42s open up, their sound tearing up the air...

And after a brief exchange of fire, the Bren team is cut down in its turn

Avoiding the fire, the second squad and the Kompanie commander go left flanking...

Taxi!?! The commander's car and one of the platoon's French APCs turn up.

The shooting having ceased, the Germans resume their advance

A wider shot

The Germans have got as far forward as the road without too many hitches now

A Werfer strike goes in, killing the PIAT team and the platoon sniper; most of the troops in the buildings are suppressed or neutralized for the present

15cm sFH13 auf Lorraine Schlepper (f) arrives to assist - it was a bad time for the PIAT team to go down

The Germans are slowly edging further forward, into the fields beyond the wall (centre-left)

Then, disaster!  The German Platoon Commander becomes a casualty, ambushed by the Paras in the small cluster of trees over the wall

Then the FOO calls in a mortar strike on the German troops in the wood and the orchard - one of the MG42 teams is knocked out, and most of the remainder are suppressed.

Another shot

The Germans have resumed their advance down the road, but the MG42 teams are still locked in a short-range but surprisingly bloodless battle with the Paras in the trees (left)

The black counters placed under the bases of the houses mark which ones were hit in the Werfer bombardment

A Panzerschrek team turns up, accompanying the Panzerschrek team that should have been with the Platoon commander but unaccountably got lost on the way...

The Para riflemen win another firefight and dispose of another MG42 team...

Hit by another mortar strike and having suffered some serious losses, the Panzer Grenadier Platoon's morale is shot and they try and withdraw - but the mortar bombs are still landing around the orchard and the road

The first German attack has petered out


Game Results:

A British victory: the Paras suffered 6 casualties, the Panzer Grenadiers suffered at least 15, with a further 6 missing...

 Game Notes:

A good game, although the Panzer Grenadiers' attack seemed to wilt at a slightly surprising moment - although perhaps it was just me, knowing that without the PIAT that 15cm sFH13 auf Lorraine Schlepper (f) would probably have won the game for the Germans just by blasting the remaining Paras out of the houses.  However, since the Germans couldn't have known that, and the remaining Paras in the buildings were not firing in order to remain difficult to acquire, it did seem justified, I guess.  The Paras' used their mortar support to good effect in this one, although it is much less dangerous and covers much less areas than the Werfer barrage the Germans got, it really pays to be in some kind of hard cover in these rules when under area fire.

The eagle-eyed observer will note that not only am I using a smaller board than usual for this battlefield (2'x2', rather than the 3'x2' I typically use for these refights), but that I reduced the size of the board even more on purpose, by taking away the top 5" or so! What madness is this?!?!

It is because Chain of Command is really designed to replicate an area of only (roughly) 240m x 160m.  Played according to the suggested ground scale, that would mean a table size of 24cm x 16cm - truly micro-gaming!!!.  I elongate the scenarios usually to cover an area of approximately 450m x 300m, more than 3.5 times the area, using a ground scale of 1cm = 5m.  A four-rifle infantry element therefore covers 15m from end man to end man.  A bit close but not inconceivable, although 30m would be better in the open.  Anyway, all of that mostly does not matter, but in the more 'urban' set-ups it really does, hence the use of a reduced size board here.

One 'matter arising' from the game is the subject of withdrawal through fire.  When the Panzer Grenadiers' morale failed at the closing stages of the battle, some of the them had a withdrawal route which would allow them to get away from known enemy positions, but going through a mortar barrage to do it.  What are your thoughts on the realism of this - I would be very interested to know what readers think?  I have always been partial to the Squad Leader rules (summarized) that if you are in cover you can stay put, otherwise you can only withdraw if you aren't in LOS and effective enemy range.   

On the campaign side, the pressure is really on the Germans now - they MUST win the next battle or they will lose the campaign (they won't have enough time left to clear the entirety of the village).