Okay, next one up is the "Blow From The Rear" Neil Thomas' One Hour Wargames scenario which is loosely based on the Battle of Krefeld (1758). I think this is somewhat similar in feel to the previous scenario, with 'Red' (here, the British) counter-attack 'Blue', with the difference being that in the previous scenario Blue attacks whereas here everything happens against a 'stalled' Blue.
As in the previous few games of this series, I have been using Polemos Ruse de Guerre rather than the 'One Hour Wargame' rules themselves to fight out the action.
The Forces:
Franco-Jacobites:
6 bases of Foot, 1 base of Dragoons, 2 bases of Horse
British:
6 bases of Foot, 2 bases of Horse, 1 base of Artillery
The Franco-Jacobites are not permitted to cross the river. 3 units must be held in reserve and cannot move until turn 7.
The Set-Up:
 |
The Franco-Jacobites in position, defending the line of the river with the reserves in the rear (bottom-right)
|
 |
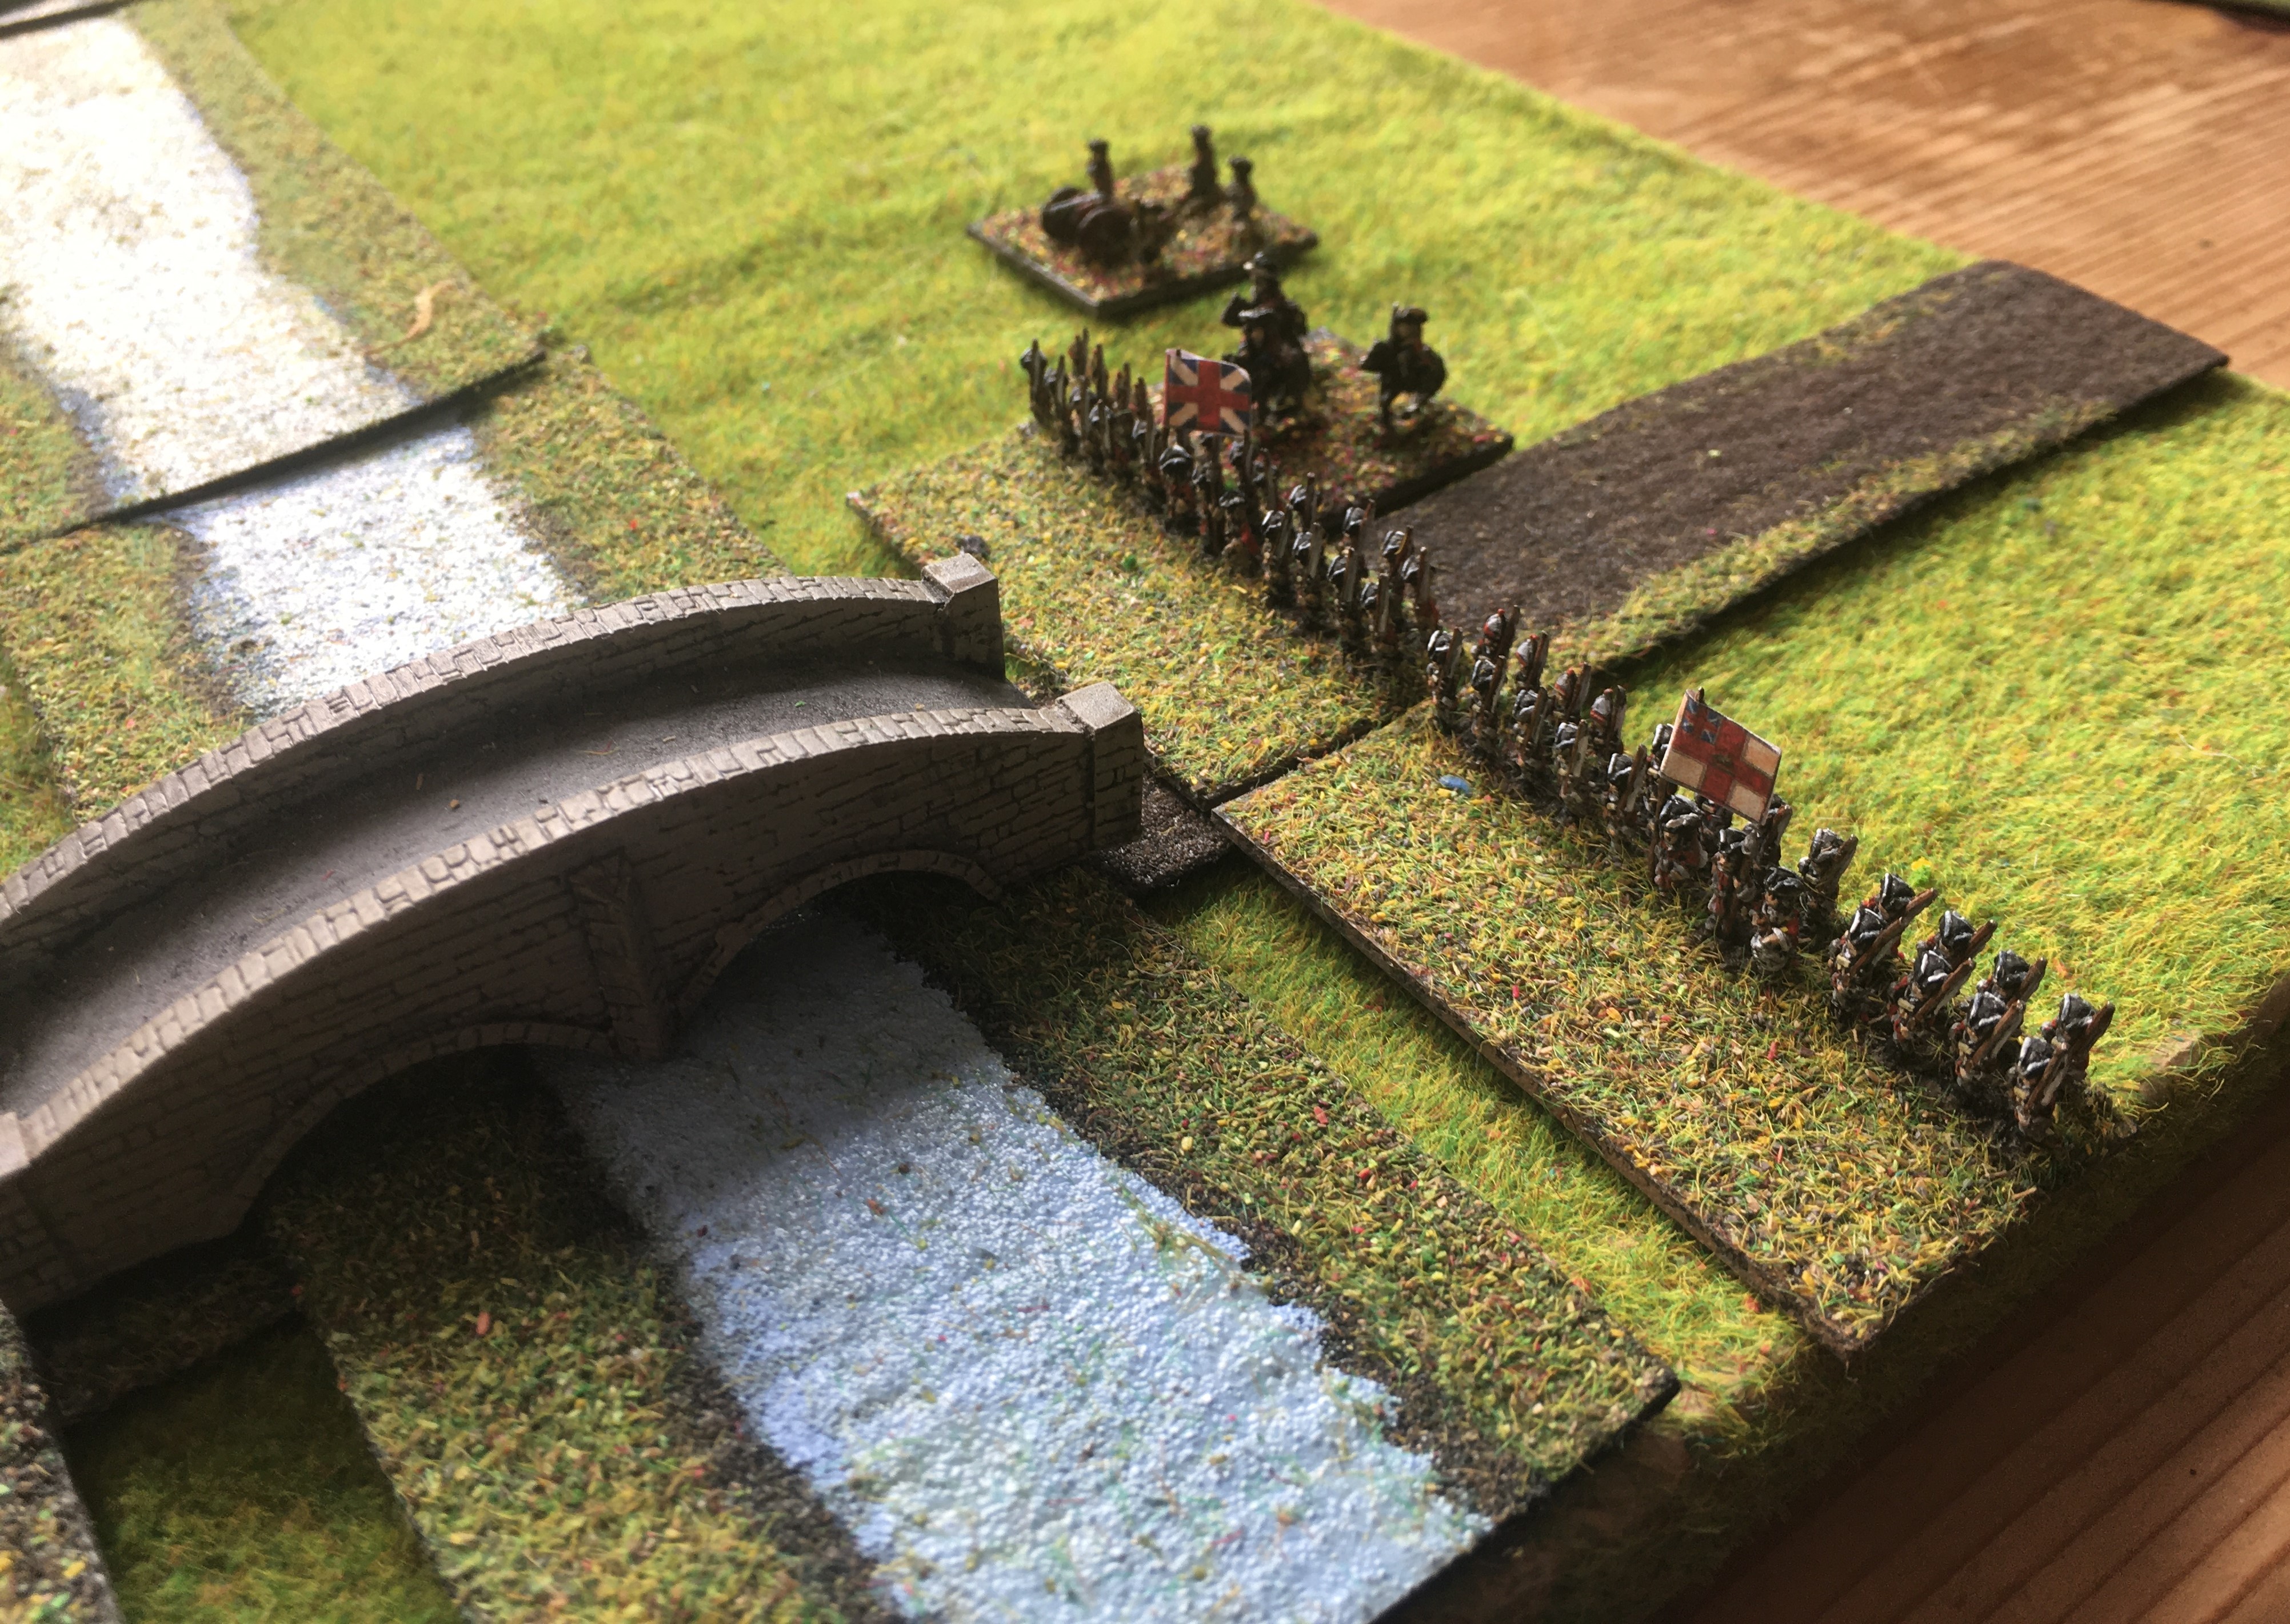
Foot and Horse block the main bridge
|
 |
Foot and Dismounted Dragoons block the ford
|
 |
Another perspective
|
 |
And again: Clare's and Dillon's regiments guard the bridge
|
The Battle:
 |
The British roll forward, bringing Foot and Guns up against the bridge; a single regiment demonstrates against the ford (top)
|
 |
Another view of the British: Seymour's Marines and the 27th Foot
|
 |
And the stand-off at the ford
|
 |
The Jacobite Horse has re-deployed to meet the Scottish regiments advancing from an unexpected direction
|
 |
Meanwhile, the British Horse rides hell-for-leather to attack the resting French reserves...
|
 |
The Jacobite Horse and dismounted French Dragoons form a new line to protect the flank
|
 |
But a spirited British bayonet charge conducted after a bloody musketry exchange sees off the French at the bridge
|
 |
The British Horse rides down the French infantry before they can get properly organized!
|
 |
The Irish regiments fight hard at the bridge and rout one of the British battalions, but the other continues its attempt to get forward
|
 |
but the French reserves have been swept away
|
 |
The position at this point in the battle
|
 |
The British Horse reforms (left) and looks for the French flank...the remaining Irish regiment at the bridge continues to hold up the British...
|
 |
and even push them back!
|
 |
Accurate fire from the French Dragoons routs one of the Scots' battalions too...
|
 |
But the Hanoverian general renews the attack on the bridge and finally sweeps away all resistance
|
 |
And the charge of the British Horse (centre-left) scatters the Jacobite horse! the Franco-Jacobites are in utter confusion...
|
Game Notes:
More good fun, but another disastrous affair for the Franco-Jacobites! Again, although the fortunes of war in the tactical battles seemed quite even, the scenario set-up didn't seem to do them many favours...attacking the French reserves before they could move seemed obvious if it could be done - this is probably an area where Ruse de Guerre, which has relatively generous move distances, interacted poorly with the scenario which may have envisaged the reserves being almost impossible to reach in the OHW tactical rules - unsure on this point.
Figures by Baccus 6mm (as ever!)
:strip_icc()/pic2450648.jpg)
:strip_icc()/pic4967644.jpg)


I've found I have to think which rules might be best suited to each scenario, given the case here of possibly being able to reach the reserves in one move. So I vary between BPII and HoW, dependent upon which one I think might be best.
ReplyDeleteVery wise. I really should have spotted the issue with this one before I got into the action, but my own rule is to let the game follow its own logic after the action begins; after all, I can always replay the scenario with some modifications.
Delete