Heretical Gaming is my blog about my gaming life, featuring small skirmishes and big battles from many historical periods (and some in the mythic past or the far future too). The focus is on battle reports using a wide variety of rules, with the occasional rules review, book review and odd musing about the gaming and history. Most of the battles use 6mm-sized figures and vehicles, but occasionally 15mm and 28mm figures appear too.

Thursday, 26 September 2019

SImple '45 Rules - Falkirk

Still scratching the itch that seeing lots of Jacobite Rebellions stuff on the Wargaming for Grown Ups blog recently created, The simple rules for the '45 in Wargames Illustrated 134 contained three scenarios: this is the second one, the Battle of Falkirk.  The real battle was a Jacobite victory, although not very decisive.  With that in mind, this scenario is tilted in the Jacobites' favour, although not quite to the same extent that the previous scenario (Prestonpans) was.


Order of Battle:
The Jacobite Army: 6 units of Highlanders, 4 units of Infantry (Lowlanders/Foreigners)
The Government Army: 8 units of Infantry (5 of which are poor), 2 units of Dragoons (both of which are poor)

The battlefield contained a ravine and an area of boggy ground which was impassable in any kind of formation.  As befitting the simplicity of the rules, they are both simply forbidden to both sides.


The Set-Up:
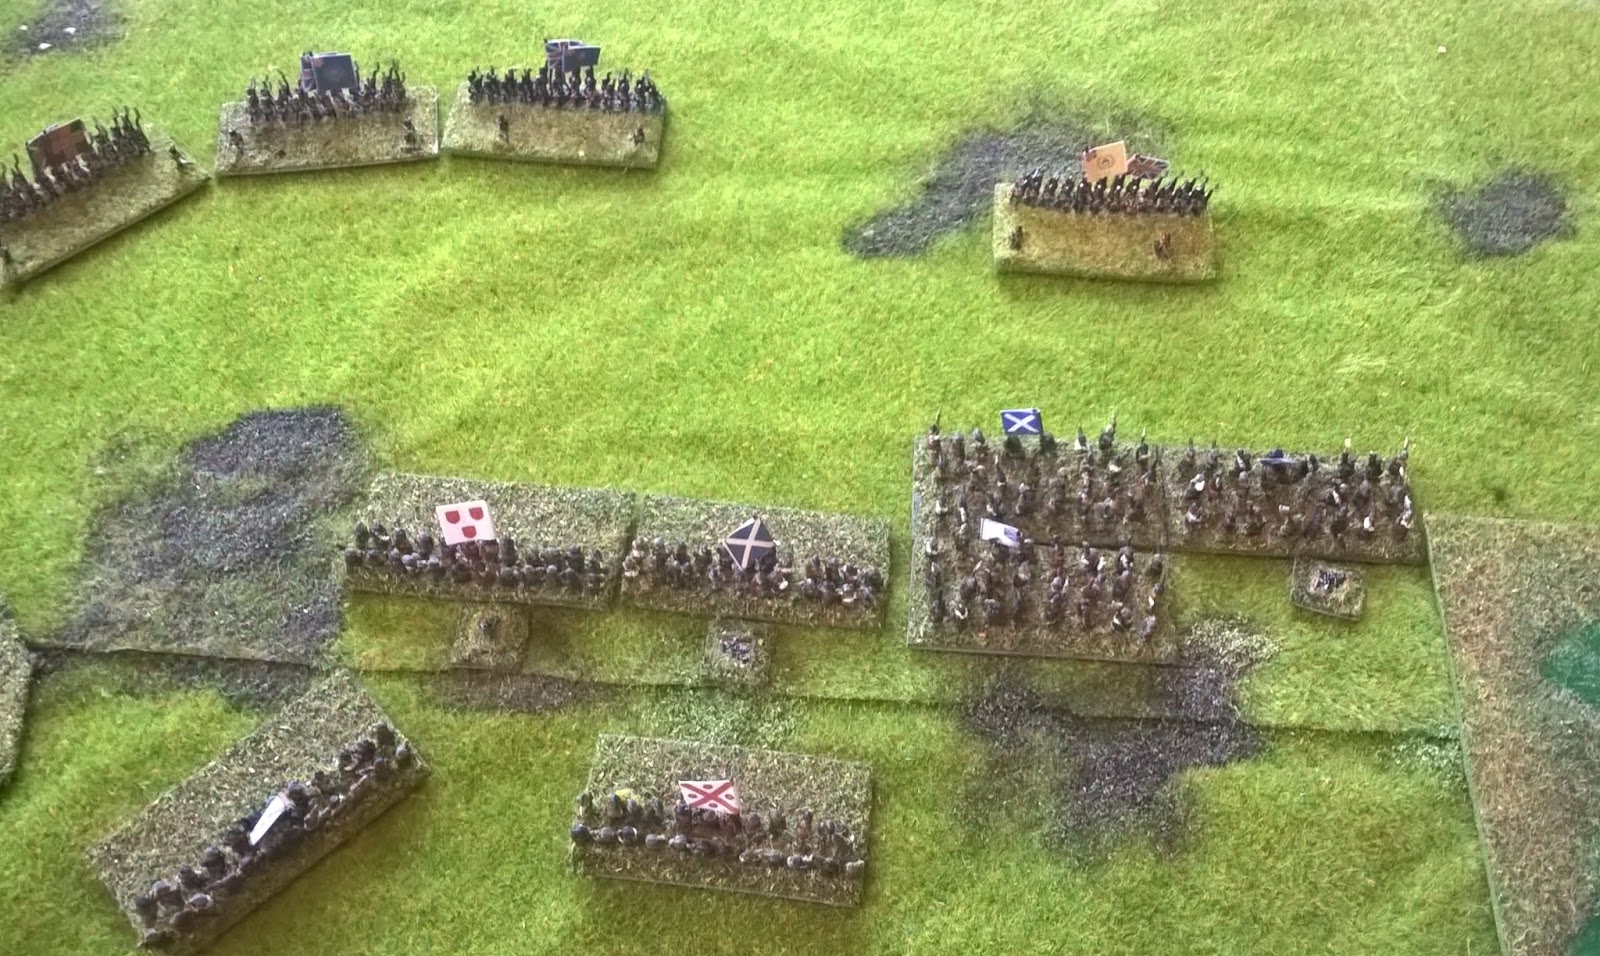
Government forces at the top, Jacobites at the bottom.  One Government unit is slightly behind the ravine and so protected (left); some of the Government's troops are just arriving (top-left);  the Jacobite Highlanders are mainly in their front line, Lowlanders to the rear (bottom)


Another view, Jacobites to the left, Government to the right


A closer view of the Government forces


And the Jacobites

The Battle:

The battle begins with the Government Dragoons advancing (right), and the Foot advancing somewhat slower (left)

Government musketry starts to cause some casualties, particularly in the centre of the Jacobite line


The Highlanders advance to meet the Government Foot.  The flanking unit (left) routs from a combination of Highlander musketry and manly bearing...


One regiment of the Government Dragoons also flees (centre)


The gaps start to appear in the Government's first line

One of the Dragoon regiments charges home


A wider view of the battle at this point


The Government's Foot does a little more damage to the advancing Highlanders...

...before the Highlanders charge in! 

Another view


Another Government Foot unit routs (centre)


So the Government's second line must come in to help the heroic battalion of Foot still resisting (centre-left)


...which sees off one of its opponents in fine style (centre)!  The left-hand unit of Highlanders starts to take serious losses from the Government's improvised second line of Foot (left)

Many Highlanders are cut down by the Government Dragoons...


Two regiments of Lowland Jacobites join the fray (centre) whilst the leading Highland regiment (top-centre) presses on into the Government's second line, regardless of its losses


A closer look at the Jacobite Foot advancing

Despite the casualties, the courage and determination of the Highlanders on the right overcomes the Dragoons, who rout


The Government Foot in the centre is finally overmatched and breaks...

...leaving a second line to overcome


The Jacobite regiment on the left cannot stand the fire any further and breaks


But the Jacobite Right and Centre resumes its advance


The leading Highland regiment is broken in the melee (centre)


But the Jacobites are about to launch another co-ordinated assault


A wider view


The Jacobite Lowlanders (centre) are taking serious casualties from the remaining Government Foot

But the Highlanders launch another charge (right)!


Amazingly, the Government Foot holds it (right), but their neighbouring unit is broken by the musketry of the Lowlanders!  At this point, the remaining Government troops began an orderly retreat


The position at the end of the battle
Game Notes:
A good, quick but fun and more interesting than the Prestonpans scenario, partly because it isn't (quite) as one-sided, partly simply because there are more units on each side, leading to more interesting interactions and possbilities.  Again, the model, although simple, worked convincingly.  It didn't quite follow history, but it wasn't too far off.  Mechanically, poor units break after one failed morale check, whereas other units must fail two.  This seems to replicate the fragility of many of the Government's regiments simply but effectively.  The morale test is well calibrated to produce believable results, but no "sure things".  They encourage all the different troop types to act believably without being prescriptive.  The main problem with the rules are that they are just that bit too short, not covering those things which give rules bulk but do need to be incorporated: arcs of fire, moving by wheeling (or not), moving backwards, firing into melee (or not) - I don't think any of this sort of stuff is covered.  As a solo player, I can rule on these things to please myself, but it might be more of a problem for head-to-head games.  What I think is absolutely needed is an army break point, to stop armies fighting to the last man.  I used the venerable "withdraw once more than 50% of units have routed", which seems reasonably close to reality.
I think that this is a game that could work in a school or college quite well, if one wanted to demonstrate how the battles of the '45 were fought.
Figures are again by Baccus (from the C17 and the Napoleonic ranges) on a 2'x2' table.  The game took about 30 minutes (including set-up and photography time).


Monday, 23 September 2019

Simple '45 Rules - Prestonpans

For my next game from the '45, I used a ruleset with a very different design philosophy from Andy Callan's "This Savage Way of Fighting" which I used last time.  Simply entitled "Three Battles of the Jacobite Rebellion 1745-6" and published in Wargames Illustrated 134 (November 1998), Stephen Simpson produced a set of rules quite similar in many ways to some of the more recent offerings from Neil Thomas. 


There are only two meaningful mechanics: an action test to do stuff (typically enter or withdraw from a melee and change from column of march into line of battle); and a morale test to see if a unit under fire or in melee combat will rout or not.

The author offers three scenarios: Prestonpans, Falkirk and Culloden.  The smallest, Prestonpans only uses the following forces:

Government: 3 infantry units, 2 dragoon units
Jacobites: 5 highlander units

The Jacobites move first (very important, because that means the Government's troops will have to test morale first - morale is tested after an enemy unit moves into range, since that unit is deemed to be automatically firing).  The two sides set up just outside of musket range.

All the Government troops are rated as poor and have a penalty to their action tests.  They will also rout as soon as they fail a morale test (normal units essentially have two lives).

The Set-Up:
Government army to the left with dragoons flanking the Foot on both sides, whilst the Jacobite army is to the right in two groups, with its right flank slightly to the rear (top-right)


The Government army


The Jacobite army

The Battle:
The Jacobites move into musket range and begin a harrassing fire.

Doing slightly better than in real life, the Government Foot maintains itself and begins its own fire on the Highlanders.  The infantry unit on the left wheels slightly to concentrate fire on the Highlanders's most advanced wing (left).  The dragoons charge home (right)


However, the fire is largely ineffective and the Highlanders' maintain their advance.  Their left-hand unit maintains itself in the fight with the Government dragoons (right).  The other Government dragoons (left) refuse to charge.


Just before impact, the Government troops break!  Both the dragoon regiments (left, right) and two of the three Foot regiments (bottom) run, only a single regiment remains in the fight (centre-left)

In a very bold move, the remaining Government Foot charges home with the bayonet!

However, whilst locked in melee, the Highlanders bring up additional troops and begin to envelop the remaining redcoats...


And it is all over! The last unit of Government Foot breaks and runs...
Game Notes:
Well, that couldn't have been more different, could it?  It is a really stark lesson in how different design philosophies work and how fashions change over time.  These rules (published 12 years after Andy Callan's offering) are much, much less detailed but they could arguably be said to be just as realistic a game, since there was no element of it which seemed untoward or unreasonable, but which took so much less time (playing time was about 20 minutes).  The only problem is that it plays so quickly that its main use is probably in a campaign game or a sereies of linked battles, to enable one to play the war out in a day.  After all, the extra die-rolling and details in the Callan rules, although it doesn't ultimately seem to equal a more accurate ruleset in terms of outcome, has more tension for longer because there are more opportunities for chance to intervene (even if the sum total of the effect of chance is the same).

The mechanics are very simple.  Action tests are done by a d10, with 4+ equalling success.  Poor troops have a -1 penalty.  The morale test is done with a d8-d6, modified by a small number of factors: a result of '0' or higher indicates carry on, a negative result means a rout.  Stark, but effective.  The author is correct in the sense that it isn't obvious that one needs anything else for battles in this campaign.

Anyway, Falkirk and Culloden are likely to follow in due course.  Figures are by Baccus 6mm, with Napoleonic British standing in for their mid-C18 forebearers.  I used a 2'x2' board but in all honesty one could have got away with 18"x18".

Portable Air Wargaming Over The Pacific - Fight Two

For the next run out of the Portable Air Wargame from Bob Cordery's Developing the Portable Wargame, I again pinched used an imaginary scenario from Just Jack's Island Hopping With The Old Lead Breed blog.  This time, it features a USAAF squadron assigned to ABDA for the defence of Palembang.  Equpped with P-40s, they have been ordered up to intercept an incoming escorted Japanese bombing raid.

Aircraft Statistics:
Four P-40Es: SPEED 7, DAMAGE 5, WEAPONS 3 red
Three A6M2 Zeros: SPEED 7, DAMAGE 3, WEAPONS 2 red, 1 white
Three G4M1 Bettys: SPEED 5, DAMAGE 6, WEAPONS: front: 1 white*, left: 1 white*, right: 1 white*, rear: 1 red, 1 white*

P-40Es Nos.3 & 4 had one energy chip each and all the Zeros had two.

The P-40E and the Bf110C have been the two aircraft so far that on the pure performance figures look much better than their typical opponents (Zeros and Hurricanes respectively) but in ways that don't seem to reflect the historical record.  With the Bf110C vs Hurricane match-up, it seems to have been a combination of advantages in wing-loading, rate of roll and acceleration that enabled the latter to do well, whereas I am not quite sure why the P-40s should have ended up being considered worse than the Zero.  Were early USAAF fighter tactics inappropriate against Zeros?  On paper, a P-40E looks much better than an F4F-3 Wildcat.  Educate me...

The change I tested in this game was to allow fighters to turn and move at the same time rather than spend a movement point turning without moving a hex.


The Game:

I stuck closely to Jack's original scenario, except made the Bettys fly the full width of the table, because the speed differential between the P-40s and the Bettys is smaller (the P-40s wouldn't have been able to intercept them at all if I had stuck with the same directions).
The first of two pairs of P-40s sent to intercept...

And the second.

The Bettys flying in tight formation

The Zeros head in to intercept the interceptors...

The first pair closes in...

But the Zeros (left) try for a head-on intercept...

The lead P-40 dukes it out with the Betty's powerful rear-facing guns...

...as does his wingman (right)

The Zeros break into the P-40s, causing some damage to the wingman...


Leaving the P-40s a choice: enter the dogfight or try and get a quick kill of a Betty or two...


For better or worse, the USAAF Captain continues on against the bombers...


And is joined by his wingman.  Both the P-40s and their targets suffer some damage in the exchange, but not enough to bring anyone down

The Zero leader gets in on the P-40s six...


And down goes the P-40!  The other Zeros attempt to destroy the P-40 leader, but miss


The leader of the second P-40 pair takes a head-on shot, but does no significant damage


The other P-40s join in but still the Bettys keep on going, as the only holes appear in the fuselage, not in the fuel tanks or engines...


The Zeros are still on the tail of the P-40s


And more line up to take a shot


And down goes a second P-40!


The remaining P-40s race for safety... (top-centre & bottom-centre), whilst the Bettys fly serenely on (right)

But the P-40s were in a terrible position and the Zeros easily get onto the six of one of them


And down goes another one!


One of the Zeros gets just into range of the remaining P-40, but misses and the American leader escapes!

Game Notes:
"So, how do you feel that went?"...
Well, the rules worked well, although on balance I am inclined to reject the turning and moving idea, since it seemed to enable the fighters to avoid choices about speed vs turn as the best use of energy (which is what the game should basically be about).  The Americans made a choice to concentrate on the bombers and hope to bring one or two down quickly.  Unfortunately their shooting was both poor and unlucky and the Zeros pounced.  I still felt this was a successful game since it all played out very quickly and the American fighters were made to pay for their arguably poor tactical choice very quickly (I would never have made the same decision if playing a flight sim!).

The current state of development is discussed on this thread on TMP. I will write it up more clearly and comprehensively and post it on the blog at some point soon.