The next action in this TooFatLardies' pint-szied campaign, Capturing Caesar's Camp, features the attempt to capture Caubert's Farm, the jump-off point for a subsequent assault on Mont Caubert. It features the same platoon from B/4/Cameron Highlanders as in the last action...
This time the platoon has the support from its trusty FOO and his mortar men, a Vickers team from 1/Princess Louise’s Kensington Regiment, a scout car from 1/Lothian & Border Horse, and, most importantly, another French Char B1 bis.
When I played this game, the real weather conditions changed a lot, so some of the lighting/appearance of the game changes quite a lot also. For this, my apologies! Hopefully the narrative can guide you through.
The Set-Up:
 |
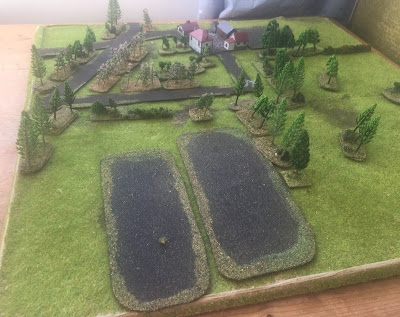
| The overall battlefield. The Scots are advancing from the South. |
 |
| A slightly closer look at the farm and its environs |
 |
| Another perspective |
The Battle:
 |
| The advance begins, two sections up. |
 |
| Hopefully you can spot the Scout Car advancing through the gap? And then the Germans in the treeline beyond? |
 |
| A wider view - the other section is working around the right using the cover of the treelines |
 |
| A better view of the German squad behind the treeline |
 |
| As the British section moves up to engage - the Germans had gotten the worst of the initial exchange and pulled back - when they see a flamethrower team set up in ambush! |
 |
| A wider view - note that the French armour support (another Char!) has turned up |
 |
| The flamethrower team is eliminated, but not before they had destroyed the British platoon's mortar team! |
 |
| A wider view - note the scout car by the junction (left) and the pulled back German squad can be seen at the second treeline (just!) |
 |
| Okay, whilst the action is happening on the left flank, maybe the right-hand section can get up to the farm. |
 |
| The British left section also goes flanking, preceded by the scout car and supported by the Char. It is taking the Vickers MG team with them too. |
 |
| A wider shot, so you can see the British Pl comd controlling the final section and the platoon support weapons as a base of fire, if needed. |
 |
| A bunch of Engineers are helping out the German section |
 |
| Ouch! the right-flanking section walks into a well-concealed German ambush!! (It is well concealed too - you can just make the German squad out at edge of the hedgerow, top) |
 |
| Okay, the fight by the farm got a bit weird - the British section managed to get close enough to launch their own ambush on the first German squad and eliminate a rifle group and the engineer group. But it turns out there was another squad concealed at the top tree line, in some kind of all around defence. The British have the firepower advantage with that Vickers though. |
 |
| A few minutes later: about half the Germans are casualties, a few are still in the fight, a few have escaped back into the farm. |
 |
| The wider perspective |
 |
| King Kong arrives. Wait, what? |
 |
| The French tanks have outflanked the Germans and are adding their firepower (top, by crossroads) |
 |
| Over on the other flank, the British are heavily suppressed by the Germans. Unfortunately for the Germans, this is where they had sited their AT gun though...(right) |
 |
| Okay, sensing the moment has come, with ony a couple of MG34 teams still holding off the British, the remainder of the British platoon advances a bit (bottom) |
 |
| The British call in 3" mortar fire onto the farm complex |
 |
| The British platoon suffers a couple more casualties in the advance, but the Germans have pretty much shot their bolt in the centre; more of their troops have become casaulties as some of the farm buildings are hit (note the fire in the near building) |
 |
| Some of the reserve section go to help out the isolated British right-hand section |
 |
| The stalemate has persisted on the othe flank - seeing the game is up, the Germans withdraw |
 |
| The withdrawal carried out successfully. |
 |
| The British advance on the farmhouse - all goes very quiet |
Game Notes:
A fun and interesting game, although the British seemed to get the upper hand quite early and the Germans were never quite able to wrest any real initiative back. Their deployment against the British Right was in a very dangerous spot, but on the Left they kept on getting outflanked - the position just wasn't that great and probably needed to be held a little further forward...although against a French tank, that probably wasn't going to work either. And then the final German squad was activated in a really annoying place (for the Germans) - they ended up being in a horrible, enfiladed position. OTOH, a more straightforward British attack up the centre might well have ended in a horrible defeat as they would have ended up in the enfiladed killing zone instead. But with the British superiority in firepower and support, the Germans were always going to struggle here, despite putting up a decent fight. The British lost 2 KIA, 6 WIA, the Germans rather more: 5 KIA, 5 WIA, 6 POW (although half of these were not part of the platoon core, so this platoon is still reasonably operationally effective).


Another very nice scenario and action there John:). Poor old Jerry is not havung much luck at present, which is obviouly good for our brave chaps! I can see some of these action being scaled up for BKCII, so may have a ganders at the pdf's later today...
ReplyDeleteThanks Steve. I believe most of these scenarios are actually scaled down for CoC, so this should work fine. In reality these actions were company or two-company attacks and I think the scenarios are bath-tubbed, rather than having a platoon-size 'slice' picked out. During battles, genuine platoon-sized actions seem to have been somewhat rarer, from my reading of the various theatres; they become more common the more desultory and static the fighting is.
DeleteAlso, I suspect it isn't quite just bad luck for the Germans, although there has been some of that - still less by my player skill. It is something to do with the forces available to both sides combined with how the German positions are quite randomly generated in terms of position and force. In some of these pint-sized campaigns it hasn't mattered so much, but it really has made a difference in this one. The Germans have just had not had sufficient support weapons.
DeleteI agree that Platoon sized actions would have been very rare, with the Company seeming to be the smallest viable operating unit for actions. This is one reason that I ditched CoC, Bolt Action et al and moved completely to BKCII, so that I felt I was playing part of a much larger battle. Much easier to recreate historical actions too.
DeleteHowever gamers being gamers, love to play 1:1 games that somehow takes us back to playing with Airfix figures, or it certainly would for me!
Certainly true. Although it wouldn't make any difference to me personally, since the WRG rules are really designed more around company actions and I am very much playing at the lower limits, whereas these would often be quite big games of CoC/Bolt Action. But CoC seemed to get more traction for TFL than IABSM, so that is where the support seems to go.
DeleteAnother really good small battle. As you say, it could have been worse for the British with better German placement but the Germans would not necessarily know either. The threat generator system works :-)
ReplyDeleteThanks Shaun, and yes, it is fair. I think where I am heading towards is this - the TGS system, or my derivation of it - generally favours the attacker, since the somewhat random generation of defenders tends to deprive the defence of a coherence. This is true of generating attackers too, but the attackers tend to be able to delay/refuse combat/re-organize before fully committing, and the defenders don't. Where the defenders have plenty of good kit, this might not matter too much, but does matter more if they are out-gunned. None of this is an absolute - it is definitely possible to generate defenders in positions which are going to ruin an attacker's day - but I think the odds favour this.
Delete