Heretical Gaming is my blog about my gaming life, featuring small skirmishes and big battles from many historical periods (and some in the mythic past or the far future too). The focus is on battle reports using a wide variety of rules, with the occasional rules review, book review and odd musing about the gaming and history. Most of the battles use 6mm-sized figures and vehicles, but occasionally 15mm and 28mm figures appear too.
Showing posts with label Wars of the Roses. Show all posts

Saturday, 13 April 2024

13th April 2024 Hobby Update

I haven't played quite as many games over the last fortnight or so, but I have managed to get a couple of things to the painting table, which are nearing completion.

The painting tray, in all its glory!

The based 6mm stuff are a variety of somewhat speculative things for the Jacobite Rebellions. This isn't too much of a problem since the whole collection has a slightly whimsical air in the first place, with the foundational armies being a British WSS force for the Hanoverians, whilst I mainly use some WotTK Highlanders for the Jacobites. That probably isn't too bad for Killiekrankie, not awful for Sherrifmuir but more the legend than the reality for Culloden. Ho hum. Anyway, these few bases are too round out some of the troops for both sides. The Hanoverians get some combined Highland Independent companies, using Baccus 6mm AWI highlanders with tam o'shanter type bonnets; the Stuarts get two 'non-Highland' Scots' Jacobite units (using the remainder of the AWI highlander pack), plus two 'English' Jacobite regiments, one being the Manchester Regiment and the other being given the semi-fictitious name of the 'Forster Regiment', as the kernel of the English Jacobites who ended up surrendering at Preston to end the first half of the '15. Like the Royal Eccossais unit, the Manchester Regiment is in a WSS-ified version of its uniform, so historicity is not quite the first priority here! I painted the other unit in brown coats, I think from the cover of the book about the Second Battle of Preston. Is there a book which covers the uniforms of all the Jacobite rebellions in sufficient detail to do all the armies? Anyway, a few non-Highland Jacobite foot units in whatever guise will be helpful for some of the battles. I would like to add some English and Lowland Jacobite Horse for the '15 but I am not quite sure how to paint the English, or whether Scots' Covenanter Horse would be 'close enough' for the Lowland Horse.

Sorry, not a great photo here, but just finishing off a few very nice Perry late C15 knights, plus a conversion of a Mahdist body with a Statuesque miniatures female head, for a 'Hammer Horror'-type scenario with a heroine running around in a nighty and a sword pulled from the mansion wall! It looks okay at wargaming-distance...

German WW2 vehicles: PzIVFs from 2d6 Wargaming* to the left in (dark) Panzer Grey - I have only very recently become aware of the differences of opinion between 'darker' Panzer grey and 'lighter, bluer' Panzer grey. I think the darker Panzer grey looks better on the smaller models especially, plus they match the early war tanks I have which are in the Panzer grey/dark brown camouflage schemer.  To the right are some more German motorcycle and sidecar combinations, and some more cars (BMWs?); I didn't have as many as I would have liked for playing some of these WW2 campaign scenarios that I am doing at the minute, so thought I would get in some reinforcements!

Still some more work to do on these Hanomags, but they are nice models! From Baccus.

Hopefully I will get most of these off the tray today or tomorrow. Not sure yet what will replace them, I might have a rummage and see what takes my fancy. I do like the colourful simplicity and elegance of WSS-era soldiers!

Game-wise, my e-mail Napoleonic Italy campaign is drawing towards its climax. Not sure what I will tackle next as a campaign. Apart from that, there are a few battles left to do in 'Kampfgrupper Heller' in Poland; France 1940 is calling my imagination again; there is still lots I want to do in the Neil Thomas-esque vein I have been mining; and I would like to do some Twilight of Divine Right battles soon too. So plenty to be getting on with.

*Incidentally, 2d6 Wargaming seems to be back trading again having been up for sale only a few months back! Strange, but welcome. Will have to have an e-rummage soon. In fact, what I really feel like doing is having a shop for a few books and a few miniatures. Will I resist? Should I even try?!?!

Wednesday, 12 December 2018

The Battle of Stoke Field 1487 - A DBA Refight

A recent issue of Wargames, Soldiers & Strategy had a Wars of the Roses theme. 


One of the battles featured inside was the Battle of Stoke Field, which I have always had on my 'to do' list. In fact I think it was also features in a Wargames Illustrated in the last few years but I don't have a copy of that one to hand to check or compare.  Anyhow, the scenario looked quite interesting and I found it easy to convert from Lion Rampant to DBA.  The only problem was the lack of scale on the map (which is a constant annoyance in maps in WSS, despite how lovely they look).  Fortunately I am quite familiar with this area so it wasn't as much of an issue as it sometimes is.  I had no idea there was a bridge across the Trent at Fiskerton in 1487 though!


The Forces:

The Yorkists:

John de la Pole:
2 x Blades (Dismounted men-at-arms & Irish Gallowglass), 3 x 3Ax (Irish Kerns)
Francis Lovell:
3 x Blades (Dismounted men-at-arms & Billmen), 2 x 4Bw
Martin Schwartz:
3 x 4Pk, 1 x Ps (Handgunners)

The Lancastrians:

Henry VII:
3 x Blades (Dismounted men-at-arms & Billmen), 2 x 4Bw
John de Vere:
3 x Blades (Dismounted men-at-arms & Billmen), 2 x 4Bw
Jasper Tudor:
2 x Blades (Dismounted men-at-arms & Billmen), 2 x 4Bw

I still just used a single D6 for PIPs, gave each army a break point of 5 units rather than 4, and each army had the three generals named (with John de la Pole able to join either the men-at-arms or gallowglass, as he liked).

The Set-Up:

Now, it is often that a battle takes place on a site it shares with one of the premier manufacturers of wargames figures!  However, that it the case with this battle...


The scenario map indicates a decent sized hill (i.e. tactically significant) on the field, starting between East Stoke and the Eden Hall Day Spa .
 
The Yorkists are positioned on the hill, with the village of Elston to the south (right); the River Trent is mainly just off table to the left (there is a loop in the river towards Fiskerton at this point); the Lancatrians are deployed around the village of Stoke (now East Stoke) to the east (top)

A closer look at the Royal Army around Stoke; Henry's contingent is to the left of the shot, John de Vere's to the right, Jasper Tudor is commanding the reserve (centre-top)

A closer look at the King

and at John de Vere's contingent...

...and at Jasper Tudor's.

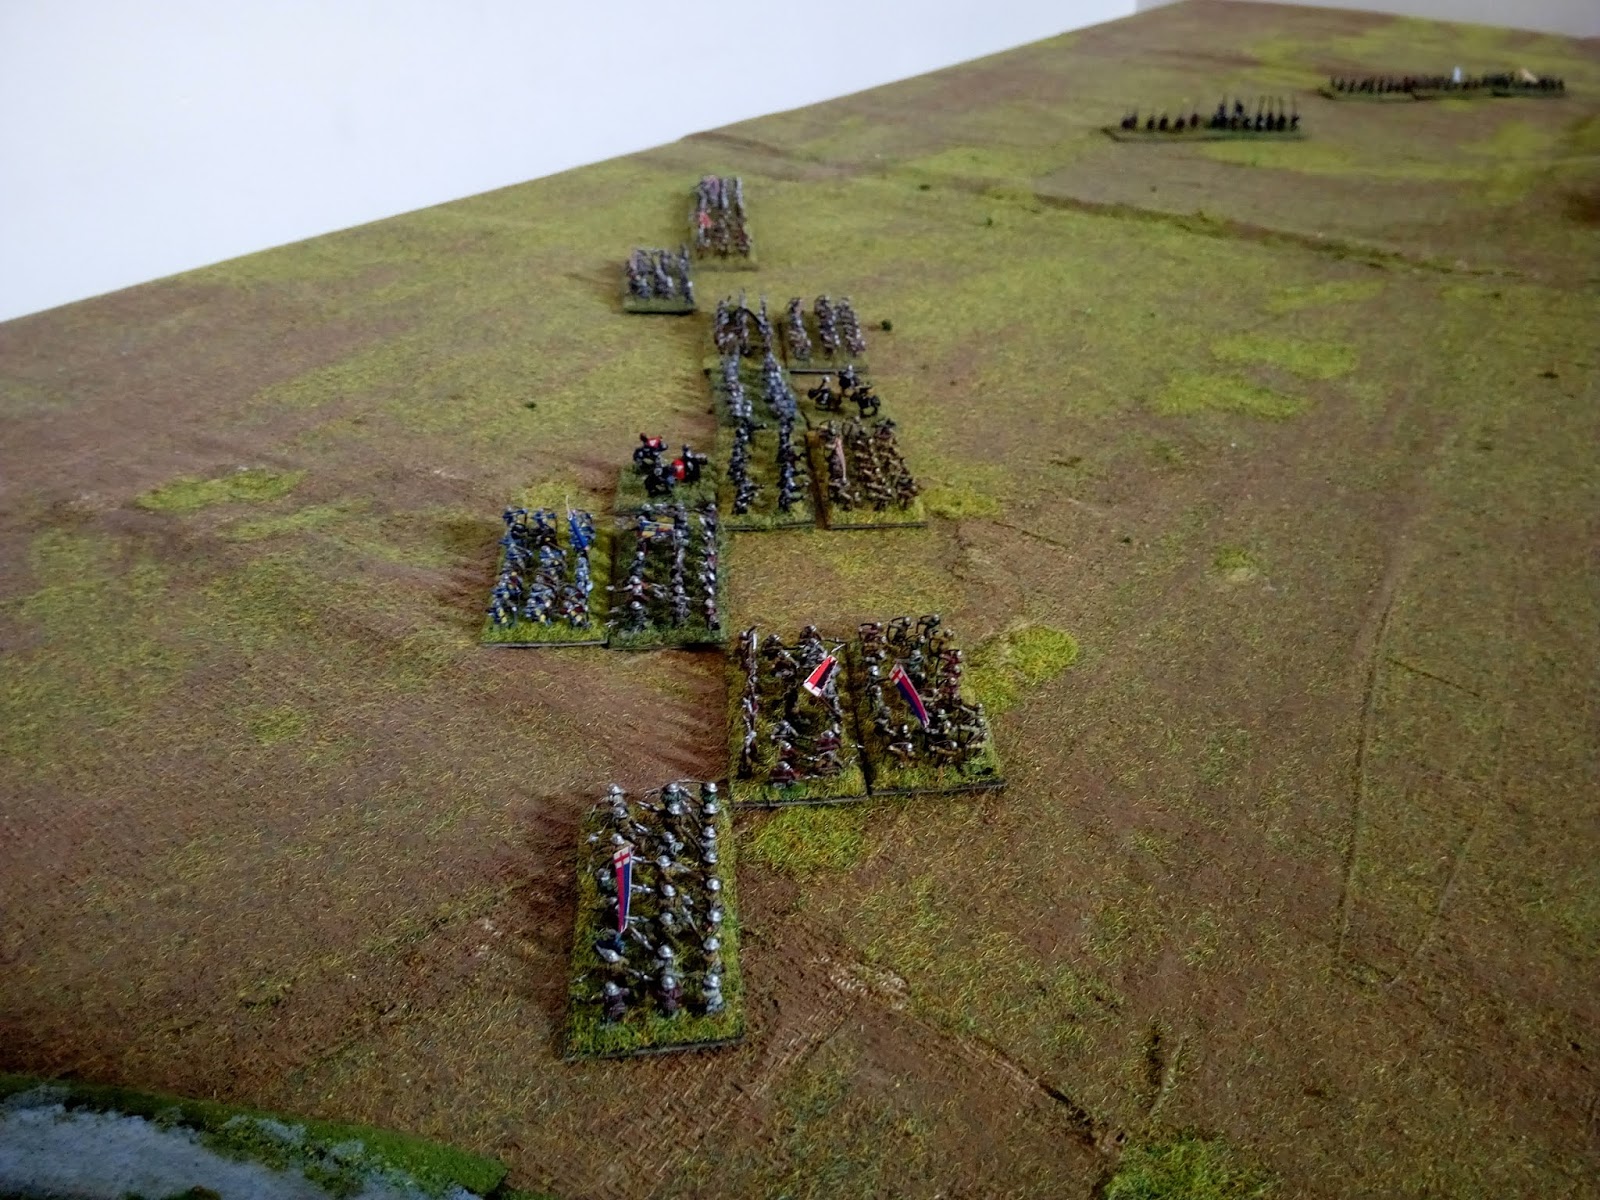
The Irish contingent form the left of the Yorkist line; Kerns to the front, Gallowglass and Men-at-Arms behind

The centre of the position with Lovell's contingent


And the Yorkist right, looking from behind Martin Schwartz' mercenary pikemen to the Royal Army
 The Battle:
The refight begins as the hitorical battle, with a charge of the Irish Kerns down the hill...

After a short, sharp fight, some of the Kerns retreat speedily back up the hill

After causing a little disruption, the King orders a general advance up the hill

The Yorkists spend their effort getting as much of their line reformed as possible

John de Vere leads his troops into Schwartz' mercenary contingent

Another, wider shot

Fighting is joined in the centre at the top of the hill, although the King is kept back by archery (centre)

Lovell and his Knights gain the advantage in the centre, routing some of the Tudor troops

A closer look at the gap that has formed

The push of the mercenary pikemen is irresistible and John de Vere's men find themselves pushed back towards Stoke.  Jasper Tudor hurries up some reinforcements (top); the handgunners harass some English billmen (bottom-right)


Using the impetus of the hill, the Kerns give a good account of themselves on the Yorkist left...

Fighting continues to-and-fro at the top of the hill.  Henry himself is now in the thick of the fighting (centre-left)

John de Vere's contingent starts to collapse; Schwartz takes a calculated risk in sending some billmen around the flank (centre-left) to try and catch John de Vere himself before Jasper Tudor can intervene

Unfortunately it does not work!  Jasper Tudor stabilizes the fight on this flank (top-left) and the mercenaries are pushed back

The Kerns have eliminated the Tudor bowmen facing them and are attempting to swamp the remaining billmen...

Henry Tudor is right in the middle of the fighting (centre) and must quickly destroy the Yorkists before his army routs...and he finds himself in a most perilous position!

He and his knights are surrounded!

The billmen and Kerns continue their scrap...

But it is all over in the centre and the King is captured! 

John de Vere and Jasper Tudor can probably escape...

 Game Notes: A hard-fought battle that resulted in a quite convincing Yorkist victory and a thorough re-writing of history.  Apart from a couple of moments of clumsy tactics on my part, the main reasons were the bonus for the hill (a +1 in DBA is really important) and the lack of emphasis on troop quality as opposed to troop function in DBA.  In the Lion Rampant scenario in the magazine, the Tudor Army is of generally higher quality, so that would probably equalize the effects of the hill. 

There is a tactical issue in DBA for WotR armies which I can never quite get my head around.  Do veteran players advance with their bowmen or leave them out of the hand-to-hand combat?  I feel instinctively that they shouldn't because the inevitable gaps would leave them vulnerable to flanking effects.

There are some good photos of a re-enactment and a re-fight of Stoke Field on Wargames Foundry's website.  It is a lovely area too, well worth a walk around, and the Eden Hall Spa is really good as well (if you like that kind of thing!).

Figures by Baccus 6mm, buildings a mixture of Baccus & Leven, rules were DBA v3.

Tuesday, 17 July 2018

Battle of Bosworth 1485: A DBA Refight

I managed to get another game of DBA to the table recently, this time to re-fight the decisive Battle of Bosworth.  I used an amalgam of two magazine scenarios, the first from Wargames Illustrated 193 and the second from Miniature Wargames 53.


As anyone interested in the period knows, the battle was largely decided by the (ostensibly neutral) Lord Stanley intervening on the side of Henry Tudor. Because I know this, the most suitable mechanism to reflect this seemed to be to roll a die every turn for Stanley to become "active" on the Tudor side, with an increasing chance each turn.  This would mean that King Richard's optimal strategy would probably be to attack, just as he did on the day.

I didn't check the history of these scenarios, since the most favoured site for the battle has (I believe) been moved since the time when the scenarios were written and published; I was merely using them as gaming scenarios.  That said, the tactical essentials of the battle appear to remain the same regardless of the site adopted.  I was also a bit sceptical about the strengths of the armies too, suspecting that the Tudor army looked a little weak in comparison to the Royal army, but decided to roll with it for this first attempt.

This is a very simple scenario in many ways: it is a straight fight to the finish!

The Forces:

The Tudor Army:  4 x Blades, 3 x Longbows

The Royal Army: 7 x Blades, 6 x Longbows

Lord Stanley's Contingent: 1 x Knights, 3 x Cavalry, 2 x Blades, 1 x Longbows

Henry Tudor rolled a D6 every turn after the first to see if he would take control of Lord Stanley's contingent.  He needed a 6 on the second turn, 5 on the third turn and so on, but would always need at least a score of 3.

The Set-Up:
The smaller Tudor army is bottom-left; King Richard is on the hill and on the forward slopes (centre-right) and Stanley is "awaiting developments" in the top-left

Henry Tudor's men in line of battle with the usual mix of the Wars of the Roses - billmen and bowmen with a smattering of dismounted men-at-arms

Stanley's forces.  This is unusual in consisting of quite a high proportion of mounted men, including some knights but also some lighter "Hobilar" cavalry

The view from behind Henry Tudor.

King Richard III's battle line, with some reserves on the hill itself
 The Battle:
The battle begins with Richard III moving into action; he leaves a reserve back on the hill, so he only has a very small numerical superiority over the Tudor army

A closer view

Stanley decides to commit quite early and begins to move forward slowly...

Stanley with his Knights, plus some Hobilars

Some very effective shooting creates a gap in the Tudor line; some slightly less effective Tudor shooting creates some raggedness in the Royal line (bottom-right)

A wider view of the same

The melee begins in earnest with King Richard and his personal knights (Centre-left), on foot, trying to burst through the gap in the Tudor lines

Stanley's men approach the Royal reserve

Royalist billmen turn the Tudor right flank (foreground)...

The Tudor line is slowly crumbling...

There is some real chaos now: elements of both armies have broken right through...

The contenders for the throne pass each other by in the swirling melee...

Stanley's troops are unaccountably slow...

The broken battle lines are beginning to favour the numerically superior Royal army, as it gets to find internal flanks...

Some of the troops have now turned through 180 degrees: in the bottom-left, the two left-hand units are Yorkists, and the right-hand unit is Tudor Billmen...; note that Stanley, seeing the crumbling Tudor resistance, has diverted his men-at-arms and supporting hobilars to the fray here (centre-top)


Stanley's light cavalry are about to hit some Royalist bowmen in the flank (bottom-right); but the main reserve body is well placed on the top of the hill to resist Stanley's infantry (top)...

The Tudor army is only just hanging on...only the difficulty in re-organizing his troops is denying the King a victory here...

The reserve bowmen swing into place just in time, but the Hobilars ride them down anyway...

But the remainder of the King's knights, fighting on foot, drive back Stanley's infantry attack

Stanley meets Henry Tudor (centre-bottom) just as the day is lost...

King Richard continues to destroy the opposition (left)

King Richard's dismounted men-at-arms take the initiative and charge Stanley's men...

The Tudor main line has finally collapsed...

As does the Stanley's line...

A wider shot of the main battle lines at the end of the combat: the sides have completely gone through 180 degrees now.  Henry Tudor's life and the embers of the Lancastrian cause will now depend upon the speed of his horse and the loyalty of his retainers...


And a wider shot at the end of the battle, showing the main battle (top-left) and the positions of the Royal reserve and the Stanleys' contingent (right)
Game Notes: 
Another great fun Wars of the Roses clash as history reverses and Lord Stanley becomes a folkloric figure for the man who arrives just five minutes late to save the day...I felt the scenario worked well in giving both sides a good chance of victory.  Fortune definitely favoured the King for most of the battle, as he seemed to get the better combat results and get more initiative points just at the right moment.  I was using the orders of battle given in the scenarios, but I wonder if it might be better to reduce the Royal Army's strength by a base or two to make Stanley's attack more likely to succeed more quickly and make the division of strength  more tricky problem for the King.
The key to the Royalist victory was getting a freak kill of a Tudor base very early on: this allowed King Richard and his men to split the Tudor line and create the overlaps and then flank attacks which lead to further recoils and kills.
As a quirk of these rules (unless I am playing it wrong!), there can be two versions of WotR battles using DBA using exactly the same forces.  Since the armies are basically combinations of bow and blade, the optimal deployment is to alternate those bases in the battle line (to give bonuses to the bowmen).  However, blades still have a decent advantage over bows so if the lines are mismatched (my blades fight your bows and vice-versa) then although it is not necessarily more likely that I will win, it is more likely that the combat will be resolved sooner.  If I have a temporary strength advantage, this seems to make it a much better strategy.  From the opposite point-of-view, when blades are matched against blades, they can fight for a long time before being destroyed.  When I have a bit more time, I may even have a look at quantifying these effects.
I think that this kind of battle works better in DBA than my recent refight of Northampton, because it seems clear that attrition as a strategy is irrelevant here and shock is everything.

Rules were DBA, figures by Baccus 6mm.