Heretical Gaming is my blog about my gaming life, featuring small skirmishes and big battles from many historical periods (and some in the mythic past or the far future too). The focus is on battle reports using a wide variety of rules, with the occasional rules review, book review and odd musing about the gaming and history. Most of the battles use 6mm-sized figures and vehicles, but occasionally 15mm and 28mm figures appear too.

Sunday 29 January 2017

Nuts! Normandy '44 Campaign - Mission 01: Patrol to Hill 342

Nuts Campaign Game - Mission 01: Patrol to Hill 342

I wanted to play Nuts! more this year, so it has made it as one of the games on my 10x10 BoardgameGeek Challenge list (also here). I have a few ideas for really good Nuts! campaigns in the future, but whilst I am still getting used to the rules system, I thought I would generate a fictional campaign from the rulebook itself.  So read below for the first in my Nuts! Final Version Normandy '44 campaign:


My Forces -  a section from the Tyneside Scottish:


Me - Section Commander (SMG) Rep 5
LCpl Robson - Section 2IC (rifle) Rep 4
Pte Charlton - Bren Gunner Rep 4
Pte Todd - Bren Gunner 2nd Rep 4
Pte Armstrong -  Rifleman Rep 4
Pte Brown - Rifleman Rep 4
Pte Nixon - Rifleman Rep 4
Pte Johnson - Rifleman Rep 3

I'm not using the "Star Quality" rules or any individual characteristics as yet, I am going to wait until I am more familiar with the ins and outs of the rules first.

The Mission
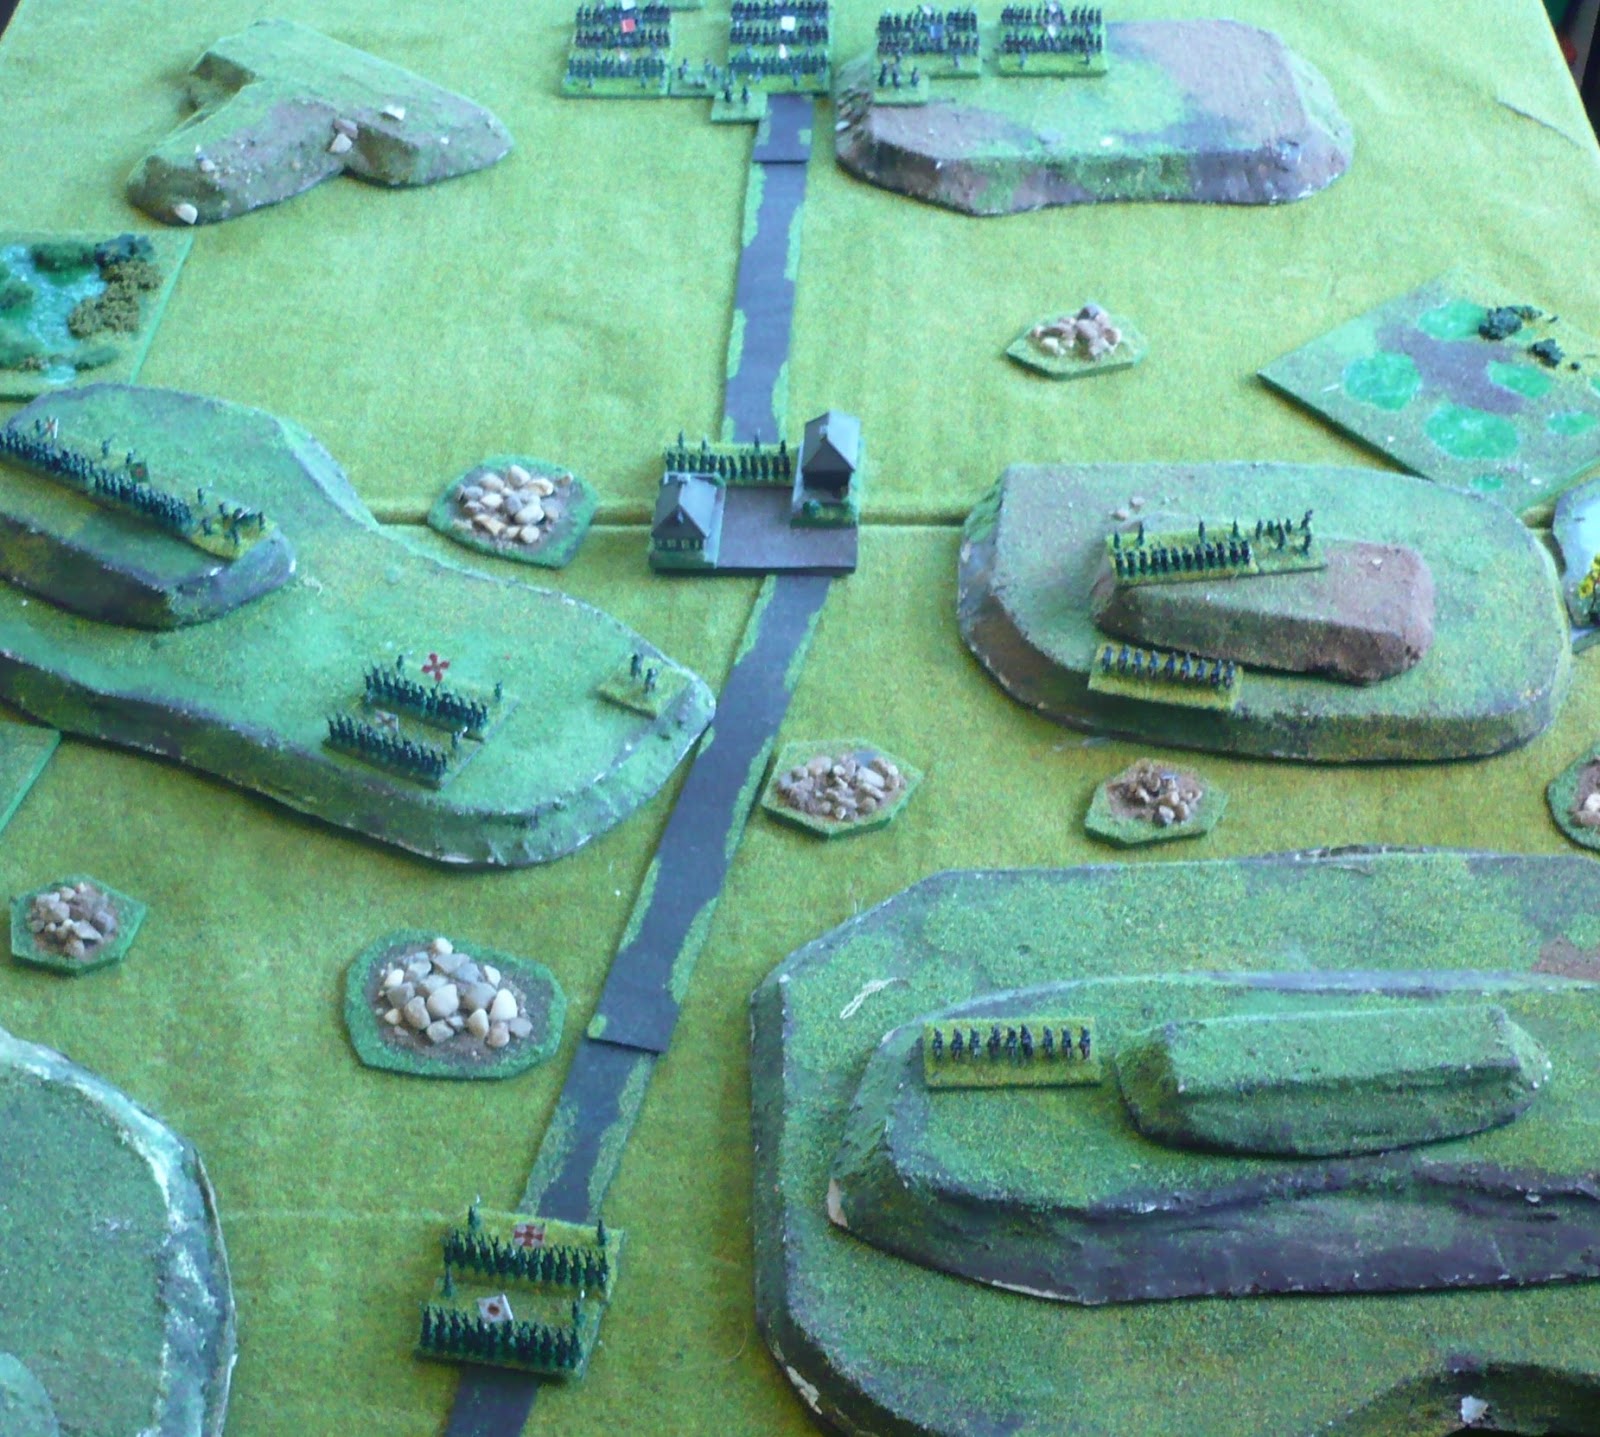
The sector: random rolling generated a nice mix of open, hills and clear terrain, including a large building. I have added the hedgerows to give a better look and more cover.  The British will approach from the bottom and must recce the top edge (get within 6cm of the of top edge, divided into three sections of 20cm, all of which sections must be approached)

A slightly closer-in shot


The leading British pair enter the right-hand woods

Black counters indicate possible enemy troops - note two on the hill.  There is a third hidden in the hedgerows to the left-centre.  In these rules, all buildings may well be occupied too. 

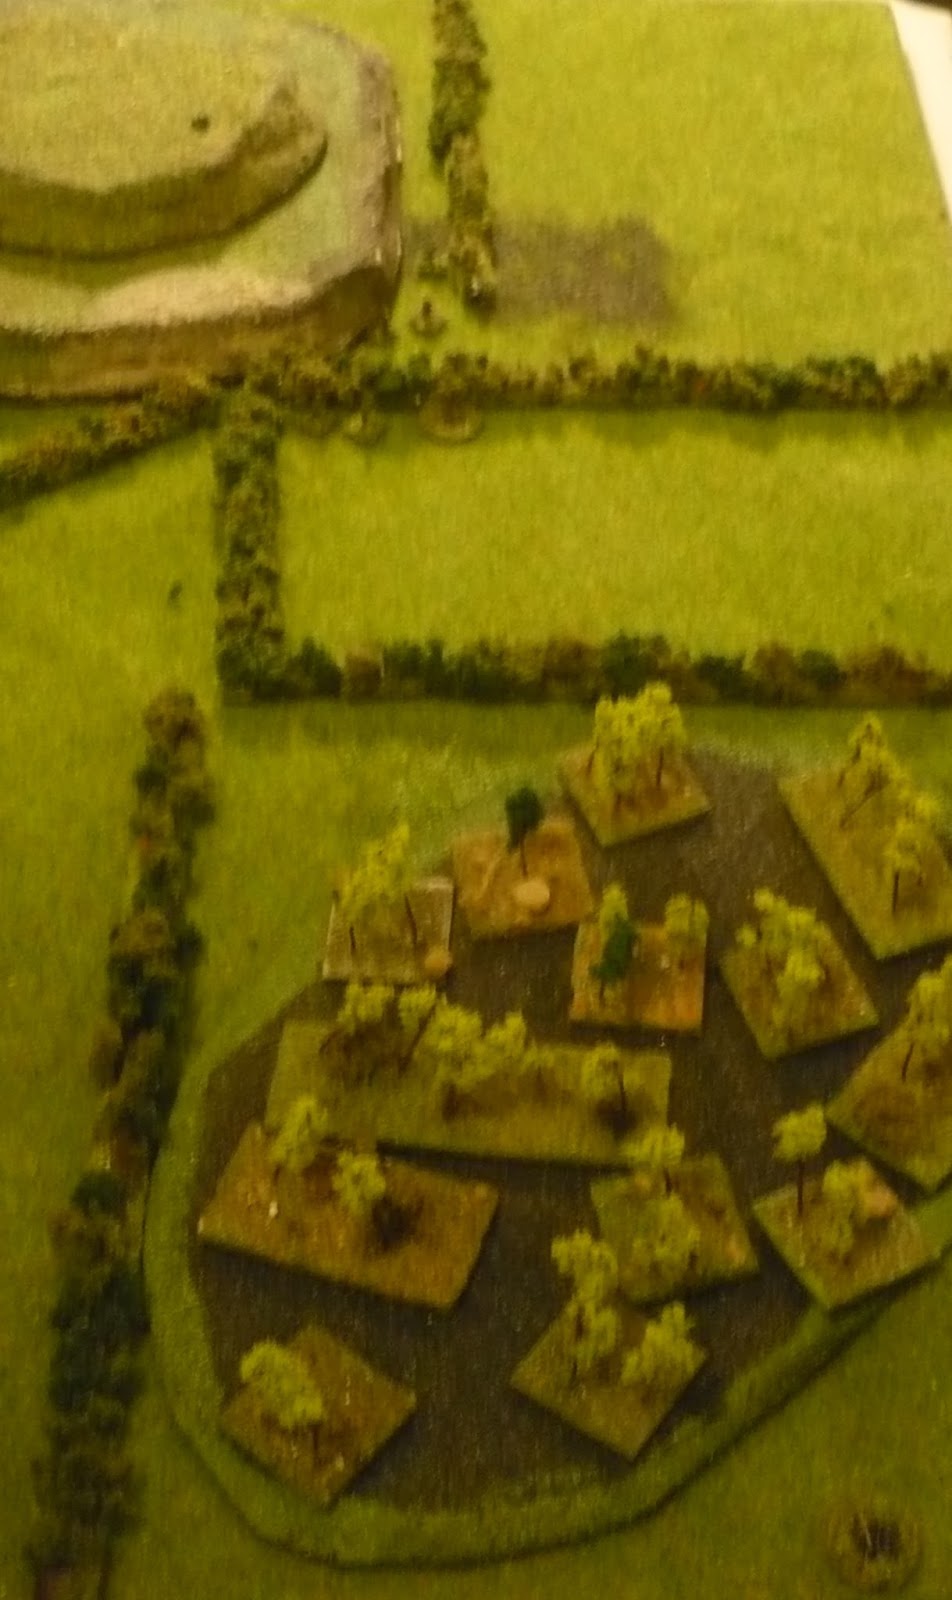
A more top-down look.  My plan is to approach the hill slightly from the right where there are good covered approaches and stay away from that church

A worm's eye view

The Brits line the hedge in ambush as a possible enemy approaches...

Weapons are readied...but false alarm!  Carry on.

Another possible enemy approaches, again the Brit section prepares an ambush...and again, another false alarm!

And again!  This should be easy for the Brits, it appears that the sector is empty

Oh no it isn't!  The sound of shouts and whistle to the rear indicate the Germans are attacking through the woods!!

There is just time to get ready before the Germans arrive.  British fire drops one of the German machine-gunners and forces the rest of the German section to take cover.  Note the British lead scout remains facing the other way to give some semblance of all-round defence

More machine-gun chatter and rifles barking!  Another German is out of the fight.  The German NCO keeps his men trying to advance however

I think this is what they mean by fighting at close-quarters! A German grenade is about to kill one of the Brits (Pte Nixon)

The German Feldwebel gets his men to charge after another grenade is thrown.  A couple of Brits are knocked down initially, but the Germans are worsted.  Two are incapacitated, then the German NCO is hit too.  The Germans run!

The British continue their patrol, but a German Panzerschrek team also approaches through the woods
The British patrol completes its recce.  Note the Bren gun group left at the hedge-hill intersection for protection

Another view

The Bren gunner kills the Panzerschrek gunner and the German number two flees.  The British then retrace their steps, not neglecting their obstacle crossing drills!

The British return cautiously

Returning through the woods


Mission completed!
Game Notes:
Another fun game of Nuts!  It rattled along at a decent pace without too many problems.  My main rules concern here was when the Germans were fast-moving through the woods, at which point would the in-sight test be triggered: when the first German figure completed its move, or when the German group had completed it.  The rules as written incline me more to the first, but it actually seems to be the second alternative (thanks to THW! for posting this video):


Apart from that though, no major issues.  The Germans rolled an "attack" mission, which is why their troops were being so aggressive.  Leadership was important too: as long as the Rep 5 German NCO was directing matters, the Germans were full of buzz (basically the leader supplies an extra die for certain crucial tests: this greatly increases the chances of troops remaining in the fight).  As soon as he was knocked out of the fight, the surviving Germans packed up straight away.  The British had been a little unlucky not to do more damage in the initial firing and one of the German grenadiers managed to get a good grenade throw off, but overall the luck of the British held and they were able to maintain their advantage.
One very good thing about these rules is that hits are difficult to achieve and there is a lot of "non-participation", as some troops can easily end up spending an entire firefight ducked back in cover.  It makes a decent stab at emphasizing the importance of machine guns and grenades, and hits with rifles are not that easy to achieve for typical riflemen (usually a 1-in-6 chance: a solid rep 4 soldier will typically need a 6 to hit).
So plenty more to explore here, but a very good start to the campaign.
Figures used were mainly Baccus 6mm, but with some GHQ and Adler in there too. Building from Baccus. Played on a 2'x2' board, took about an hour or so of playing time.

Campaign Notes:
After the successful mission, the squad has improved too:

Me - Section Commander (SMG) Rep 6
LCpl Robson - Section 2IC (rifle) Rep 4
Pte Charlton - Bren Gunner Rep5
Pte Todd - Bren Gunner 2nd Rep 4
Pte Armstrong -  Rifleman Rep 4
Pte Brown - Rifleman Rep5
Pte Elliot - Rifleman Rep3
Pte Johnson - Rifleman Rep4

British Force morale has improved, German morale and commitment has decreased.  On with the next mission!

Friday 27 January 2017

The 10x10 Challenge

Inspired by the "Six-by-Six" challenge on Kaptain Kobold's blog, I'm going to have a go at the full hardcore boardgame geek challenge: rules of the challenge are here.

The list is here, but to summarize:

DBA


Polemos Napoleonics


Polemos SPQR


Polemos ECW


Nuts! Final Version


WRG 1925-1950


Wargaming: An Introduction (plus I am including "Simplicity in Practice" from Battlegames 23 here)


Lone Wolf gamebooks


Heroquest


CSI


Discworld


Wish me luck!  A lot of the wargaming rules should tie into various campaigns, which I am hoping will provide the inspiration for a lot of the games.

Wednesday 25 January 2017

A Review of 2016 & Look Forward Into 2017

A very happy New Year to everyone!  My own year was up and down, but had lots of highlights.

Despite a hectic work and family schedule, I have managed to get a fair number of games played this year, along with a reasonable number of figures painted.  If I look back to the end of last year, I find that my objectives were:

1 - Expanding my 6mm ECW army when Baccus 6mm releases its updated range.
Baccus haven't released the new sculpts yet, although there have been pictures of some of the greens on their website.

2 - Creating a new 6mm Napoleonic Prussian army.
I have achieved this one, more or less.  This one has been a mixture of Baccus 6mm for the Reserve and Landwehr troops, Commission Figurines for the Regulars.  All I need to do is finish and base up a few last infantry and artillery bases.

3 - Expand my 6mm buildings collection.
Achieved this one, with some additional pieces for the early medieval period and for NW Europe 1944. I think the majority were from Leven Miniatures.

4 - Consider  Late Romans (and appropriate enemies), War of the Spanish Succession, WW1 and Moderns.  
Considered and rejected for the moment.

5 - Buy some more figures suitable for Heroquest and perhaps fantasy skirmish games.

Done.

6 -  Continue my Peninsular War campaign, with the provisional target of getting to the end of 1810.
Campaign completed.  It was great to complete successfully such a large campaign but it has left quite a hole in my gaming life!  I am really looking forward to starting another big campaign like this one.

7 -  Completing the Scottish Corridor mini-campaign.
Done.  Well sort of, it felt half-finished, half-abandoned

8 - Begin a Wars of the Roses campaign using either be Kingmaker or one from a magazine article and DBA 3.0 for the battles.
Not started.
 
9 -  Begin a Gallic Wars campaign, using a suitable boardgame to use as an engine for this one (I have most of the figures I shall need, I think), perhaps using Polemos SPQR for the battles.
Not started.

10 -  Refight some ECW battles to get "in training" for re-fighting the whole ECW as a campaign in the future, using the Polemos ECW rules.
Done.

11.  Finish the Heroquest revival I have been playing with the bairns.
Done, but haven't gone on to find a follow-on game.
 
12 - Do "general gaming" from interesting scenarios on the web and in magazines.
Done.

13 - Be "finished" (i.e. no big lead mountain or plastic pile) again by the end of September 2016.


So, for 2017...

The priority is to start another engrossing campaign. The most likely options here are again based on a boardgame.  The two I am looking at are:

Caesar's Gallic War:


The English Civil War - The King's War:


However, there are also a couple of campaigns published in magazines I would like to have a look at.  I also want to re-do the TooFatLardies "Scottish Corridor" campaign:


For the Gallic War, I will use either the Polemos SPQR rules, DBA or the Neil Thomas' Ancient & Medieval Wargaming rules.  I may get some more figures too: I don't have enough Romans or Gauls to convincingly show six legions or an equivalent number of tribesmen, which I think would be about the biggest size of battle in this campaign.
For the ECW, I will use either Polemos ECW or the Neil Thomas' Wargaming: An Introduction rules. However, I think I might run into "not enough figures" issues if I were to use the Polemos ECW rules - they can end up needing a lot of bases of horse!

Apart from this, there are a few magazine-based campaigns I would like to try, including, but not limited to:

A Napoleonic "Northern Italy" campaign in Miniature Wargames 031, written by George Gush:


A fictional horse-and-musket campaign, written by Henry Hyde, in Battlegames 034:


And a couple of Steve Jones' campaigns:


So lots and lots to look forward to and try to fit in.  I am likely to be having another extremely busy year, with lots of new challenges - but all very positive ones.

Shopping List for 2017

Relatively little.  I'm much more into being minimalist and getting rid of excess stuff.  That said, toy soldiers do bring a lot to my life, so they aren't the focus of this, and I enjoy painting too.  But I don't want to get vast swathes of new stuff.

1 - Fill out my ECW forces when Baccus 6mm releases its new sculpts.

2- Possibly reinforcing my Roman and Celtic/Gallic forces.  Although maybe the answer here is to experiment with more rules.  Lost Battles, perhaps?

3 - Some more bits and pieces for my Napoleonics, mainly filling out existing armies.  Perhaps some Wurtembergers and Poles, too.

4 - Maybe some WW2 British Paras.

5 - Some more bits of terrain (extra bridges, more WW2 farm buildings, that really nice Total Battle Miniatures castle, perhaps); I'll turn my hand to making some more 15mm and 28mm terrain too.

6 - I'm thinking of getting some WW2 aircraft for Bag the Hun.

7 - There are a couple of rulesets I think I might try, just for a change as much as anything.

Anyway, that is the outline of my plans - I hope that your plans go well too!  Happy New Year

Monday 2 January 2017

Polemos General de Division AAR: Action at the Saltanovka Crags

This small battle is in the style of a Grant-esque "Tabletop Teaser" published in the latest issue of Wargames, Soldiers and Strategy (issue 88): a scenario capable of being adapted to whichever size and era of forces that a particular gamer possesses in his or her collection.  As it happened however, I had the units to recreate the action in the same period as the author, Adrian McWalter - French against Russians in the Napoleonic Wars.


The Terrain:
Interestingly, the scenario did not actually come with a map.  My mind rebelled against this slightly but I did my best to set it up in accordance with the description given in the text:


"The main feature of this battlefield is a large area of high ground that is covered by broken or rough ground known as the Saltanovka Crags. The crags culminate in a significant crest on the defender’s side of the table, which is the objective for attacking forces. To make matters more complex for the attackers, the crags are flanked on either side by marshland. However, a substantial roadway runs from the centre of the attacker’s board edge through the defender’s, bisecting the crags. There is a village in the middle of the board adjacent to the roadway, at the start of the heights. There are also a few other lower hills on the plain beneath the crags."

The article then detailed the particular rules covering the effects of this terrain, such as the reduced movement rate going up the slopes and the fact that the village is dilapidated and isn't really a proper strong point.

The Orders of Battle:

The Imperial Russian Army
Gen Husin (Capable)
1st Brigade: 4 bases of Trained SK1 infantry
2nd Brigade: 2 bases of Veteran SK1 infantry (Grenadiers)
3rd Brigade: 2 bases of Trained SK2 infantry (Light Infantry)
Cavalry: 2 bases of Trained Light Cavalry
Artillery: 1 base of 12lb Foot Artillery, 1 base of 6lb Horse Artillery (*used as a Foot Bty in this game; in the Polemos rules, Horse Btys can't normally be used for long-range bombardment)

The Imperial French Army
C-in-C Gen Deschamps (Capable)
1st Division: Gen Lefort (Capable)
1st Brigade: 2 bases of Trained SK2 Infantry (Light Infantry); 4 bases of Trained SK1 Infantry
2nd Brigade: 4 bases of Trained SK1 Infantry
3rd Brigade: 4 bases of Veteran SK1 Infantry (converged Elite Coys.)
1 x 6lb Foot Bty

Cavalry Brigade: 2 bases of Trained Light Cavalry, 1 base of 6lb Horse Artillery

The French C-in-C was forbidden from committing his elite brigade until the village was cleared.

The Set-Up

The French approach along the road from the left; the Russians in defensive positions along the crags and in the village in the centre.  The Russian grenadiers remain in reserve (right)

View from behind the advancing French columns

And the view from behind the Russian defenders.  Note that the artillery is placed on the crags on each flank

The Battle

The French columns advance swiftly.  Accurate Russian artillery fire causes some delay on the French left-hand column (top)

The French columns begin to break out into formations deplyoed for attack!  The Russians bring up their Grenadiers to supprt the light infantrymen defending the village

A textbook French light infantry attack takes the village and throws out the Russians!  The left-hand French infantry find advancing much tougher because of the continuous accurate Russian artillery fire

Same position, different perspective.  Note the single figure by the Russian column just above the village, indicating its disorder
Same position again, but showing the wider context.  Note the Russian cavalry moving to support the infantry defending the crags to the south of the road (bottom-centre), facing the French line.  However, the Russian Grenadiers' morale collapsed as a result of the village battle and they withdrew from the field!  This appeared to leave the morale of the entire Russian Army quite shaky...
The Russian Jaegers deliver a superbly executed "volley-and-charge" reminiscent of British guardsmen, and knock an attacking French column down the slopes.

The French prepare an attack from the village to try and force the pass

Before the next French attack gets going however, the Russian light infantrymen launch a second, devastating charge!  The leading French battalion routs in tatters, the supporting battalion is distinctly wavering, despite the presence of the French general...
The Russian counterattacks continue to devastate! Note that the Russian light infantry has continued its attack and routed the second French battalion, whilst the infantry brigade on the southern crag has matched this with an attack of its own, which has devastated two more French battalions.  A pity for the French, as their attack from the village has started to be successful and pushed the Russian defenders back.

Different perspective


And from a bit further out

The end of the battle as the French force's morale collapsed, two of the three infantry brigades being now spent.  The Russian light infantrymen maintained their discipline and this kept the Russian force from facing a similar collapse.
 Game Notes:
A fast, interesting, enjoyable game, played out as usual for me using the Polemos General de Division rules. 


As ever, hills are very considerable obstacles in this ruleset and I continue to internally debate the case for reducing the defensive modifiers somewhat.  The Russians did get a bit luckier generally on the key dice rolls too!  The formation and force morale rolls also played a typically big part in the game.  The early collapse of the Russian grenadier brigade (a 1-in-6 chance) left the Russians within one more broken formation of a possible army collapse for the rest of the game - fortunately for them, they rolled well (low) after this disaster.  The French on the other hand failed four key morale rolls in a row which led to the collapse of two infantyr brigades and then the whole army's morale.  In retrospect, the French were slightly drawn into an attack on too wide a front and would have done better to mask the slopes and force the pass until the leading Russian high positions were bypassed. Better luck next time!
The table was a 4'x3' board.  Figures Baccus 6mm Napoleonics, with buildings by Timecast.  The game took just over an hour of playing time, with the game lasting 11 turns (c.55 minutes of game time). This scenario was very well designed and gave a good game.  I am still in two minds about the lack of a map though.  A part of me thinks "a picture is worth 1000 words" but a part of me thinks that it is a good way of ensuring players just use the closest thing they have to hand, rather than stressing too much about trying to match an imaginary map.  I suppose much will depend on wether the scenario requires very precisely laid terrain to make it work.