Heretical Gaming is my blog about my gaming life, featuring small skirmishes and big battles from many historical periods (and some in the mythic past or the far future too). The focus is on battle reports using a wide variety of rules, with the occasional rules review, book review and odd musing about the gaming and history. Most of the battles use 6mm-sized figures and vehicles, but occasionally 15mm and 28mm figures appear too.

Thursday 27 December 2012

Re-fighting the Peninsular War


I’d like to undertake a solo re-fight of the entire Peninsular War – does anyone have any advice?

Re-fighting the entire Peninsular War was the first project I thought about undertaking when I got back in to wargaming in 2007 and in a way it has been the guiding principle for these last five years.  Figures, rules and terrain have all been experimented with on the way.  The initial use of 1/72 plastics with the Bruce Quarrie rules has given way to 6mm Baccus figures using the Polemos Napoleonic Rules.  While the terrain I use is nothing to write home about, I’ve achieved a standard that I don’t feel any urgent need to improve upon radically and at least as importantly, I’ve found the ways to make the terrain work with the figures and the rules.

However, the actual campaign mechanics remain a problem.   I’m not sure that five years or so of experimenting have led me closer to a solution I’m really happy with.  Various methods I have tried have included:

The Bruce Quarrie campaign rules:  comprehensive,  but difficult to get the appropriate mapping with enough ‘definition’ of Spain in 1808 without doing an awful lot of work; time-consuming; good siege-rules; very different in philosophy to the Polemos rules I’ll be using for the tactical battles.

The Polemos campaign rules: simple, require some home mapmaking but nothing too strenuous, but really designed for smaller duration campaigns; will work fine with the tactical rules; siege rules lack detail and ‘feel’; need to effectively write my own rules for the  more ‘strategic’ aspects of the campaign, so supply, reinforcement etc.  Henry Hyde’s campaign rules and George Gush’s campaign rules have similar virtues and flaws.  Henry Hyde’s rules perhaps being more comprehensive, but requiring a little more work.

The board game ‘Tomb for an Empire’ http://boardgamegeek.com/boardgame/38578/age-of-muskets-volume-i-tomb-for-an-empire; excellent mechanisms for conducting the strategic aspects of the campaign, not too difficult to fit in with the tactical rules; lots of good set-up detail.  However, the game effectively abstracts the ‘operational’ aspects of campaigning: so little possibility of some of the varied battles that are part of the appeal of campaigning: the rear guards, the convoys etc.

I’m also unsure whether the campaign should be solo, or I should try PBEM.  The tactical battles will have to be solo affairs.  Although not exclusively a solo wargamer, neither am I regular face-to-face player.

Any thoughts would be gratefully received.


Peninsular Campaign Battle 06: Hot Pursuit of the French Rear Guard

The Situation: As Lord Wellington continues to pursue Marshal Marmont's forces from Ciudad Rodrigo to Salamanca, Marmont has been attempting to definitively break contact.  After suffering a reverse in the last battle, Marshal Marmont has been attempting to re-establish some kind of order, whilst the Anglo-Portuguese forces remain in hot pursuit...

The hindmost of Gen Sauret's rear guard must evade Gen Berwick's pursuing troops without suffering more then 20% losses.

The Initial Set-Up:


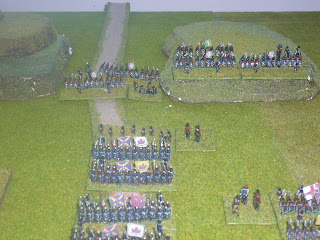
The French forces are situated astride the stream, marching from right-to-left (East-to-West) as seen; the pursuing Anglo-Portuguese to the West and Southwest

The same scene as viewed from East to West
The British Cavalry Triumphant!

The French attempted to slow the British advance by deploying their two regiments of Chasseurs  a Cheval as a rearguard; however, in yet another battle, the 10th Hussars have led a magnificent charge and sent their opponents into a headlong rout!  This effectively achieved the Anglo-Portuguese victory conditions, as the whole French cavalry then packed up.  With just under 50% of Gen Sauret's troops in rout or otherwise spent, the French had another defeat to contemplate.  Could the Anglo-Portuguese complete the destruction of the French force?
The British Cavalry Less Triumphant!

The British Hussars boldly attempted to complete their victory by  charging the hindmost French infantry unit.  However, the veteran 3/113 Line has proved just as tough as the 10 Hussars in the recent battles and in this case, come out victorious, smartly turning and sending the Hussars back in disorder with a volley at 25 paces...
The Main Assaults:

Gen Sauret built on the success of 3/113 Line by deploying it and 1/119 Line  to defend the stream and restore the pride of French arms.  Gen Berwick has been forced to wait until the leading Portuguese infantry units arrive to support the Hussars before re-commencing his attack.
Having soundly defeated the first Anglo-Portuguese assault, despite being outnumbered nearly three-to-one, with 3/113 Line driving its opponents back in disorder and 1/119 Line routing Portuguese 8 Line with a crushing short-range volley. Gen Berwick is again forced to wait for the arrival of further troops before attempting his third attack to secure the crossing of the stream.
The Allied success:

The next few turns went by in a bit of a blur!  The first French line was defeated by  the third assault, with 3/113 Line finally breaking under the pressure, and 1/119 Line driven back with heavy casualties.  Gen Sauret attempted to repeat his success (he had delayed the Allies for around two-and-a-half hours at his first position) by forming a second position on the westerly stream.  However, Gen Berwick was not to be rushed and despite being slightly delayed by accurate French artillery fire, prepared a crushing assault which drove back the French in short order. - the highlight being the capture of the French artillery by the 68 Durham Light Infantry.  The French infantry, although severely shaken, did manage to inflict further losses on the Anglo-Portuguese infantry before being forced to retire.  However, out numbered and outflanked, French morale plummeted and Gen Sauret's force made an immediate turn for the rear.
As a result of this battle, 2 Cacadores and 1/119 Line were promoted to Veteran status.  5 Chasseurs were demoted to Raw.

Game Notes:
This scenario was based on Scenario 07 from Scenarios for All Ages .  The game lasted for 73 minutes, and the battle as a whole was very enjoyable.  However, the Allies had 'won' according to the victory conditions on Turn 3.  I'm not sure if this indicates a problem with the morale rules in Polemos General de Division or whether the scenario's victory conditions are, perhaps unconsciously, more suitable for rules based upon figure removal .  I'm beginning to think that, in general, the Red Forces have marginally less difficult victory conditions than Blue in many of these scenarios!

Monday 24 December 2012

Peninsular Campaign - Battle 05: Action at San Munoz

The Situation: Marshal Marmont is still retiring on Salamanca, hopefully to regroup and organize a counter-offensive to drive Wellington back over the Portuguese border at the very least.  However, Wellington is determined to remain on the heels of the French Army, giving them no respite and hoping the disorder will spread throughout Marmont's command.

To gain time, Marmont has ordered Gen Sauret to take charge of the rear guard and delay Wellington at a defensible position near Sancti-Spiritus.  Wellington however has charged General Berwick with crushing this  defence and allow the French no rest at all...

Orders of Battle:

ALLIED ARMY


Anglo-Portuguese C-in-C: Gen Sir William Berwick (Competent)

1st Division: Maj-Gen Robson (Competent)
1st Brigade:
1/5 Northumberland *
3/27 Inniskillings
1/52 Oxfordshire (Light Infantry)
55 Westmoreland
2nd Brigade:
1/4 King's Own
1/43 Monmouthshire (Light Infantry) *
1/61 South Gloucestershire
1/92 (Gordon Highlanders) *
Divisional Artillery:
7 Coy/8 Bn RA (Lawson's) 6lb

2nd Division: Maj-Gen Charlton (Decisive) 
1st Brigade:
2 Queen's Royal **
68 Durham (Light Infantry) ***
2/92 (Gordon Highlanders) ***
2nd Brigade:
2/43 Monmouthshire (Light Infantry)
51 2nd Yorkshire (West Riding) (Light Infantry)
Divisional Artillery:
5 Coy/1 Bn RA (6lb)

1st Light Cavalry Brigade:
9th Light Dragoons
16th (Queen's) Light Dragoons

2nd Light Cavalry Brigade:
10th Prince of Wales Own Hussars (V)***
15th King's Hussars

1st Dragoon Brigade:
4th Queen's Own Dragoons *
6th Inniskilling Dragoons (R)

2nd Dragoon Brigade:
3rd Prince of Wales' Dragoon Guards
5th Princess Charlotte of Wales' Dragoon Guards (V)

IMPERIAL FRENCH ARMY

French C-in-C: Gen Sauret (Competent)

1st Division: Gen Renault (Competent) 
1st Brigade:
1/28 Light **
1/32 Light ***
2nd Brigade:
1/113 Line (R)
2/113 Line
3/113 Line *
1/119 Line ***
Divisional Artillery:
1/1 Foot Artillery 8lb

2nd Light Cavalry Brigade:
1 Hussars
6 Hussars

The Set-Up:


The unoccupied battlefield

The French are deployed in a strong position: a town defended by infantry and artillery, with  the hills on the flank guarded by further infantry.  Two regiments of French Hussars are in reserve to the left (East);  two brigades of the British 2nd Division are approaching from the right (West)

The initial clashes:

French manoeuvering on the Northern flank (bottom) causes the British troops to redeploy, whilst a British demonstration against the town entices Gen Sauret to bring forward his Hussars from reserve; to the South,  British troops prepare to attack the hill

In the South, the French troops have driven back the British with light losses, who subsequently reform upon reserves moved from the centre.  The rest of the British troops form up for a more general assault
The Crisis of the Battle:

French troops on the Northern flank (bottom) deliver a volley which shatters  1/43 (Monmouthshire) Light Infantry, then deliver a bayonet charge which completes their destruction; the French Legere now face 1/4 Foot - but 10 and 15 Hussars have positioned themselves on their flank.  The British troops in the centre have pushed back the French Hussars, but have declined to attack the town so far; however, the second assault on the Southern hill has proved most successful: 1/119 Line are in rout and 3/113 Line have retreated in some disorder.  A major decision point has been reached: should the French Light Infantry return to defending the Northern hill or should they press their advantage?
Defeat!

The fortunes of war:  the French Light Infantry have routed 1/4 Foot back Westwards; however, they have been hit hard in turn by the charge of the veteran 10 Hussars, nobly supported by their brothers of 15 Hussars.  1/32 Light have broken and 1/28 have retired in disorder - and the brigade has failed its morale check.  As 50% of the French Infantry division's brigades have broken (i.e. 1 of 2), then the whole division has become 'spent'!  Fearing disaster, the French infantry have retreated from the village without defending it...the shame...and at this point, without support, the French Hussars have withdrawn too! (the French failed their army morale check)...
Same position from a view behind the British centre
Results:
On the Allied side, 68 (Durham) Light Infantry and 2/92 (Gordon Highlanders) were promoted to Veteran status
On the French side, 3/113 Line and 1 Hussars were promoted to Veteran status.

Game Notes:
This game was based on Scenario 06 from Grant and Asquith's Scenarios for All Ages .  This was another battle over relatively quickly - in perhaps just over 60 minutes of playing time.  Perhaps the write-up doesn't do justice to just how tense this game was.  It ended up on a thread of whether or not the morale of the British 1st Division's 2nd Brigade would hold or not (it did) or if the French 1st Division's First Brigade would break (it did).  The odds at this key moment were 1 in 3 that the British would break, 2 in 3 that the French would (both sides or neither was a possibility).  The unfavourable die roll at this moment really did for the French.

It might have been better for the French if the division had been organized in three brigades of two battalions, rather than one of two and another of four.  However, this would have increased the chances of the Southern hill falling more quickly than it actually did.  Overall though, if I replay this scenario with these rules and forces, I will try this.  Three brigade divisions would seem to be less fragile than two brigade ones, in general.

Tuesday 18 December 2012

Peninsular Campaign - Battle 04: An interlude

This battle is a 'flashback'.  It is the Battle of Saalfeld scenario taken from the Polemos Napoleonic Companion, but using Spanish forces from 1808 in place of the Prussians.

The Companion is a bit light on what both sides were actually trying to do at Saalfeld, so I re-read the relevant section in Petre's Napoleon's Conquest of Prussia . Basically, Prince Louis (the Prussian C-in-C) was trying to maintain his position on the left bank of the Saale rather than just hold the right flank, to allow his superiors freedom to manoeuvre on both sides of the river, in accordance with alternative plans presented in the previous days.  Marshal Lannes, the French Corps Commander, disobeyed Napoleon's orders and attacked with support - but success forgave all!

French Forces:
A Division of 20 battalions of infantry and two artillery batteries, plus a brigade of three light cavalry regiments.

'Spanish' (Prussian) Forces:
A brigade of six infantry battalions with a battery of artillery (in Polemos terms, 1xSK2, 3xSK1, 2xSK0; these being the skirmish ratings assigned to Prussian Jaeger, Fusiliers and Line Infantry respectively for the 1806 Prussian army;  I used Spanish Light Infantry in place of the Jaegers, with more or less efficient Spanish line infantry replacing the others.)
A brigade of six line infantry battalions (all SK0)
Two light cavalry brigades each of two-three Hussar bases with a horse artillery battery attached.

All units on both sides were classified as 'Trained'.  The French C-in-C and Gen Suchet (the French Divisional commander) were both rated as 'Decisive' (the best), Prince Luis, the 'Spanish' commander was rated as 'Competent'.

Set-Up:


Looking at Saalfeld from the West
The French troops advancing from the West (bottom); opposed by  two brigades of infantry and two of cavalry

 The Initial Manoeuvering:

Reille's Brigade advances up the middle to pin the opposing Spaniards who  for their part are strengthening their centre and deploying the majority of the cavalry to each flank.  Vedel's brigade starts moving towards the right to threaten the heights on the Spanish left.

The Spanish Cavalry Charge!

Who says that Spanish Cavalry is rubbish?!   These Dragoons have just routed four battalions of French infantry! Mind you, the other Spanish Dragoon regiment was routed in short order, but history will gloss over that...
The Spanish Cavalry Charge again!!

On the other flank mind you.  Two regiments of Spanish Hussars, supported by a horse artillery unit, are just about to break the French Light Cavalry brigade opposing them...In the melee (to round off some very unlucky French dice-rolling), the French C-in-C (the small base with 3 figures, the right-hand horseman carrying a tricolor) is about to be sabred by a French Hussar!  How the wheel turns - in the real battle, the Prussian C-in-C Prince Louis was killed by a French Hussar quartermaster...)
The French in Crisis:

The Spanish close in on the French.  With Vedel's brigade on the right having retired from the field , spent after seeing off the Spanish Dragoons, and the French light cavalry routed by the Spanish Hussars, and having made little or  no progress against the Spanish infantry in the centre, in the woods or on the heights, the C-in-C killed, Gen Suchet assumes command and hands over the division to his senior brigadier, Gen Reille.  Should he withdraw? No!  Relying on those raw pugilistic skills a later historian would see as the true bedrock of French success, the French stand firm and await the Spanish assault...

The Spanish Assault:

...which is delivered with boldness!  Can the French infantry hold?

Snatching Victory!

Yes!  The action was so fast and furious, one would need to film it to do it justice, but, in essence:  the French infantry on the right, hold, then throw back the Spanish cavalry and their supporting infantry;  Claparede;s Light Infantry on the right, despite suffering heavy casualties, see off the Spanish on the hill, the personal attention of Gen Suchet and a supporting battery of horse artillery just out-matching the value of the heights to the Spanish defenders; and in the centre, the French infantry, despite having their artillery captured by the Spanish, hold, throw back, and finally rout their opponents!  Then, swinging into the flank of the Spanish troops holding the central wood, these troops too are sent retreating, their officers maintaining a semblance of order and discipline...just.

Despite, the Spanish troops still being willing to fight on, Prince Luis could see there was no way that the road to Saalfeld could be held further and he ordered his two most intact brigades to retreat North to rejoin the main body, trusting that the lack of French cavalry would enable him, and the rest of his scattered command, to escape...

N.b.  Sorry the road was looking a bit disevelled by this point!  I need to either make or buy some better roads.
Game Notes:
At one point I nearly threw in the towel as the French player, but I'm glad it did not, as the war game see-sawed and was genuinely tense until the end.  The game took 15 moves, and lasted just over 90 minutes.  It is possibly the bloodiest game of Polemos I have ever fought.  Often the morale rules work so that armies retreat after relatively few casualties, but here everyone stuck it out.  I think this was partly because the French had two brigades of nine battalions, which are quite hard to break; while the Spanish were organized in brigades only (no Divisions) and that seems to increase robustness at the expense of command efficiency.

Peninsular Campaign Battle 3 - Action at St Rodrigo


This game was based on the fourth scenario in Grant and Asquith's Scenarios for All Ages.  The premise is that a small Red force has advanced too far into enemy territory and Blue is attempting to destroy it with superior converging forces.  Red must escape with 80% of its forces intact to succeed.

The Situation:  After defeating Marshal Marmont's attempts to relieve the Siege of Ciudad Rodrigo, Wellington is focused on reducing the city's defences and organizing an attempt to storm the place.  However, although Marmont has given up on the city, he still hopes to arrange a blow against Wellington before the place falls.  His chance has come when his cavalry patrols have discovered that a column of Allied troops have probed too far towards Salamanca, unaware of the French positions.  Marmont has hurriedly ordered his forces to converge upon and destroy this rash detachment...

Allied Forces:

C-in-C Gen Berwick

2nd Division: Gen Charlton (Decisive)
1st Brigade: 2 Foot (Queen's Royal), 68 Light (Durham), 2/92 Highlanders (Gordons)
2nd Brigade: 2 Cacadores, 6 Line (V), 7 Line (V), 8 Line, 22 Line (V)
Artillery: Lawson's Bty RA

Light Cavalry Brigade: 10 Hussars (V), 15 Hussars (R)

Dragoon Brigade: 4 (Queen's Own) Dragoon Guards, 6 Inniskilling Dragoons

French Forces:

C-in-C Gen Sauret

1st Division: Gen Renault (Competent)
2nd Brigade: 1/113 Line (R), 2/113 Line, 3/113 Line
3rd Brigade: 1/116 Line (R), 1/119 Line, Irish Legion
Artillery: 1/1 Ft Arty

2nd Division: Gen Villeneuve (Decisive)
1st Brigade: 1/94 Line (R), 1/95 Line, 1/118 Line, 1/2 Nassau Infantry
1st Dragoon Brigade: 1 Dragoons, 10 Dragoons
2nd Dragoon Brigade: 19 Dragoons, 22 Dragoons
Artillery: 1/2 Hs Arty

3rd Division: Gen Panis (Competent)
1st Brigade: 2/28 Light (R), 3/28 Light (V)
2nd Brigade: 1/96 Line, 1/117 Line (R)
3rd Brigade: 1 Hussars, 6 Hussars

The Set-Up:


The Anglo-Portuguese forces are set-up in the centre, intending to punch  through the French force to the South.
The Initial Attack:
Hussars attack the French Light Infantry Regiment to the Left; Portuguese Infantry advance upon the French Hussars to the right - but the British Dragoons are held-off by the French Line infantry in the centre.

A wider shot: The French Dragoons are advancing quickly in the top-left; the French Infantry column  to the top-right is making much slower progress (in game terms, the French C-in-C is concentrating on spending his command effort on getting the Dragoons into range to force the Allied troops to turn-and-face, thus slowing their attempt to escape)
The Turning Point:

The initial Allied attacks were generally successful:  10th Hussars famous charge routing two battalions of 28e Leger, and the leading Portuguese infantry have pushed the French Hussars temporarily off-table; however, 1/117 and 1/96 Line have stood firm against the British Dragoons...and the French Dragoons are now approaching fast!  Meanwhile, the  remaining Allied infantry are making slow progress through the plowed fields...

La Gloire!

The French Dragoons have turned the tables in a magnificent charge led by General Villeneuve!  They have captured the British guns, routed the Inniskilling Dragoons and destroyed the hindmost Allied brigade  (8 Portuguese Line, 22 Portuguese Line) and snatched  victory from the Allies.  This may just save Marmont from Napoleon's wrath when Ciudad Rodrigo falls...The other Allied brigade escapes unscathed...

Game Notes:
Cavalry charges are quite risky affairs in Polemos General de Division, but sometimes, when they come off, the results can be devastating.  The success of the British Hussars and the French Dragoons were key moments (especially the latter), the failure of the British Dragoons (against both the French Infantry and the French Dragoons) equally key. This game played out quite quickly (eight turns), as the optimum strategy for both sides seemed to be all-out aggression.

Performance Ratings:
Allies: 4 Dragoon Guards*, 2 Cacadores **, 6 Line*, 10 Hussars***, 15 Hussars*, Charlton*, Berwick*
French: 22 Dragoons****, 1/117 Line*, 1/96 Line*, Villenueve**, Sauret**

Broken Units:
Allies: 6 Inniskilling Dragoons, 8 Line, 22 Line, Lawson's Bty
French: 2/28 Light, 3/28 Light

The following units were promoted to Veteran: 22 Dragoons, 1/96 Line
The following units were promoted to Trained: 15 Hussars
The following units were demoted to Trained: 22 Line
The following units were demoted to Raw: 6 Inniskilling Dragoons

Sunday 9 December 2012

The Spanish Army in the Peninsular War - Book Review


This a re-worked version of a book first released 25 years ago. The original book has been out-of-print for some time and obtaining a copy had become quite difficult and expensive. Detailed treatments of the Spanish Army during this period in English have been rare, although Osprey have updated their original rather sketchy volume with an excellent 3-volume work which has brought much more detail to light on the uniforms and tactical organisation of the Army from 1793-1815. These Ospreys complement rather than provide an alternative to Esdaile's work however, as Esdaile focuses on answering wider questions about the Spanish Army, but contains little about the campaigns themselves, the uniforms, lower-level organisation or the tactics employed by Spanish troops except in relatively general terms.

This book has a slightly unusual structure. The original edition is re-printed in its entirety rather than being re-written to incorporate the author's (extensive) research over the intervening period. Instead, this material is all together as an update at the beginning of the book. This method (apparently chosen for technical reasons) has the virtue of showing how the author's opinions and research have developed since the book was first published, but it does make the book less coherent and readable.

The first chapter explains the workings of the Spanish Army pre-1792. It details exactly why the Army was organised and recruited the way it was, and how there was no easy remedy for its systemic flaws, those flaws in many ways being a reflection of the society from which it was drawn. It goes into some detail on the human material that composed the Spanish Army – from which quarters of society it was recruited, and which ranks the various social orders occupied, the author going in to some detail on issues of recruitment and promotion. It also attempts to explain the efforts made to keep pace with military developments across Europe and the brittle logistical underpinning and cumbersome administration which was to be so exposed in 1808. The author adds little in his update to this section.

The second chapter concerns the period of Godoy's reign in power in Spain, and in particular his attempts to reform the army and the military institutions. In essence, the author shows that Godoy deserves more personal credit than he is sometimes given for his attempts to create a workable foreign policy and a reformed army to back it up, and these attempted reforms are described in some detail. However, the story the author tells is ultimately one of failure, as the opposition towards the reforms from key social groups was too entrenched to be overcome, and led to Godoy's temporary fall from power. In the author's update, there is some explanation of the events of the Spanish Army's invasion of France in the Revolutionary Wars, and its subsequent failure with some attempts to quantify how popular the resistance to the French counter-invasion was.

The third chapter deals with the Army's response to and participation in the revolutionary and resistance events of May 1808 – September 1808. It is a complicated picture, as it is full of tensions between legitimist, collaborationist and revolutionary tendencies. It is however a much fuller picture of how political events influenced the first campaigns than one finds in the more military-orientated histories of the Peninsular War in English, like Oman's History of the Peninsular War http://www.amazon.co.uk/History-Peninsular-War-1807-1809-Fontainebleau/dp/1163311197/ref=sr_1_11?ie=UTF8&qid=1355043415&sr=8-11 or Gates' The Spanish Ulcer http://www.amazon.co.uk/Spanish-Ulcer-History-Peninsular-War/dp/0306810832/ref=sr_1_1?s=books&ie=UTF8&qid=1355043471&sr=1-1 . It also shows how political control of the Spanish Army was obtained and that military considerations and opinions were subordinated to political goals. In the updated section, the author is keen to emphasize that popular resistance was reasonably marginal and how instead we should focus on revolutionary intrigue as the source of the Spanish uprising against the French. This would seem to have consequences for subsequent criticism of Napoleon's response to these events.

The next chapter deals with the period of the struggle when the Spanish armies were controlled by the Central Junta. The author explains how political pressures simultaneously demanded unrealistic military objectives whilst rendering impossible the measures necessary to improve and enlarge the Spanish Army so it would be capable of attaining them. There are hard words about the Spanish officer corps and the cavalry arm in particular, as well as some debunking of myths regarding the effectiveness of both the guerillas and popular resistance overall. Again, this would seem to have implications for how the Napoleonic effort in Spain as a whole should be judged.

The author then tackles the period 1810-1814 where Spain was controlled by a Liberal government, who, although stout in their opposition to the French, were at least as exercised by the danger of militaristic and reactionary despotism, so as they attempted to increase Spanish efforts against the French, the ideological and economic circumstances ruled it out. Esdaile does point out that Spanish troops could be reasonably efficient at this stage – pointing to Albuera and some of the units with Wellington's forces that had reasonable rest and logistical support, but overall the clash between the Liberals and the higher echelons of the Spanish Army prevented the Spanish from successful reforming their Army into a truly effective force, with the effect that the major role in liberating Spain was played by the Anglo-Portuguese armies. The updated section contains a major critique of the impact of the guerrillas upon the war, as well as additional information on the experience of the Spanish Army at war in this period.

The book ends with a short epilogue on the shape of the Army from 1814 and the effect of its politicization during the preceding six years.

I found the book well-written and well-referenced. Citations for sources are given at the end of each chapter.

Overall, this book is highly recommended for people interested in the Spanish Army of this period or the Peninsular War, as it explains trends and attitudes which would otherwise leave certain events and phenomena inexplicable. In my opinion, it shades my understanding of the whole war, especially from the French side: it makes it much more clear why Napoleon remained hopeful for a comprehensive victory as long as he did, as well as indicating why Napoleon thought he might get away with the machinations of Bayonne.

Many of the arguments and conclusions in this book can be found in abbreviated form in the author's contribution to the  "Armies of the Napoleonic Wars"

Saturday 8 December 2012

Polemos SPQR Review

Polemos SPQR Review

Polemos SPQR is a set of rules which covers the battles of the Late Roman Republic and the Early Imperial Roman periods. There is much in common with other sets in the Polemos series, as well as some differences.

The first part of the rules deals with unit types and basing. The rules use the Polemos standard base of 60mm x 30mm, but the rules do explain that pretty much anything will work as long as the two-sides are based the same. A base of infantry represents about 400-500men, so a Roman Legion will be represented by 10 bases or so.

The command and control mechanic of the game is based around tempo points. In essence, these are similar to PIPs in the DB-x sets of rules, except that they are also used to bid for 'the tempo'. The player with the tempo will move first in a turn, and will be able to achieve more with each tempo point than the player who lost the tempo.

All groups of units have general orders – Advance, Hold or Skirmish – and tempo points are used to move from one order to another. This removes one of the objections that have been made towards other PIP-based games, that units have to be made to move every turn. The costs to change these orders have been calibrated so that regular troops are more controllable than irregular ones, and that narrow formations are easier to control than wider ones. Irregular troops in long lines are almost uncontrollable in this game.  Manoeuvre is pretty difficult, complex manoeuvres are near impossible.

The mechanics for movement are fairly straightforward but pretty tough. Bases can about face, but all wheeling has to be done on a static pivot. This makes flank attacks very difficult to avoid or meet, troops literally have to fight their way out of it. Interpenetration is quite restricted too, so it pays for everything to be in 'relatively' ordered blocks to allow for passage of lines.

As in the ECW rules by the same author, charging is considered a type of ranged combat with effects separate from any actual melee. To me, it reminds me of an old WRG style reaction test, but using the same mechanics as ranged combat (if that makes sense!). If you move into charge range, you have to charge, which is an unusual touch.

All combat is worked out as an opposed die-roll. Each side gets a numerical factor reflecting the troop type and basic situation (e.g. Chariots attacking mounted get a '4', Pike attacking foot get a '2', and so on), add 1D6 and then add or subtract appropriate modifiers. There are quite a few, but only a few will ever apply to any particular combat and you memorize them pretty quickly, however although I don't mind using a list of factors, I know that some find such lists off-putting. All the factors and modifiers seem reasonable to my inexpert eye. There is lots of slogging, but I have been subject to a couple of truly shattering charges when caught in the wrong formation, as routing units will 'burst through' units they cannot inter-penetrate, causing them to rout in their turn too. I have lost half a legion in a few moments this way...

As in other Polemos rulesets, casualties are not tracked per se, degradation of troop effectiveness is described in terms of 'shaken points', reflecting increased disorder. This can be rallied back so units can regain their effectiveness. Broken units however cannot be rallied.

Morale other than that incorporated into combat results is taken at the Army level. As more and more bases are lost, morale will drop from Confident through Optimistic, Hopeful, Pessimistic, Hopeless to a general Rout. Each stage has certain negative effects and/or restrictions. Interestingly, as there is a random element in each test, army morale can actually fluctuate upwards as well as down. There is no intermediate morale stage between that of the base and that of the entire Army – a Legion, or 'host' or whatever.

I felt that overall this set is better than the WSS and Napoleonic rules in terms of explaining how the mechanics work and there are good diagrams and examples to back up the rules. The author has been very helpful in explaining any points on the Yahoo! Group http://games.groups.yahoo.com/group/polemos/ or on his blog http://ancientrules.blogspot.co.uk/ .

In addition to the main rules, there are sections dealing with terrain, including a terrain generation system,and some notes on hill forts and marching forts. As ever, there is no points system in this set of Polemos rules, the author instead preferring to use an army generator. Usefully, there is a set stereotyped army of about 20-bases strength for each of the factions covered, including Romans, Germans, Gauls, Parthians, British, Numidians, Sarmatians, Dacians, Spanish and a Pontic Army. The author includes a description of each army as well, to justify his choices for the army generator.

There are two scenarios included in the book: the Battle of Charonea and the Battle of Mons Graupius. Each scenario has three different variants – Small, Medium and Large. The small games are designed for armies of approximately 20 bases each played on a board of 54cmx 36cm (if using the standard basing) so they are very suitable for a newcomer. I've played Mons Graupius and achieved a more-or-less historical result in about ninety minutes of play.

I find all the Polemos rules very amenable to solo play, as the tempo bidding  mechanic provides the inbuilt variability and chaos I find make a good solitaire game.  There have been discussions on the Yahoo! group as to the various methods of using tempo points as the basis for good solo games.

As a fan of other rules using the Polemos system, I expected to like these rules and I haven't been disappointed. The touches that differentiate it from the other rulesets all seem well-judged to create a very different game despite the overall structure being similar. The history seems to me accurate to the low-level of my knowledge, and the author does provide citations for his conclusions. I've played a few games face-to-face and solo now, and they have all worked well, giving me at least some of that elusive period feel and all the games have had plausible, historical outcomes.

Friday 7 December 2012

The Peninsular War Narrative Campaign

I have decided that the most appropriate form of campaign for me at the moment is the Narrative Campaign.  This will mean the only 'campaign' element is the conservation and development of forces, as successful troops gain status while defeated troops may lose status.  The actual scenarios will be taken from old wargames magazines and the Scenarios for All Ages book by Grant and Asquith.

The Situation:
The year is 1812 and the Anglo-Portuguese Army commanded by Lord Wellington has begun its advance into Spain.  His immediate objective is to capture the two Western fortresses of Spain, Ciudad Rodrigo and Badajoz, then defeat the Imperial forces sent to oppose him, then liberate the Spanish capital Madrid.

Peninsular Campaign Battle Two - Battle of Ciudad Rodrigo


Situation:

With Wellington's forces about to invest the fortress of Ciudad Rodrigo, Marshal Marmont has come up with an imaginative plan to disrupt Wellington's preparations.  The French Marshal has swung part of his forces to attack the British covering force on the left-wing knowing that a severe reverse to the Anglo-Portuguese here will at worse demoralize the besiegers, and at best force Wellington to withdraw to re-organize, thus gaining vital additional time for the besieged to get supplies and reinforcements into the city.

Marmont has given Gen Sauret a force of two infantry divisions and two cavalry divisions to carry out this mission.  Sauret plans to pin the forces of Gen Berwick opposite, whilst sending an outflanking force to turn the Allied position.  As the morning mist clears, Berwick sees the French turning movement, but looks to be too late to prevent them seizing the bridge...

Allied Forces: C-in-C Gen Berwick

1st Division: Gen Robson (Competent)
1st Brigade: 2 Queen's Royal, 68th (Durham) Light, 2/92 Gordon Highlanders, 5/1 RA (6lb)
2nd Brigade: 2 Cacadores, 6 Line, 7 Line, 8 Line, 22 Line (V)

2nd Division: Gen Charlton (Decisive)
1st Brigade: 1/5 Northumberland, 3/27 Inniskillings, 1/52 Light Oxfordshire (Light), 55 Westmoreland
2nd Brigade: 4th Queen's Own Dragoons, 6th Inniskilling Dragoons
3rd Brigade: 3rd Prince of Wales' Dragoon Guards, 5th Princess Charlotte of Wales' Dragoon Guards, Ross' Troop RHA (6lb)

1st Light Cavalry Brigade: 9th Light Dragoons, 16th Queen's Light Dragoons

2nd Light Cavalry Brigade: 10th Prince of Wales Own Hussars, 15th King's Hussars

Imperial Forces: C-in-C Gen Sauret

1st Division: Gen Renault (Competent)
1st Brigade: 2/113 Line, 3/113 Line, 1/119 Line, Irish Legion
2nd Brigade: 1/28 Light, 1/32 Light, 1/113 Line, 1/116 Line
3rd Brigade: 1/94 Line, 1/95 Line, 1/118 Line, 1/2 Nassau Infantry
Divisional Artillery: 1/1 Foot Artillery (8lb)

2nd Division: Gen Panis (Competent)
1st Brigade: 2/28 Light, 3/28 Light, 1/96 Line, 1/117 Line

3rd Division: Gen Arnoux (Decisive)
1st Brigade: 5 Chasseurs, 17 Chasseurs
2nd Brigade: 1 Hussars, 6 Hussars, 1/2 Horse Artillery

4th Division: Gen Villeneuve (Competent)
1st Brigade: 1 Dragoons, 10 Dragoons
2nd Brigade: 19 Dragoons, 22 Dragoons

Initial Positions:

View of the Allied right
And also:

The opposing forces race for the unguarded bridge...but the French have the headstart and their cavalry is faster....
The conflict begins on the Allied left:

French Chasseurs have crossed the bridge first, but the British Dragoons are in position to charge...


A couple of successful charges by the Dragoons have seen off the French Light Cavalry and two battalions of French infantry...but the third French infantry battalion has succeeded in forcing and holding the bridge...
The final charge of the Dragoons results in heavy casualties, but the French commander loses his nerve and retreats, as the British infantry approaches
As the flanking attack faltered, Gen Sauret tried a frontal attack:

The French infantry approach the main Allied position while the French dragoons try to find a gap round the extreme Allied Right...
The French Dragoons have crossed the stream, outflanked the Portuguese infantry and broken one of the British Hussar regiments - the other has withdrawn to the high ground and is now supported by the reserve Portuguese infantry Bn


The situation at the end of the battle: the French infantry have made some progress against the 2 Foot supported by Light Dragoons on the left and against the Portuguese brigade on the right, but the central French brigade has been put to flight by the 68th Light Infantry and 2/92 Gordon Highlanders; meanwhile the French dragoons have seen off the second British hussar regiment, but been defeated in turn by the Portuguese infantry facing the flank.  At this point French morale collapsed and they withdrew.

Another very enjoyable battle, with some mistakes made on both sides.  After the first few turns I thought the French were going to get a one-sided trouncing, but they pulledit back to make it a close-run thing.

I rated the performance of the units as follows:

Allies:
6th Inniskilling Dragoons 3*, 5th Princess Charlotte's Dragoon Guards 3*, 2 Foot 2*, 2/92 Gordons 2*, 68th 2*, 2 Cacadores 2*, 7 Line 3*, 6 Line 2*, 10th Hussars 1*

French:
1/96 Line 2*, 3/28 Light 1*, 1/119 Line 2*, 1/32 Light 2*, 1/28 Light 2*, 1 Dragoons 3*

The Commanders: Sauret 1*, Villeneuve 2*, Renault 1*, Arnoux -2*, Berwick -1*

Broken:
17 Chasseurs, 3/113 Line, 1/94 Line, 1/118 Line, 1/113 Line, 1/116 Line, 2/28 Light, 1/117 Line

10 Hussars, 15 Hussars

As a result of this, the following units were promoted to Veteran:
5th Princess Charlotte's Dragoon Guards, 7 Line, 6 Line, 10th Hussars
3/28 Light, 1/28 Light,

The following units are now Raw:
17 Chasseurs, 1/94 Line, 1/113 Line, 1/116 Line, 2/28 Light, 1/117 Line
15 Hussars

Gen Villeneuve is now rated as Decisive.

Game Notes:
The game was played with the Polemos Napoleonics General de Division rules.  The scenario is based closely on the second one in Scenarios for All Ages
All troops were rated as Trained except the Portuguese 22 Line.  Light Infantry units were rated as SK2, all other infantry as SK1.  The Light Dragoons were rated as Light Cavalry. The game lasted 11 turns before French morale collapsed.

Sunday 2 December 2012

First Battle of the Peninsular Campaign - Battle of Canabrava


2nd January 1812:

On 01 Jan 1812, General Berwick, commanding the advance guard of Wellington's Anglo-Portuguese Army, encountered the 1st Division of Marshal Marmont's Army of Portugal, commanded by General de Division Renault, which had been watching the border.  Realising that this presaged an offensive by Wellington, the French commander deployed his forces at a point where the road passed through a line of hills, knowing a spirited defence, although ultimately hopeless, must give time for Marmont to concentrate for battle while disrupting the English general's plans.

Berwick knew that Wellington had not expected the French to defend this point, and has thus decided to force the French position as quickly as possible.  Both Allied and French losses are a secondary consideration, as time is currently the more important factor. 

The Forces:

Anglo-Portuguese C-in-C: Gen Sir William Berwick

1st Division: Maj-Gen Robson (Competent)
1st Brigade: 1/5 Northumberland, 3/27 Inniskillings, 1/52 Oxfordshire (Light Infantry), 55 Westmoreland
2nd Brigade: 1/4 King's Own, 1/43 Monmouthshire (Light Infantry), 1/61 South Gloucestershire, 1/92 (Gordon Highlanders)

2nd Division: Maj-Gen Charlton (Competent)
1st Brigade: 2 Queen's Royal, 68 Durham (Light Infantry), 2/92 (Gordon Highlanders)
3rd Brigade (1st Division): 2 Cacadores, 6 Line (1 Porto), 7 Line (Setubal), 8 Line (Evora), 22 Line (Serpa)

Cavalry Brigade: 9th Light Dragoons, 16th (Queen's) Light Dragoons

Artillery: 7 Coy/8 Bn RA (Lawson's) 6lb

French C-in-C: Gen Sauret

1st Division: Gen Renault (Competent)
1st Brigade: 1/28 Light, 1/32 Light
2nd Brigade: 1/113 Line, 2/113 Line, 3/113 Line
3rd Brigade: 1/116 Line, 1/119 Line, Irish Legion
Divisional Artillery: 1/1 Foot Artillery 8lb

Initial Set-Up:

Allies advancing from the South (bottom of the table) - most of the French are posted around the central hill, with two Light Bns in the woods close to the British left.
The British right - cavalry and infantry being opposed by a single French infantry unit (1/119 Line)


 A British brigade attacks the French light infantry in the woods while the remainder of the army advances:


The Portuguese advancing up the road towards the French centre

British infantry attacking the French light infantry in the woods - a volley from 2/92 Highlanders disrupts 1/32 Light.
 The British clear the French out of the wood despite the losses to the 2/92 Highlanders, but the French artillery delays the advance of the Portuguese:


The Highlanders have been forced back with heavy losses after an even better volley from the French! However, the 68th and the 2nd have driven off 1/28 Light and 1/32 Light has withdrawn to re-group.  This French brigade has had enough and begins to withdraw.
The French artillery positioned just off the road drives back the Portuguese infantry.  The British infantry on the right advance towards some steady-looking Frenchmen...
 Hard fighting as the British struggle to make progress in the centre and on the right:


The crisis of the battle approaches.  The Portuguese have finally got through the French artillery fire and are about to assault.  Note the red markers on the British right-hand unit: 1/119 Line has just seen off 1/52 Light with heavy losses...

Closer-in: the French have stopped 1/52 Light in its tracks, and have now withdrawn slightly to prevent 3/27 Inniskillings from bursting through a gap in the French defences
 The Portuguese attack eventually tells on the French defenders...just in time!

The Portuguese, though suffering some losses, are causing heavy losses and confusion in the French defenders: one more push lads!

Note that the French on the hill, although they have been shaken, have seen off their British attackers temporarily, then withdrawn to maintain the defensive line

The pressure finally tells - as the Portuguese rout 2/113 Line, the French troops are pushed back and their morale collapses - precipitate withdrawal the only option remaining.  The Portuguese have broken through, just in time.


Result of the Battle:
Although there had been moments when he had doubted that he could break the French defence in time, Berwick was satisfied with the results of the battle as the French resistance had broken within the two-and-a-half hours he had allotted for the task, and although some units had taken some casualties, no units had suffered severely and his Portuguese had had the honour of taking the French guns.  Sauret was left cursing his luck - although they had fought hard, his Light units threw in the towel at quite an early stage which left the morale of Renault's division quite brittle, and although the artillery and 113 Line had thrown back the opposition initially, half-an-hour of tough fighting resulted in heavy French casualties and a precipitate flight to the rear.  Wellington's way to Ciudad Rodrigo is clear and Marshal Marmont will not have the time to prevent him.

Notable Performances:
Portuguese: 8 Line***, 22 Line***
British: 68 Light*, 2/92 Highlanders*, 1/43 Light*, 1/5 Foot*, 1/92 Highlanders*, Lawson's RA*
French: 1/32 Light*, 1/113 Line*, 2/113 Line*, 3/113 Line*, 1/119 Line*, 1/1 Foot Art*

Broken Units:
French: 2/113 Line, 1/1 Foot Art

Units were given a chance with 1* = 1 'pip on a D6 chance of advancement.  So a unit with 3* had to roll 4-6 to gain a level of experience.  All broken units, if they rolled 1-3, would lose a level.  The results of this were:

22 Line promoted to Veteran

Commanders thought to have performed well were given the chance of advancement.  This was applied to Berwick and Charlton, with a 5-6 needed.  Charlton is now rated as 'Decisive'.  None of the commanders were deemed to have performed badly enough to have a chance of losing a grade.

Game Notes:
The game was played with the Polemos Napoleonics General de Division rules.  The scenario is based closely on the first one in Scenarios for All Ages
All troops were rated as Trained.  Light Infantry units were rated as SK2, all other infantry as SK1.  The Light Dragoon were rated as Light Cavalry.  The Allies had 10 moves to reach the end of the board - the French army's morale gave way at the end of turn 8.