Heretical Gaming is my blog about my gaming life, featuring small skirmishes and big battles from many historical periods (and some in the mythic past or the far future too). The focus is on battle reports using a wide variety of rules, with the occasional rules review, book review and odd musing about the gaming and history. Most of the battles use 6mm-sized figures and vehicles, but occasionally 15mm and 28mm figures appear too.

Monday 31 July 2017

Battle of Thielt 1128: A DBA Refight (or two)

In Miniature Wargames 26, Guy Halsall took a break from writing Early Medieval scenarios set in Britain and moved to C12 Flanders, offering up a simple scenario for the Battle of Thielt.  In that pre-internet age, I believe that much of the value of scenario writing was simply in finding suitable information from hard to obtain publications and then translating it into useful information for the tabletop, both skills which Guy Halsall possessed in abundance!

Using the forces given in the article as the basic inspiration and then using the closest DBA list (IV/4a Feudal French Army 1072-1199AD) as the basis for both sides, I chose the following forces:

William of Clito: 9 x 3Kn (his was an all cavalry force, as suited an army of nobles fighting to keep down the commoners!)
Thierry of Alsace: 5 x 3Kn, 4 x Sp, 1 x 4Cb, 2 x Ps

William of Clito's break point was reduced to 3 units rather than the normal 4.

The terrain was very simple - William of Clito occupies a hill right in the centre!

The Deployment:

William of Clito's knights are located on the hill: he raises his personal standard on the right-hand side of the force; Thierry's troops are approaching the hill in their historical array: knights to the fore, foot to the rear

Different angle, hopefully showing off the gentle slope

A closer view of Thierry's force, a mixture of knights, spearmen, crossbownen and archers

...same again, but from the rear...

While William's knights look on from the summit of the hill
 Battle One
In this first engagement, both sides approach each other - William is keen to retain the advantage of the slope, whilst Thierry brings his crossbowmen up to support his knights and sends archers round the flank to try and tempt William's knights off the hill

The knights face-off; crossbow bolts start flying into the ranks of William's knights

A closer view

Conscious that in the end he must slowly lose to the crossbowmen if nothing else happens, William orders his reserve forward on both flanks

Thierry has formed a longer, stronger line, with spearmen now guarding the flanks of the knights

Note the recoiling knights in the centre of William's line, suffering from the one-way crossbow bolt traffic

As the crossbowmen maintain their fire, Thierry extends his line to the right and left with his foot soldiers

To break the deadlock, William detaches the knights on each flank to try and ride down Thierry's archers

...as we see mirrored on Thierry's left flank

Honours are even: the spearmen and bowmen on Thierry's left destroy William's knights, but the isolated bowmen on the right are ridden down in their turn...

Feeling that the odds are now in his favour, Thierry orders his line to charge!

Clash!
And I am well pleased by a lord
when he is the first to attack,
on horseback, armored, fearless:
thus does he inspire his men
with boldness, and worthy courage.
And when the battle is joined
each man must be ready
to follow him with joy:...

As it turns out, Thierry was wrong...the overlapping spearmen only achieve pushback results, but the knights in the centre of the line are overwhelmed by William's men!

A wider view: note William's detached cavalry on the right of shot prepare to return to the fray

William's victorious knights rip great holes out of the centre of Thierry's line and the day is won! (and lost...)
 Battle Two
One of the beauties of DBA is how easy it is for the toy soldiers to have another go before they are returned to their boxes! They line up again...(I have retained the same deployment, for reasons which I will return to in the game notes)

This time, Thierry tries to extend his line in both directions before moving forward; William tries to come off the hill, but will find his force somewhat slow (low PIP rolls)

William closes the distance whilst Thierry completes his manoeuvre: Thierry is careful to keep his knights on the plain, so that William's knights cannot use the impetus of the slope to their advantage

Thierry's crossbowmen again cause some disruption to William's knights, whilst covering the last moments of his deployment

William divides his reserve, so it is able to react more quickly to threats on either flank

Who will blink first?

Some highly efficient shooting by the crossbowmen destroys a group of knights in the centre of William's line, forcing him to commit his reserves. Thierry begins to move infantry around William's left flank

William refuses both flanks, unwilling to be outflanked and wishing to retain the benefits of the slope

Another view

Fighting begins on the flanks

Thierry tries to increase the pressure on both flanks

William's knights on the left triumph! Thierry's spearmen are destroyed

However, Thierry then launched his charge after his crossbowmen destroyed yet more knights; on this occasion, his knights and soldiers were much more successful, partly as a result of the creation of the additional gap in William's line.

William's knights eventually triumphed on the other flank too, but by this time the knights in the centre were falling like flies to Thierry's attack adn William's army was broken!
 Game Notes:
The events of the original battle are hard to replicate with any wargaming rules, as they involve feigning flight and knights breaking contact, and for the latter reason in particular, extremely difficult to replicate as a solo game.  To retain some feel of the original battle, I kept to historical deployments for both games so that Thierry was unable to fight an infantry battle, as if he were commanding a Scots army instead of a continental European one.  The advantage of the slope was hard to overcome, as was the knights ability to quick kill spearmen in good going.  So the key event in the second game was the destruction of the second element of knights by the crossbowmen - as well as physically reducing the strength of William's line by creating additional flanking opportunities, it also meant that Thierry only needed a single extra kill to twin the game.  Thierry's main mistake in the first game was launching his attack too soon and using his skirmishers as bait; his main mistake in the second game was not using spearmen elements in pairs to gain the support bonus.

Losses:

In game one, William lost one element, Thierry lost five (2 x Kn, 2 x Sp, 1 x Ps); In game two William lost four elements, Thierry lost three (2 x Sp, 1 x Ps).


DBA continues to give great, enjoyable games whilst replaying these old magazine scenarios.  If you do get a chance to browse a copy of this magazine, this article is well worth it for its discussion of the mechanics of C11-C12 cavalry combat and how that might be incorporated into one's rules of choice (WRG at the time).  The terrain was my home made game mat covering about 4'x4' of table, figures were from the  Baccus 6mm Norman range.

Sunday 30 July 2017

Wellesley Versus Junot in Portugal 1808 - An E-book Review

This short booklet, entitled Wellington Versus Junot in Portugal, 1808,  briefly recounts  the story of the battles of Rolica and Vimeiro in 1808, at the beginning of British direct military support to the Portuguese and Spanish against Napoleon's invading armies. According to the blurb, it is a re-working of an old booklet published many years ago by the writer, Mick Sayce. 


The main content starts with an overview of the general situation at the time, in particular the formation of the British force, then quickly moves in to the details of the Battle of Rolica and then the Battle of Vimiero. I would describe the content as roughly equivalent to that found in an Osprey guide. There is a moderately detailed description of the fighting, a reasonably comprehensive order of battle with strengths and commanders down to brigade level. Most usefully, he gives details of the actual composition of the French artillery, which I don't think I had seen before. The author tries to give some details of the formation and manoeuvres down to unit level, which will interest those concerned with such matters. The text is accompanied by plain but clear maps. The results of the battle are dealt with quite summarily: a few paragraphs describe the lack of follow-up and the Covention of Cintra. Losses are detailed for the armies involved, but not broken down to the level of individual units except in a few specific cases, which was a pity. It doesn't quote any primary sources directly: it clearly isn't aimed at that level of historical detail.
There are some appendices which give some brief biographical information on the commanders of both sides, more information on the orders of battle of both sides, some details on the use of shrapnel by the British and a bibliography.
The booklet is clear and reasonably well-written. I think it could be reasonably described as like an Osprey but without the pretty pictures and maps. To those enthusiasts familiar with Oman's Historyof the Peninsular War, supplemented with the monographs on the Napoleon Series, there will not be that much new here. I think the readers who will get most from it would be those wanting a level of detail equivalent to a feature-length magazine article (or monograph in a collection of articles) at a price rather lower than that of such a magazine.

Saturday 29 July 2017

Space Hulk - Introductory Missions

Over the last couple of days, we have been having a play of the first couple of missions of the classic Games Workshop game Space Hulk.  I don't have any particularly fascinating insights, except to say that the game really is good: the rules are easy to learn and intuitive to play, the scenarios balanced to give really tense games.  The children could grasp most of the rules pretty easily, so they could concentrate (with a little assistance) on the tactics:


MISSION 1: SUICIDE MISSION


A very close game this one: the Marine with Flamer just getting into the control room to blow it up before the Genestealers got him...

MISSION TWO: EXTERMINATION
 
blip...blip...blip...they are all around us!!

blip...blip...blip...massing just out of sight...

Interlocking arcs, the standard defence tactic in Space Hulk

Why we love Space Hulk: can the Marine Sergeant kill enough of the Genestealers to win the game before he is overwhelmed...

He did in fact manage it: the 30th Genestealer did go down before they got to him!!!

A Polemos General de Division Battle - Tabletop Teaser "The Battle of Soggy Bottom"

Although I have managed to get a couple of games in with the children, today is the first full-scale battle I have played in my new home.  Despite having big plans for the next few years, I settled on something realtively straightforward to christen my new table: one of the superb tabletop teasers written by Charles Grant and published in both Battlegames Issue 08:


and the collection of Battlegames tabletop teasers:


The Scenario: The aim of the scenario is to control a town and its approaches in the middle of a valley, hotly contested by two forces.  I used the same forces as given as the example in the scenario, Napoleonic-era Austrians and French.

The river valley: gentle hills surround the small fordable river, which contains a large-ish town situated on the river bed.  The Austrians are apporaching from the top-left, the French from the bottom-right

Looking down the valley from the right (French) side

A slightly closer look at the town.
The Orders of Battle:

The forces for both sides were approximately doubled to reflect the different battle sizes aimed at by the Grant Napoleonic rules and the Polemos General de Division rules respectively.  This meant both sides had a large infantry division, a light cavalry brigade and a heavy cavalry brigade.

Imperial French:

C-in-C: Gen Alliot (Capable)

1st Infantry Division (Gen Arnoux - Capable)
3 x Infantry Brigades each of 4 bases of Trained SK1 Infantry
1 x Infantry Brigade of 3 bases of Trained/Elite SK1 Infantry
1 base of 8lb Trained Foot Battery

Light Cavalry Brigade
3 bases of Trained Light Cavalry

Dragoon Brigade
3 bases of Trained Dragoons
1 base of 4lb Horse Artillery 

Imperial Austrian:

C-in-C: Gen Fichte (Capable)

1st Infantry Division (Gen Schiller - Plodding)
4 x Infantry Brigades each of 4 bases of Trained SK0 Infantry

1 base of 6lb Trained Foot Battery

Light Cavalry Brigade
3 bases of Trained Light Cavalry

Dragoon Brigade
3 bases of Trained Dragoons
1 base of 3lb Horse Artillery

As can be seen, very equal forces but with an advantage to the French in terms of the quality of their infantry and command.

Both sides arrived off the line of march in the following schedule:

Turn 1: Light Cavalry brigade and C-in-C
Turn 2: 2 Infantry brigades
Turn 3: Remaining infantry brigades and the divisional artillery
Turn 4: Heavy cavalry brigade

The Battle:


The French light cavalry arrives, with Gen Alliot at its head.

As do their Austrian counterparts on the opposite side of the board.

The Austrian light cavalry probe towards the town

The French corps clambers up the slopes

A wider view of the same

The Austrians, handicapped by their plodding divisional commander, make more pedestrian progress towards the town.  Some of the infantry begin to cross the stream.

The lead elements of both armies begin to come with range

The faster moving French have secured the area at the bottom of the town, whilst the Austrian infantry have just managed to get their first brigade across the stream

The French are slightly more strung-out as the French C-in-C has concentrated his efforts on rapidly gaining position with his lead elements.

The battle begins to develop its shape: cavalry and infantry face-off in mutual support to the south-west of the town, whilst French infantry cross the stream to try and extend their control onto the northern bank

A closer view of this key point: the French have secured the southern suburbs, and are crossing to try and force the issue on the North-Eastern approach too.

Gen Arnoux leads his troops into the attack!


With mixed results! The French are in the ascendant upon the right, led by Gen Arnoux in person, but the other Austrians have delivered a devastating volley and the left-hand French units retreat in considerable disorder

Pressing home their advantage, the Kaiserlichs surge forward and push the Frenchmen back into the stream

Gen Alliot leads his grenadiers in an attempt to break the deadlock to the South of the town.

The Austrian infantry hold on against Gen Arnoux's attack

And the Austrian infantry are victorious!!  Note the lead French battalion has been routed and the remaining French units are very shaken (the individual figures mark the level of disorder); Gen Arnoux falls at the head of his troops.

A renewed Austrian attack breaks the French brigade in its entirety!

Gen Alliot's attack fails; and the line is restored - he calls his artillery forward to resume the attack.  Note that the Austrian infantry has dropped back a little from the southern suburb to create a stronger line.

The victorious Austrian infantry surges across the stream and advances towards the French Dragoons.  More Austrian infantry begin to envelop the southern suburb.

The Austrians carry out a two-pronged assault against the French in the town, co-ordinated by Fichte and Schiller in person.

...menawhile, the Austrian infantry advances in its squared up the slopes.  Note that the French infantry begin another attack on the far bank.


With the battle going against him, Gen Alliot launches an all-out charge on the southern flank!

Whilst the French infantry tries to come to grips on the Northern bank.  Note that the Austrian infantry has made significant progress on the western axis of its attack on the southern suburb (somewhat against the odds, the French infantry have held on well on the other side)

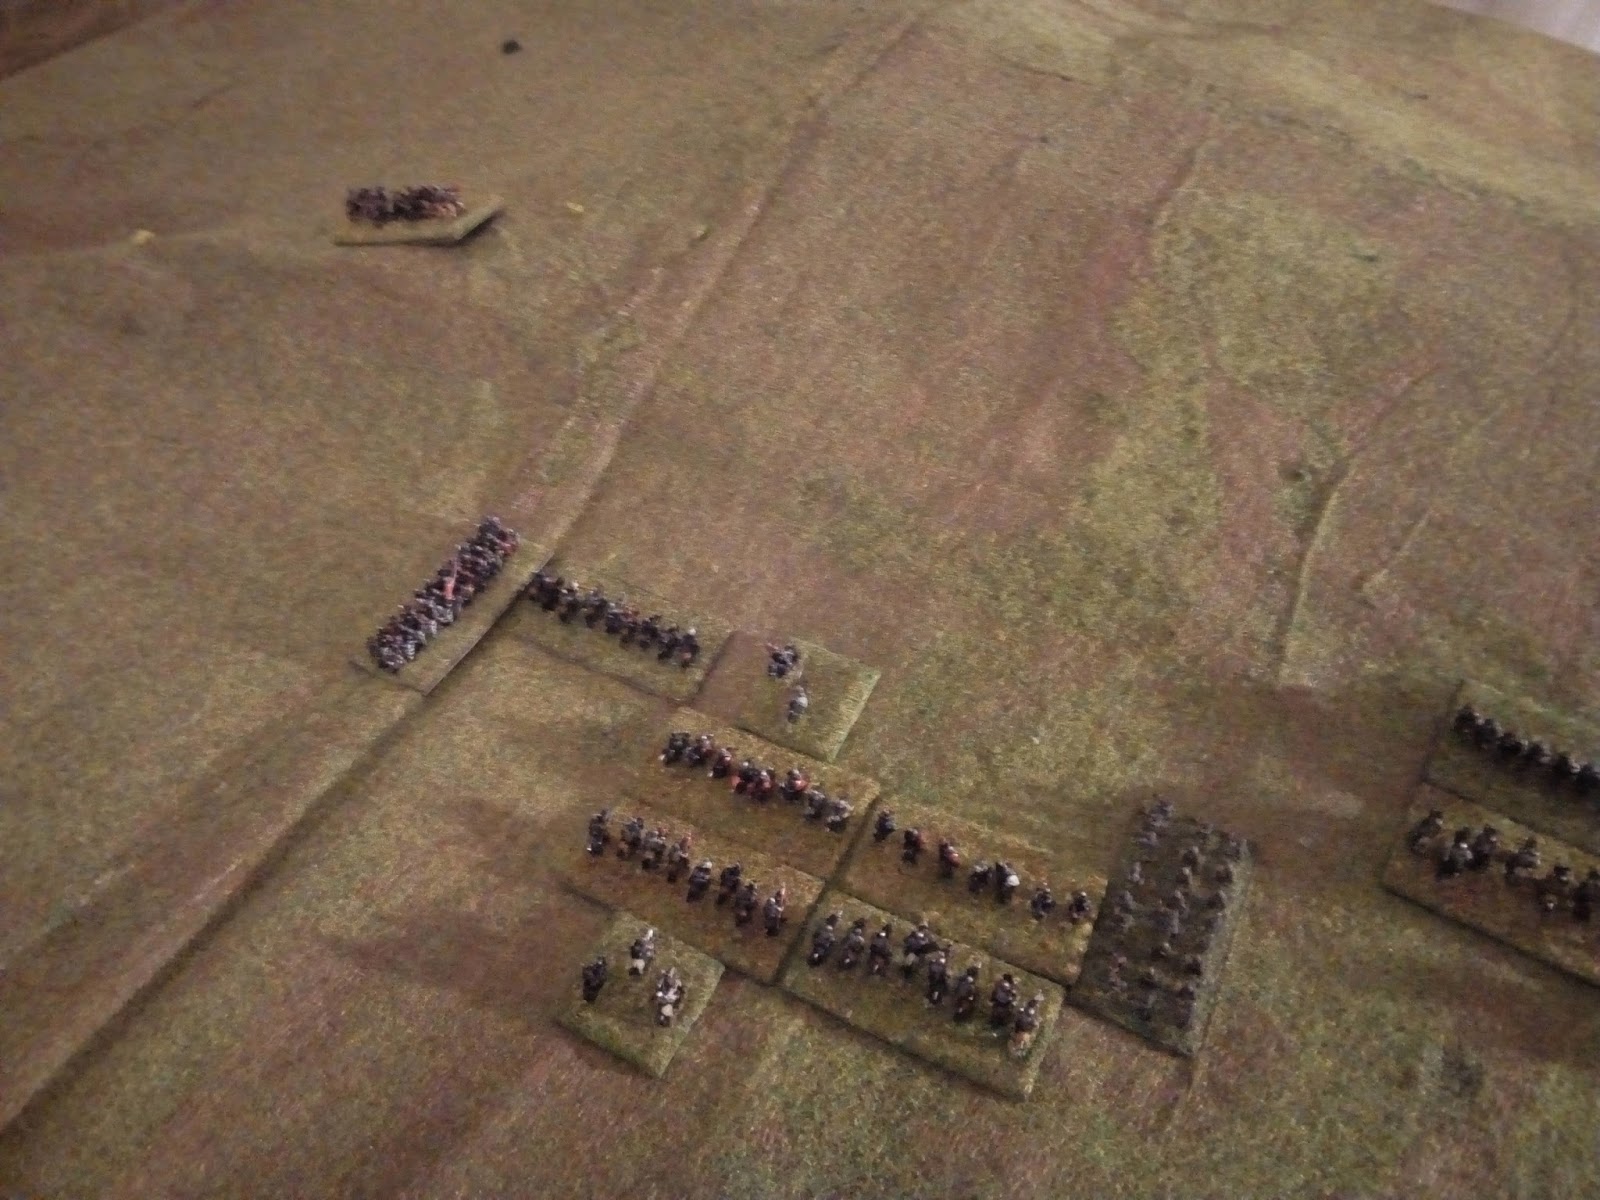
The Austrian infantry keep up continous pressure on the French dragoons.  Note centre-left the French battalion routing away from the town's suburb.

The French Dragoons launch a bold charge and are blessed with luck!  The Austrians rout back towards the stream.

However, the French light cavalry attack has not been blessed with success, and many of its units are routed or shaken.

The Austrians hold off another French attack on the Northern bank.

The French Dragoons pursue the routing Kaiserlichs.

The French position dissolves entirely...

...and the field is full of routing French units. 


The Austrian position is now secure on both sides of the stream and only the French Dragoons remain fit for combat.  The French commander admitted defeat at this point.
Game Notes:

An exciting action to get back into the swing of things.  The Austrians had the rub of the dice in this game, particularly in beating back the first French infantry assault - this was a really close and tough fight and the Austrian success here somewhat defined the game, enabling more freedom of Austrian manoeuvre in the centre.  Although the French Dragoon charge was blessed with good fortune, the French light cavalry charge was more unfortunate - but that attack was something of a last-gasp effort anyway.


As usual, I was using the Polemos General de Division rules, although with some minor modifications, these being the 'flatter' factors I have discussed previously, i.e:

Raw troops -1
Veteran troops +1
Uphill +1
Shaken -1
Towns are also given a defence factor of 1 rather than 2
All of the above worked fine.

The other modification was a slight change to the command rules, in that the rules that apply between commander and subordinate (if further than 6BW away or out-of-sight, only receive half TPs) is also applied to subordinate  and group (double the order points required to carry out an action, unless the commander-in-chief is himself within 6BW and in sight of the group).  This worked pretty well actually: if you are a Polemos player vaguely unhappy with the telepathic subordinate general to group aspect, then this is a solution that might work for you.  But as ever, the rules continue to give an excellent game.

Figures from Baccus 6mm, buildings a mixture of Baccus, Total Battle Miniatures and Leven Miniatures.  The game cloth was about 6' x 3.5'.  The game lasted for just over 20 turns and took just over 2 hours of play.