Heretical Gaming is my blog about my gaming life, featuring small skirmishes and big battles from many historical periods (and some in the mythic past or the far future too). The focus is on battle reports using a wide variety of rules, with the occasional rules review, book review and odd musing about the gaming and history. Most of the battles use 6mm-sized figures and vehicles, but occasionally 15mm and 28mm figures appear too.
Showing posts with label Gallic War. Show all posts

Tuesday, 1 June 2021

Ariovistus Triumphant! - Gallic War Campaign, 54BCE.

54 BCE:

Caesar persuaded the Atrobates to abandon Ariovistus, but in his turn, Ariovistus was able to bring the Cardurci back onto his side.  Caesar then ordered his XI and XII Legions, accompanied by the Aedui, to attack the Mandubi.  The Mandubi attempted to defend Alesia, but after a short if bloody siege, the stronghold fell to the Romans and their allies.  Ariovistus concentrated on further diplomacy, persuading the Andes to join him.  
Increasingly desperate to try and make some real progress, Caesar led the IX and X Legions to join the Averni, whilst the VIII Legion moved to join the Allobroges.  Ariovistus continued his run of diplomatic successes by getting the Tolosates onto his side.

A Gallo-Roman force (the Arverni, VII Legion and the Roman Cavalry) attacked the Cardurci in their fortress of Uxellodonum.  Although victorious, the siege was incredibly bloody, with the Cardurci and Arverni being reduced to mere remnants, and the Roman units combined only numbering around 2000 men.  Caesar meanwhile defeated the Santones at the Garumna, although losing quite heavily in the process; his pursuit did manage to eliminate all the resisting Santones, however.

 Ariovistus' diplomacy finally failed him, when he failed to persuade the Britons to throw their lot in with him; whilst Caesar persuaded the Treveri to join him (again)!  However Ariovistus quickly moved and eliminated these rebels.*

 At this point, Caesar called off the campaign.  Hoping that his string of battlefield successes would cover for the ultimately unsuccessful prosecution of the campaign, which he was hoping to recast as a punitive raid, he, with some trepidation, returned to Rome...

Position at the End of the Campaign:


Game Notes: Well, it was good fun while it lasted, but it fizzled out somewhat when I realized that Caesar couldn't win!  My strategic play as the Romans had been so bad that Caesar basically had no chance; with the major Gallic rebellion still to come it was inconceivable at this point in the game that Caesar could conquer enough territories to win.  So, my fault, basically.


Why was this so?  Again, my fault: in the test games of Caesar's Gallic War, I had done a reasonable job in teaching myself mechanically how the game worked, but because the optimal strategies for both sides are so different, I hadn't really appreciated until too late the real nature of what both sides had to do to win.  More by good luck than good management, my Ariovistus decisions really helped his cause whilst I was doing terribly and not even realizing it as Caesar.  I allowed too many tribes to go be in a position to go back to Ariovistus (who was admittedly a little lucky overall with the success of his diplomacy) rather than taking more risk to hold ground.  So by late 54 BCE, Caesar had so many territories to conquer that there just seemed to be no chance to pull it off, so he conceded.  I am looking forward to trying this one again at some point, but I need to play the boardgame a few more times to better grasp the nuances of how the mechanics and the VP-system interact, rather than just generating battles.  I will definitely be learning from this for future boardgame-driven campaigns.

Saturday, 27 March 2021

Gallic War Campaign Battle 9: Battle of the Garumna

Situation: In 54BC, Caesar finally turned his attention away from the Rhine frontier and the areas of the Helvetii, instead moving to pacify Southwest Gaul, which had become progressively more rebellious.  The previously quiescent Santones tribe had joined the Ariovistus and Caesar moved to quell this new rebellion, taking the IX and X Legions on the expedition.

The Santones originally blocked Caesar on the line of the Garumna river.  Lacking a viable bridge or ford, Caesar was forced to cross downriver, then move back along the opposite bank, committed to attacking the Santones in a strong position on a narrow front.

The Forces:

The Romans:

Commander: Julius Caesar (Inspiring, Steady)
Geta (Inspiring, Steady), 1 base Veteran Cavalry, 1 base Trained Cavalry, 8 bases of Veteran Legionaries, 2 bases of Trained Legionaries, 2 bases of Raw Legionaries, 1 base of Veteran Skirmishers, 1 base of Trained Skirmishers, 2 bases of Artillery
 
The Gauls:
 
Commander: Aviacos (Average, Steady)
Vindiorix (Average, Rash), 2 bases of Trained/Elite Cavalry, 2 bases of Trained Tribal Foot, 6 bases of Raw Tribal Foot, 2 bases of Raw Skirmishers

The Set-Up:

The Santones occupy the line of hills and a settlement (top); the X Legion (right) and IX Legion (left) approach


Vindiorix positions himself with the cavalry (left), with half of the tribal foot warriors within the wood on the hill; Aviacos commands the foot warriors around the settlement (right)

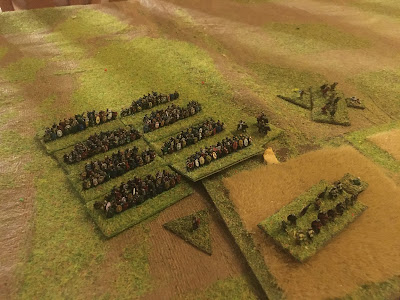
IX Legion (right) and X Legion formed up ready to advance.  Two cohorts of IX Legion form a reserve, as does the Roman cavalry, whilst the bolt-throwers are attacked to X Legion.

X Legion in a deep formation, ready to attack towards the Gallic settlement...

...whose warriors will attempt to defend it to the last

A closer shot of the foot warriors in the woods

The Battle:

As expected, the battle begins with a Roman advance, except on the far side of the stream (top), where Gallic javelinmen advance to skirmish with Caesar's slingers.


The remainder of the Gallic javelinmen attempted to delay and disrupt the X Legion, but in the confusion of battle, the Legionaires advance quickly enough to catch them...

...and rout them in short order, unsurprisingly.

Decision time for the Santones: do they wait on the defensive, or counter-attack? Vindiorix decides that there is no point in waiting to accept battle on Caesar's terms and seizes the initiative, ordering his foot warriors to advance from their hiding place in the woods (top-left) and ordering his cavalry, with him at their head (bottom-left), to charge the leading cohorts of the IX Legion (right)

The charge is completely successful!  The leading two cohorts are routed or killed in a few moments...

However, the slingers attached to IX Legion (right) coolly stand their ground and their missile fire breaks some of the disordered Gallic cavalry (centre), whilst the remaining Gallic cavalry are about to suffer the same fate at the hands of the remain Legionaries (top)

The Santones turn the tables again!  The charge of the foot warriors breaks the two remaining cohorts in the front line, who have to be reinforced by the Roman foot reserve.

However, these reserves again turn the tide and the Gallic right is now in full and headlong rout.

In the background, Caesar's X Legion has cleared the approaches to the settlement and is about to storm it, when the remaining Santones lose confidence and decide to withdraw hastily.

Another view of the position at the end of the battle.


 Game Results: A surprisingly close this one, since both the Santones and the IX Legion suffered heavily, although Caesar triumphed in the end. The Romans lost just over 1,600 legionaries (and a few slingers), whereas the Santones lost around 1,800 dead and wounded, and about 2,300 dispersed.


Game Notes: As ever, both the mechanics and calibration of Polemos: SPQR really encourage Gallic armies, with their mixture of cavalry and tribal foot, to attack - it is simply a better option than trying to defend in nearly all circumstances.  The downside - being caught disordered in pursuit after an initial victory - is just a risk that has to be taken, since otherwise they will simply forfeit their advantages to the Romans.  Vindiorix was probably justified in his actions therefore, although they led to defeat.

The set-up for this one was quite interesting.  Using the terrain generator in the rules (as I do for all these campaign battles), I managed to generate an unworkable battlefield (!).  This happens because it is possible to generate a river between the two armies with no crossing points.  Instead of rolling again (I hate doing stuff like that), I instead generated more battlefield at the 'top' of the original and changed the direction of the attack: the stream, track, the hill on the settlement and the hill above the stream were all created in this way (I assumed that the overall terrain would be more thick than in the original placement).

Obviously it has been a little while since I got one of these games to the table: time hasn't much changed my opinion of the rules!  They give a decent game with believable results, but sometimes feel a bit harder work than Neil Thomas or DBA.  Anyway, whatever, it was just nice to be able to get a game in and get the campaign moving on a bit.

Figures by Baccus 6mm, buildings by them and Timecast.

Thursday, 14 January 2021

The Gallic War 56-55 BC

 A campaign journal covering two years here, since I thought I had written one for 56BC but it turned out later that I hadn't...

56 BCE:

56BC began with Caesar ordering the XIII Legion and the Treveri to subdue the Menapi (which they did easily) and the Allobroges and Helvetii to invade the territory of the Sequani.  After besieging the Sequani's key fortress, the area was subdued and only a small rump of the Sequani escaped.  Ariovistus tried to persuade the Allobroges to desert Caesar, but this failed.  Caesar then continued operations with his Gallic allies, as the Mandubi and Helvetii again invaded the territory of the Leuci, to subdue it and them, and defeat their German allies.  The Leuci retreated, but then re-invaded with the help of some German allies.  In the resulting battle , the Germans were victorious.

His military plans having temporarily failed, Caesar turned to dilpomacy, bringing the Arverni to his side.  Ariovistus was less successful, being unable to bring the Santones to his banner.

In late summer, Caesar felt strong enough militarily to resume his stalled offensive, ordering a major tribal force stiffened with XIV Legion to conquer the Leuci and rid the area of the Germans - this was successful, with the Leuci being destroyed in small actions and the Germans retreating across the Rhine.  Ariovistus countered this by persuading the Aedui to join his side.  Then turning his attention to Southwest Gaul, away from the Rhine frontier, Caesar led a big expedition of the X and XI Legions, supported by the Arverni, to crush the Cardurci, which they duly did.  Ariovistus retaliated by persuading the Aedui to attack the weakened Mandubi tribe, which they successfully did, taking Alesia.

So the year ended with Caesar having made some small gains in the Northeast and and Southwest, but Ariovistus continually able to undermine these gains by persuading Gaulish tribes to defect.

At the end of the year, urgent political and family matters forced Caesar to return to Rome.  He would have to direct his campaign by letter and messenger for the next 12 months. 


55 BCE:

The year began with Ariovistus persuading the newly-subdued Sequani to immediately revolt and rejoin him.  Caesar in turn got the Bellovaci to join with him.  Ariovistus continued his diplomacy, but the Menapi were unmoved by this.  

Caesar was pleased to be able to send his armies some much needed logistical support from Rome, to ease their supply difficulties somewhat.  However, Ariovistus had the bit between his teeth: he persuaded the Sequani to subdue the Leuci, which they did easily.  He himself led a combined attack on the Treveri, forcing a battle which resulted in their army's defeat and their surviving warrior retreated to the succor of their fellow Roman allies, the Menapi.

Caesar tried to stabilize the situation in the North by persuading the Bellovaci to attack the Atrobates, and thus indirectly support the Menapi and Treveri.  However, the Bellovaci were defeated by inferior numbers of Atrobates in a series of skirmishes, upon which their host disintegrated!  Ariovistus quickly exploited the situation by throwing a much superior force against the Menapi and the rump of the Treveri, eliminating both as effective resistance and consolidating his control over the Gallic bank of the Rhine up to the Channel.  Realizing that his 'Allies-First' strategy had unraveled, Caesar ordered his legions to move into Gaul, Legions XI, XII, XIII, XIV going into Allobroges territory;
Legions VII, VIII, IX and the Roman cavalry going into Boii territory.  Ariovistus suddenly switched to diplomacy however, persuading the Helvetii to revolt again!

Furious with the disastrous results of this campaign season, Caesar ordered some all-out attacks: Legions XIII and XIV and the Allobroges attacked and vanquished the Sequani (again).  Meanwhile, Legions XI and XII attacked the Aedui; in the resultant battle, the Romans slaughtered the Aedui.

Despite this, the situation was greatly improved for Ariovistus by the end of 55BC, and a good deal worse for Caesar on his return from the Saturnalia festivities in Rome.


Sunday, 10 January 2021

Gallic War Campaign Battle 8: Battle of the Arar

 Gallic War Campaign Battle 8: The Battle of the Arar

Situation: Caesar had become increasingly alarmed by the course of events in 55BC, although being absent in Rome, there was a long time delay between an event and his knowledge of it.  After a string of military and diplomatic reverses to his Gallic allies at the hands of Ariovistus, he ordered a two-pronged attack up the Rhone valley.  The left-hand column, consisting of the XI and XII Legions, was ordered into the area of the Aedui, in order to subdue the rebellious tribe which had left its previous alliance and joined the Germans.

The Forces:

The Romans:

Commander: Falco (Inspiring, Steady)
Sextus (Average, Steady), 2 bases of Trained Cavalry, 2 bases of Veteran Legionaries, 10 bases of Trained Legionaries, 2 bases of Trained Skirmishers, 2 bases of Artillery
 
The Gauls:
 
Commander: Cannatus (Average, Rash)
Tascos (Average, Cautious), 1 base of Veteran/Elite Cavalry, 1 base of Trained/Elite Cavalry, 1 base of Trained Tribal Foot, 7 bases of Raw Tribal Foot, 2 bases of Raw Skirmishers 
 

The Set-Up:

The initial set-up: the Romans are approaching from the South, with their two legions in the centre and their auxiliary light infantry and cavalry on each flank; the Gauls have divided their forces into three, a horde of tribal warriors on one hill (left), their noble cavalry on the other hill (right) and their youths in the centre to harass the legionaries.

The Gallic foot warriors atop one of the hills, led by Tascos.

The youths of the Aedui tribe, ready to delay the Romans in the centre.

The Gallic Cavalry, led by Cannatus in person.

Another view of the whole battlefield.

The Roman legions: XI Legion is on the right (i.e. left in the photo), XII Legion is on the left.

The Battle:
The battle begins with the Roman legions wheeling to face the direction of the threat on each hill; feeling that they must attack or be slowly overwhelmed, Tascos leads his warriors towards the Romans (top)


A wider view: the Gauls are rapidly approaching the Roman legionaries (centre) but the Roman cavalry detachment is preparing to charge in support of their foot brethren (bottom)

On the other flank, Cannatus rides at the head of his horsemen towards the Romans

However, seizing the initiative quite brilliantly, the Roman cavalry (just out of shot to the bottom right) begins to charge and some of the Gallic cavalry flinches! (centre)

The Roman cavalry do not hesitate and drive back their foes!

The Roman cavalry supporting XII Legion also charge home, although the Aedui foot warriors are slightly less intimidated.  The Roman charge does halt the Gallic advance here, however.

On the other flank, half of the Gallic cavalry is in rout up the hill; Cannatus, with frankly little other option, decides to press on.

The Gallic foot cannot charge whilst they are in contact with the Roman cavalry.


Cannatus leads his cavalry into the mass of the XI Legion: the leading cohort is driven back in disorder, but it takes its place behind its supports whilst it attempts to rally (centre-bottom)

The reserve cohort vigorously pushes back and the Gallic horsemen are forced to give ground (centre); Cannatus becomes a casualty in the melee.

The XII Legion makes contact with the Gallic foot warriors; meanwhile, the warriors on the Gallic right (left) are pushed back by the Roman horsemen.

The leading foot warriors fall, are put to the sword, or flee, Tascos amongst them; the Roman cavalry and legionaries push on remorselessly.


The Aedui are losing heart quickly, shaken by the efficiency and violence of the Roman attack

The collapse begins

Meanwhile, the Gallic cavalry is in full flight on the other flank (top-right)

 Game Result: A fairly convincing victory for the Romans: being more skilled, better equipped and more numerous, this was perhaps not surprising.  The Aedui lost around 2000 killed and wounded, with the same again captured, deserted or dispersed: Roman losses were quite trivial, with their cavalry losing around a hundred, the legionaries even less.

Game Notes: A fairly straightforward game, which turned on a couple of key moments.  The Roman deployment allowed their cavalry to intervene effectively, as long as they could seize the initiative at the right moment - which they did.  This blunted both Gallic attacks, robbing them of speed and impetus.  This meant that the shock of impact did not do enough damage to the legionaries to cause anything but the mildest problems.  The loss of the Aedui's leaders quite early didn't help either, and afterwards the tribal warriors were ground down.  The Gallic skirmishers were too weak to intervene effectively, which is typical of light infantry in this game - they are really only good for delaying advances and causing otherwise pointless tempo point expenditure.   Conversely, the spoiling attacks of the Roman cavalry were probably the most important bits of the battle.  Why was this so?

It is an emergent property of the 'groups' used by Polemos: SPQR.  It isn't really explained as such, but these are the key elements of the game, both for good and bad.  Unlike in DBx-games, these groups have to be constituted before the game.  Therefore the only way that bases can be voluntarily 'detached' is as single bases: the tempo point cost is prohibitive unless you really need to do this.  However, bases which are shaken also stop being part of the group until they are rallied back to normal.  This causes some interesting effects:

So looking closely at the tribal foot, one of the leading bases is shaken by the Roman cavalry (you can just see the shaken marker between the triangular-'advance' marker and the tribal foot base).  It is therefore 'not' part of the group at this point.

As it was halted, the group no longer has its 'advance' orders and because the base is shaken, the bases behind it cannot interpenetrate and therefore the remaining 7 bases, all of which are still in the group, cannot charge.  The only base that could charge would be the unshaken leading base, if it did so independently.  This would be so unlikely to succeed as to be not worth the bother.  There is also a hidden danger in using 'depth' rather than 'width' to stack combat bonuses in Polemos:SPQR, although tribal foot doesn't really have that much choice: 'shaken' units to the flank can provide support, 'shaken' units to the rear cannot.  Since one of the good mechanics of the game is that shaken units can be relieved by their rear supports, this comes up quite often. Thus, for tribal foot to win, they must successfully charge home - if a fight lasts for more than a couple of rounds, it is much more likely that the Romans will win it.

Everything I have written about groups above is directly taken from the rules.  It is however taken from mentions in many separate places.  This is one of the problems that makes the rules more confusing than they need to be, important concepts are widely separated and not treated holistically in the play examples.  Those examples are generally fine, but they needed to be much more in depth, I think, to truly make Polemos:SPQR a great ruleset.  With the exception of Polemos: Ruse de Guerre, which uses a much simpler system, the concepts of 'groups' and 'forces' were under-explained, and perhaps under-developed, in many of the Polemos sets, considering their importance to play.

On a less theoretical note, I used two 3'x2' gameboards today, rather than my gaming mat.  I decided that there was a bit too much room on the flanks in a couple of my previous games, so I have started using a formula which is number of bases in the largest force x 6cm is the minimum width to be used, up to the next 'foot'.  So the Romans in this game had 16 bases (excluding commanders and artillery), so a minimum of 96cm, therefore a 4' wide board was used.  I was a bit happier with this.

Figures as ever by Baccus 6mm.


Saturday, 2 January 2021

Gallic War Campaign Battle 7 - The Battle of Calubriga

 Battle 7: The Battle of Calubriga

Situation: The situation has remained fairly similar into the first half of 55BC: the Romans and their Gallic allies are attempting to clear the Gallic frontier up to the Rhine, whilst the Germans and their Gallic allies try to prevent this by continually instigating revolts.  Ariovistus, having got the Mandubi to abandon the Roman cause and join his own again, has launched another invasion of the Treveri's territory...

The Forces: 
 
The Germans:
Commander: Ariovistus (Inspiring, Steady)

Germans: Commander Zelig (Inspiring, Cautious), 2 bases Trained Cavalry, 8 bases Trained Tribal Foot, 2 bases Trained Skirmishers
 
Gauls: Commanders Biuito (Average, Rash), Andoston (Average, Cautious), 1 base Veteran/Elite Cavalry, 1 base Trained/Elite Cavalry, 1 base Trained Tribal Foot, 3 bases Raw Tribal Foot, 2 bases Raw Skirmishers

The Roman-Aligned Gauls:
Commander: Samo (Average, Steady)
 
Gauls: Commander Lukotrix (Poor, Rash), 1 base Veteran/Elite Cavalry, 1 base Trained/Elite Cavalry, 1 base Trained Tribal Foot, 7 bases Raw Tribal Foot, 2 bases Raw Skirmishers

The Set-Up:

The defending Treveri have a position around a small settlement (bottom) flanked by hills, a wood and some enclosures (centre).  Their youths are in the woods and the enclosures, with their cavalry on the hill (bottom-left) and the foot warriors in the settlement and enclosure.

A wider shot, where one can see the Gallic reserves (bottom); there are also 1000 warriors just out of shot on the hill to the right, defending against the flanking movement.

The Battle:

The battle begins ominously for the Gauls - their youths are surprised by the accuracy of the German youths' spear-throwing and retire deeper into the wood.

Ariovistus moves his troops forward, starting to veer towards the enclosure...

Meanwhile, Ariovistus' Mandubi allies arrive promptly and in good order on the Treveri flank.

Ariovistus leads his warriors into the enclosure in person, sword in hand...

The Mandubi eschew subtlety and charge the small holding detachment of Treveri warriors up the hill.

Ariovistus' charge is successful and the leading Treveri warriors fall under his sword...

Whilst the Mandubi's charge has been equally successful, routing the Treveri foot warriors.

Ariovistus' charge continues and routs the remaining Treveri warriors out of the enclosures; the Treveri youth, in some desperation, try to get around the flank of the advancing Germans (top).

Samo, realizing he faces quick defeat unless he can seize back the initiative, puts himself at the head of the Treveri horsemen and charges the German cavalry: Zelig falls, wounded by a Gallic sword and his comitatus is pushed back (top-right); the other fight is more equal.

Unfortunately, there were a lot of unusable photographs towards the end of the battle, so I will have to summarize events: after a short but sharp struggle, Ariovistus managed to break into the settlement.  The Treveri's reserves counter-attacked, and forced back some of the German infantry and causing severe casualties - but the Mandubi arrived on the flank, Ariovistus restored the situation, and the brave Treveri were surrounded and eliminated - this is the position that one can see now.  Note (top-left) that the leading Treveri reserves actually managed to push the Germans back quite far, but in the end, numbers told...


A wider shot of the end of the battle.  The cavalry are still locked in indecisive combat (left), whilst Samo having led his Comitatus to victory in the charge, has only just managed to get his warriors back in some kind of order, as the rest of his troops are defeated.  The pincer movement is hopefully clear around the settlement, as are the routing Treveri foot warriors from the settlement (bottom). 

Another wide shot.  As is typical, the two skirmish fights were entirely inconclusive (centre, above enclosure; and left, at edge of wood).


Game Results: Despite some brave local fights, the Treveri suffered very heavily, losing c.2200 warriors killed and wounded, and about the same have fled. Both their commanders survived and escaped, however.  The German on the other hand lost only around 600, roughly evenly divided between their foot and horse warriors, although this did include Zelig, who died at the head of the horsemen.  The Mandubi suffered only trivial loses.

Game Notes: The Treveri's fate was more-or-less sealed when the Mandubi turned up right at the beginning of the battle.  As is typical in Polemos:SPQR, the attacker can stack up odds in their favour so heavily as to make them all but certainties.  

There were a couple of points about how the rules played out in this battle.  The rules for skirmishers outside the woods skirmishing with enemy skirmishers at the edge of the woods wasn't particularly clear.  The rules put in range restrictions for ranged weapons in woods but it isn't clear how that applies to skirmishers firing into, and out of, the edge of woods.  Interestingly, javelin-armed skirmishers are typically more effective than archers in these rules.

There were also some interesting interactions in the infantry combat when Tribal Foot break Tribal Foot, when both are in multiple ranks.  I think the intended outcome should be that if attacking charging tribal foot break their immediate opponent, then the immediate opponent is removed and the base behind gets a single shaken point.  The charging tribal foot has to pursue in their next movement phase (p.33).  At this point the originally attacking tribal foot (assuming it isn't attacked first) then has to attack the second defending tribal foot base.  I am not clear whether this should be an advance-to-contact or a charge. 

This kind of thing (i.e. combat outcomes) is the most awkward part of most Polemos sets (excepting Ruse de Guerre, which eliminated most of the issues by eliminating most 'outcome' types of movement).

Anyway, the game was generally fine, the Treveri were always on a bit of hiding to nothing, but the individual combats and general shape of the battle all seemed plausible enough.  

Figures as ever by Baccus 6mm.