Polemos ECW, the ECW rules produced by Baccus 6mm, normally uses a figure scale of 1 figure = 12.5 men (or so). To enable me to play it on my existing table with my existing collection, I adjusted the scale so 1 figure = 20 men (i.e, a base of foot would represent 720 men rather than 500, a base of horse would represent 180 troopers rather than 125) and allowed 1 base width to represent about 110 yards. I supposed that this change would be small enough to allow me to play the rules as written, without doing undue violence to ranges and movement distances and so on.
The Polemos ECW rules don't have a scenario for Edgehill as such, but do have an army generator which gives suitable details. Adapting this slightly, I used the following orders of battle:
THE ROYALISTS:
C-in-C: Charles I (Bad)
Left Wing:
Commander: Lord Wilmot (Good)
1 base of Trained Dragoons
1 base of Artillery
1 brigade of 2 bases of Trained Horse (S i.e. uses Swedish order and tactics)
1 brigade of 1 base of Trained/Elite Horse (S)
1 brigade of 2 bases of Raw Horse (S)
1 brigade of 1 base of Veteran Horse (S)
Centre:
Commander: Earl of Lindsey (Bad)
2 brigades of 3 bases of Trained Foot (M i.e. equal mixture of shot and pike)
1 brigade of 4 bases of Raw Foot (M)
1 brigade of 3 bases of Raw Foot (M)
3 bases of Artillery
Right Wing:
Commander: Prince Rupert (Good)
2 brigades of 2 bases of Raw/Elite Horse (S)
2 brigades of 2 bases of Raw Horse (S)
1 base of Artillery
PARLIAMENT:
C-in-C: Earl of Essex (Bad - commands centre directly)
Left Wing:
Commander: Sir James Ramsey (Bad)
1 brigade of 2 bases of Trained Horse (D i.e. uses Dutch order and tactics)
1 brigade of 1 base of Trained Horse (D)
1 brigade of 2 bases of Raw Horse (D)
1 brigade of 1 base of Raw Horse (D)
1 base of Raw Dragoons
Centre:
1 brigade of 6 bases of Trained Foot (SH i.e. shot-heavy)
1 brigade of 5 bases of Raw Foot (SH)
1 brigade of 6 bases of Raw Foot (SH)
3 bases of Artillery
1 brigade of 1 base of Trained Cuirassiers (D)
Right Wing:
Commander: Earl of Bedford (Bad)
1 brigade of 2 bases of Trained Horse (D i.e. uses Dutch order and tactics)
1 brigade of 1 base of Trained Horse (D)
1 brigade of 2 bases of Raw Horse (D)
1 brigade of 1 base of Raw Horse (D)
1 base of Trained Dragoons
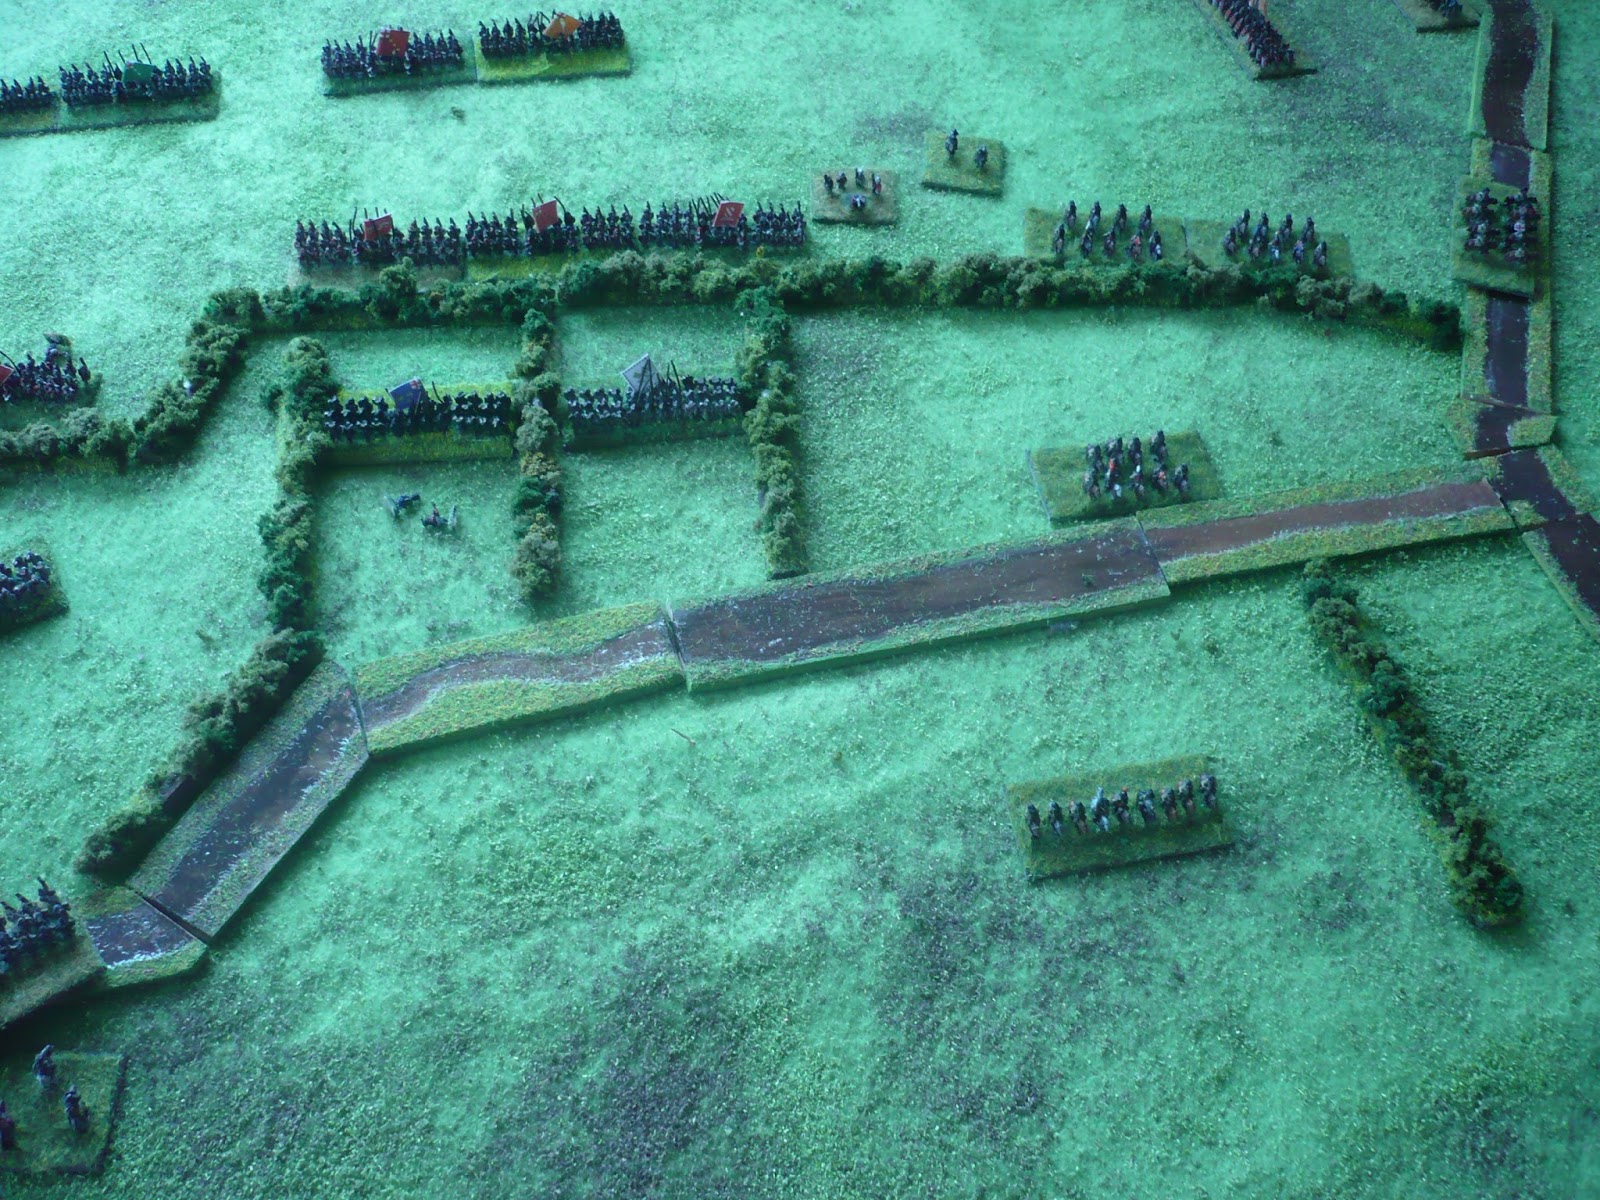
The Battlefield & Deployment:
 |
| Royalists at the bottom; Parliamentarians at the top. The sides are divided by a small ditch, whilst the Parliamentary left wing was arrayed behind some hedges |
 |
| Closer shot of the centre; the sides separated by a small ditch |
 |
| The Royalist right / Parliamentary left; a good view of the Parliamentary troops lining the hedges; with another small ditch running perpendicular to the battle lines |
 |
| And a closer shot of the same |
 |
| And the Parliamentary infantry in the centre |
 |
| Both sides advanced and honours are about even in the initial clash: the left-hand Royalist cavalry troop routed its opponent in short order (and captured the Earl of Bedford to boot!) but was then routed immediately when hit by Parliamentary supports: Royalist cavalry is at its most vulnerable just after it is victorious in the Polemos rules. The remaining Royalist cavalry has been checked. |
 |
| Same position, different shot |
 |
| The Royalists have regrouped and are trying again; the Royalist artillery has managed to repulse the Parliamentary troopers trying to cross the ditch |
 |
| Further losses to both sides; but the Royalists have managed again to get a foothold on the far side of the ditch - their troopers are again wavering however, and the remaining Parliamentary Horse is advancing... |
 |
| Same shot, but notice to the left that the Parliamentary troopers have finally forced the Royalist artillery back; also note the infantry clash getting underway to the right of the shot |
 |
| Renewed fire from the Royalist dragoons and artillery drive the roundheads back over the ditch; the Royalists seem to have gained the upper hand in the cavalry fight here and the Parliamentary infantry is trying to hold them off |
The Battle - The Royalist Right
 |
| Under Prince Rupert, could there be any other choice but for him to lead the Royalist Horse into the charge? The Parliamentary horse has been thrown back from part of the hedge, but at other places they have bravely resisted and sent the cavaliers scurrying back |
 |
| Determined resistance then pushes all the Royalist troopers back! Prince Rupert reforms them for another go. |
 |
| In goes the charge! The roundheads are routed |
 |
| But the Parliamentarian reserves trot forward and contact the Royalists - and Prince Rupert is taken! |
 |
| The Parliamentary dragoons are routed but then the Parliamentary troopers break the remainder of the Royalist first line; the other Royalists still cannot gain the hedge |
The Battle - The Infantry Centre
 |
| The initial clashes weren't recorded, but this is the position as the infantry fight hots up: the leading Royalist infantry (blue and white flags) decline to trade fire with their better-armed opponents and plunge into the centre of their opponents line, scattering a battalia as they take the ditch |
 |
| Same position, different shot |
 |
| Royalist infantry try to get to grips with their opponents over the ditch and through the hedgerows |
 |
| Both sides take losses and have units routing; but overall the Royalists have pushed the Parliamentarians back to the hedge in the centre; the right-wing Parliamentary foot are still holding advanced positions near the ditch |
 |
| Mixed fortunes: a Parliamentary infantry bases is routed (near the artillery on the left) but two Royalist battalia have been routed; this was the limit of the Royalist advance |
The End of the Fight on the Left
 |
| The last Royalist cavalry advances over the ditch |
 |
| One of the Royalist cavalry units routs some Parliamentary troopers (top-left) and goes off in a wild pursuit; the raw Parliamentary infantry successfully holds off the Royalist troopers with its continuous accurate musketry: some of the Royalist cavalry is becoming increasingly shaken by the hail of musket balls |
Collapse of the Royalist Right
 |
| Bereft of Prince Rupert's inspirational leadership, the Royalist cavalry is in increasing disorder, pushed back over the hedge and the ditch |
 |
| The Parliamentary troopers celebrate a decisive victory - all the Royalist cavalry has been outfought and is in rout |
 |
| The overall position on the right; Parliament has triumphed decisively on this flank |
 |
| The remaining Royalist cavalry on the left was finished off by the Parliamentary musketeers; despite the routing of more Parliamentary infantry in the centre, Royalist morale collapsed at this point and forbade advancing to contact for all but elite troops; as the Royalists no longer had any, this spelled defeat and the end of the battle |
 |
| Royalist infantry towards the right are in the middle of their last ditch effort to break through the defensive line on the hedge |
 |
| Same position |
 |
| The Royalist left, denuded of troops as the Parliamentary cavalry have finally captured the guns and driven off the Dragoons in the hedged enclosure: Royalist morale collapsed at this moment |
Game Notes:
An interesting and hard-fought encounter. In general the rules coped well and gave a quick game, but the abiding weakness of Polemos rules remains - the moves and combat outcomes keep on generating situations where it is hard to know immediately how to resolve them; I can normally work out what should happen or come to a reasonable compromise - and these situations are becoming fewer as I internalize the rules - but they will always exist I imagine, partly as the bases interact with the terrain in odd ways, partly because the rules don't use the "conform" mechanics of DBx, which add complexity, but remove the possibility of uncertainty. The guts of the game - tempo system and the combat system - continue to work well and give believable outcomes.
The game was fought on a 5' x 3' table. It lasted about two-and-a-half hours of playing time. Figures were from the Baccus 6mm ECW range.
Great write up. I've got the Polemos rules but never really warmed to them, I think I might have to give them another try though. Have you looked at the Baroque rules? I've been using them for 6mm ECW and, a few tweaks aside, they seem to work very well.
ReplyDeleteThanks very much. I haven't used Baroque, because I didn't really get into Basc Impetus. I may have another look.
ReplyDeleteI'd be really interested in your thoughts. There are a few things about both sets of rules (Polemos and Baroque) I really like and a few things I don't and I just can't make my mind up which system to stick with!
ReplyDelete