Heretical Gaming is my blog about my gaming life, featuring small skirmishes and big battles from many historical periods (and some in the mythic past or the far future too). The focus is on battle reports using a wide variety of rules, with the occasional rules review, book review and odd musing about the gaming and history. Most of the battles use 6mm-sized figures and vehicles, but occasionally 15mm and 28mm figures appear too.
Showing posts with label The Portable Wargame. Show all posts

Tuesday, 26 December 2023

A Portable Wargame - The Nutcracker (Miniature Wargames with Battlegames #386)

Back in Miniature Wargames with Battlegames #386, Arthur Harman penned an intriguing, if whimsical scenario, converting the fight between the toy soldiers and the mice in The Nutcracker into a wargame! 


He based the mechanics upon those in Bob Cordery's The Portable Wargame which are always a suitable 'go to' game for getting something quick yet tactically interesting to the table in a variety of periods; furthermore, it cries out for adaptation and modification of every sort, and Arthur Harman had clearly taken on the challenge.  I have mulled over getting it to the table over Christmas for a couple of years now, and this year, having finally got around to purchasing and painting a suitable artillery piece, I finally managed it...


The board: the ferocious rodents to the left, behind the kitchen door...

There they are..

Clara and a dashing officer; the Mouse King wants to capture Clara to torture her, for all the crimes committed by humans against mice...

Another shot

As the rodents begin to pour out from the kitchen, the officer calls upon his soldiers who were in their toy box...the soldiers wheel out their cannon first...

The rodents advance across the floor...

The artillery crew, having missed wildly initially, have now got their eye in...

The effectiveness of the gun gives the soldiers more time to deploy and advance

The rodents knock down a couple of the toy soldiers, but some of the rodents are running and more or stunned from the effects of the soldiers' gun...

Clara and the officer move forward to revive some of the fallen soldiers...

The artillery crew continue to splatter rats at a high-rate of knots...the infantry soldiers advance - quite a few of the rodents are running for the kitchen door

The Rodent King (the standard bearer) and the dashing officer trade blows in the centre...

The King is forced to retreat, and he desperately needs to revive and revitalize some of the wavering rodents..

The officer is knocked down by one of the rodents! The mass of fallen rodents and soldiers in the middle of floor is making manoeuvre very difficult...a small squad of enterprising soldiers is moving round to try and block the door!

The King is trying to hold the door, whilst rallying some of the fleeing rats

The fighting is ferocious!

Many soldiers fall, but at last the officer runs the Rodent King through!!

Clara, and the day, is saved!

Clara (excitedly): Oh well done! The soldiers were very brave, weren't they?
Officer (gravely): They were. But as the foremost soldier of our age has noted, it is with artillery that one makes war, and that made the difference.


Game Notes:

Jolly good fun, and with a surprisingly rich set of tactical nuance given the nature of the game. In particular, the maximum square occupancy of four models provided interesting restrictions on movement. The Rodent King in particular has many options of things to do - fight, rally, revive - and not enough time to do all of them, and he can't take too many risks, for if he is defeated it is an instant loss. Clara's twin roll as objective for one side and combat medic for her own side provides similar conflicts. The artillery made the difference for Clara and the toy soldiers, but this was by no means a foregone conclusion - after being totally ineffective initially, they followed the old gamers' dictum of if in doubt, roll high, and for a crucial period it felt they couldn't miss. Incidentally, I think this is the only part of the article which doesn't have a specific mechanic actually written within it and instead refers back to the Portable Wargame book itself. I used 5-6 to hit the target square, otherwise a miss lands one square distant, with 1 being orthogonally above, 2 to the right, 3 below and 4 to the left. 
 
For a Christmas game, I really enjoyed this - will be giving it another go! Figures were:
Toy Soldiers - Perry Miniatures British Napoleonics
Rodents - GW Skaven
Clara - One of the North Star girl elementalist figures

Saturday, 19 November 2022

Portable Wargame Battles 03: The Villers-St.Pierre Road

The last battle in this mini-series of games using Bob Cordery's The Portable Wargame adapted a somewhat larger original scenario.  Again, a fight set in summer 1941 on the Eastern Front has been transposed to 1940 on the Western Front.  In this action, the German Corps is attempting to trap and destroy the remnants of the British line-of-communications troops.
 
 
The structure of this scenario is that the two German infantry divisions attack from opposite side of the battlefield and then slightly later the German Panzer division arrives to assist. 714 Infantry Div will attack from the West, the approach defended by 21 (Westmoreland) Division.  Shortly after, 790 Infantry Div attacks from the East, which is defended by 84 (Cumbrian) Division.  101 Panzer Division will follow 714 Infantry Division.  The remnants of 'Bobforce' are in reserve in the Northeast.
 

The forces: 

Germany
714 Infantry Division:
Command & Staff (Good)
7140 Infantry Regiment (3 SP, Average)
7141 Infantry Regiment (3 SP, Average)
7142 Infantry Regiment (4 SP, Average)
714 Artillery Regiment (2 SP, Average)
714 Anti-Tank Battalion (2 SP, Average)
Breakpoint: 5 SPs 
 
790 Infantry Division:
Command & Staff (Average)
7900 Infantry Regiment (4 SP, Average)
7901 Infantry Regiment (4 SP, Average)
7902 Infantry Regiment (4 SP, Average)
790 Artillery Regiment (2 SP, Average)
790 Anti-Tank Battalion (2 SP, Average)
Breakpoint: 6 SPs 
 
101 Panzer Division
Command and Staff (Good)
101 Panzer Regiment (3 SP, Average)
102 Panzer Regiment (3 SP, Average)
101 Panzer Grenadier Regiment (4 SP, Average)
101 Artillery Regiment (2 SP, Average)
101 Recce Regiment (2 SP, Average)
101 Anti-Tank Battalion (2 SP, Average)
Breakpoint: 6 SPs 
 
British Forces:
21 (Westmoreland) Division:
210 Infantry Brigade (4 SP, Poor)
211 Infantry Brigade (4 SP, Average)
212 Infantry Brigade (4 SP, Poor)
21 Regt RA (2 SP, Average)
212 Regt RHA (AT) (2 SP, Average)
Breakpoint: 6 SPs   

84 (Cumbrian) Division:
Command & Staff (Average)
84 Infantry Brigade (4 SP, Average)
85 Infantry Brigade (4 SP, Average)
132 Infantry Brigade (4 SP, Average)
8 Regt RA (2 SP, Average)
48 Regt RHA (AT) (2 SP, Average)
14th Lancers (1 SP, Average)
Breakpoint: 6 SPs  

'Bobforce':
Command and Staff (Average)
1st Tank Brigade (3 SP, Average)
2nd Tank Brigade (3 SP, Poor)
Reconnaissance Force (2 SP, Average)
 

 The Set-Up:

21 Div to the West (left), 84 Div to the East (right), 'Bobforce' in reserve in the North-East (top-right)

A closer look at 21 Div.

And at 84 Div.  I haven't gone back and checked so I couldn't remember if 84 Div were expecting an attack from the East...so for these purposes, I decided they weren't.

and lastly, the remnants of Bobforce on both sides of the bridge

The Battle:


714 Infantry Div attacks, concentrating on the right flank of 21 Div; the anti-tank guns set-up to deter any counter-attack from Bobforce

The flanking British brigade has lost half its strength very quickly, but the rest of the Division has managed to get into some kind of line

84 Div redeploys to face the actual threat direction

Bobforce moves down the road to put itself into a central position

790 Infantry Div attacks!  Its brilliant attack on the hill quickly forces the British infantry back into the woods and village, but it has suffered some losses amongst its anti-tank guns (bottom)

The remorseless German attack from the West has caused heavy casualties amongst the British infantry and artillery and the whole division is 'just' still in the fight.  Some good shooting is starting to wear down the Germans too in this sector.

Heavy British fire from 84 Div is stopping the advance of 790 Infantry Div off its startline

21 Div has held-on and has now been partly relieved by Bobforce, whose arrival has stopped 714 Div cold, with heavy losses.

84 Div and 790 Inf Div are engaged in a slugging match, in which the Germans are slowly pushing forward, and casualties are slowly mounting

714 Inf Div is overmatched now and is being slowly ground down by the British infantry and tanks

The thin khaki line has stopped the Germans, but its own losses have mounted now

714 Inf Div is down to its last remnants, but 21 Div has now lost its offensive power too

101 Panzer Division arrives and starts to turn the tide, immediately causing losses amongt the British armour

German firepower starts to rapidly ground down the remnants of 21 Div

21 Div's survivors are in full retreat, covered by Bobforce which has also suffered quite heavily

84 Div has given a little ground, but at the expense of some German losses

However, hearing of the arrival of 101 Panzer, it begins a phased withdrawal with its Right retreating behind its Left: the lack of mobile German forces here makes it very hard to prevent this, if the mounting German losses hadn't installed some caution anyway

21 Div retreats along the road

790 Inf Div has essentially been stopped and is unable to pursue: its losses have been just too heavy

A closer look at the British rearguard

It is close, but the British troops have managed to reach the bridge

The German attack has caused further losses, but in the main has been driven back by the rearguards as they cross the bridge

84 Div continues its phased withdrawal

The position at the end of the battle.  The Germans have just triumphed - only 101 Panzer Division is capable of any further offensive action - but the remnants of three British divisions have managed to safely escape towards the Dunkirk pocket...

Game Notes: The original scenario also took place on an 8x8 gridded board which would have been a very crowded battlefield indeed.  This 13x8 battlefield seemed to match the forces a little better and produced a marvellous game.  The rules are such that withdrawals are emminently doable and fun parts of the game and so suit campaigns admirably: the 'bitter end' isn't bitter in this game, it is actually really fun.  I don't think I encountered any additional issues with the game rules per se although I did learn a few things about how best to do 'game management' with larger forces, which should make it go a bit more smoothly for me next time.

I used the basic rules without really adding the optional extras given for more random activation and to be honest, I didn't necessarily feel that I missed much without them, although perhaps that will change after repeeated plays.  I can really see these rules as being perfect for playing through an entire campaign in a day or two, like one could use DBA for.  In any case, I played three games of this today and I could have easily stretched that to six I think, in the right circumstances, or perhaps even more.

Infantry by Baccus, guns and crews are a mixture of Baccus and Heroics & Ros, vehicles a mixture of Heroics & Ros and GHQ, buildings by Leven.

Portable Wargame Battles 02: Battling Bobforce

 The next battle in this sequence of games using The Portable Wargame rules for the mid-20th Century features the clash of a German Panzer Division with a British armoured force.  Historically, the British 1st Armoured Division hadn't been brought into action yet, although there was plenty of British armour in action, so I, in the style of the time, have christened the British as 'Bobforce'.  Again, this action is relatively even in terms of strength, so the Germans have to take advantage of the initially scattered British deployment.


The original Bob Cordery scenario which this was adapted from can be found here.

The Forces: 

 
German 101 Panzer Division
Command and Staff (Good)
101 Panzer Regiment (3 SP, Average)
102 Panzer Regiment (3 SP, Average)
101 Panzer Grenadier Regiment (4 SP, Average)
101 Artillery Regiment (2 SP, Average)
101 Recce Regiment (2 SP, Average)
101 Anti-Tank Battalion (2 SP, Average)
 
British 'Bobforce'
Command and Staff (Average)
1st Tank Brigade (3 SP, Average)
2nd Tank Brigade (3 SP, Average)
3rd Tank Brigade (3 SP, Average)
1st Motor Brigade (4 SP, Average)
Reconnaissance Force (2 SP, Average)

The same comments apply as in the previous scenario - I am using the 'vanilla' Portable Wargame rules, so I simply gave the Germans +1 on the dice when rolling for who goes first each turn.

Incidentally, I use one physical vehicle or base of infantry or artillery to represent one strength point, in case that isn't obvious.

The Set-Up:

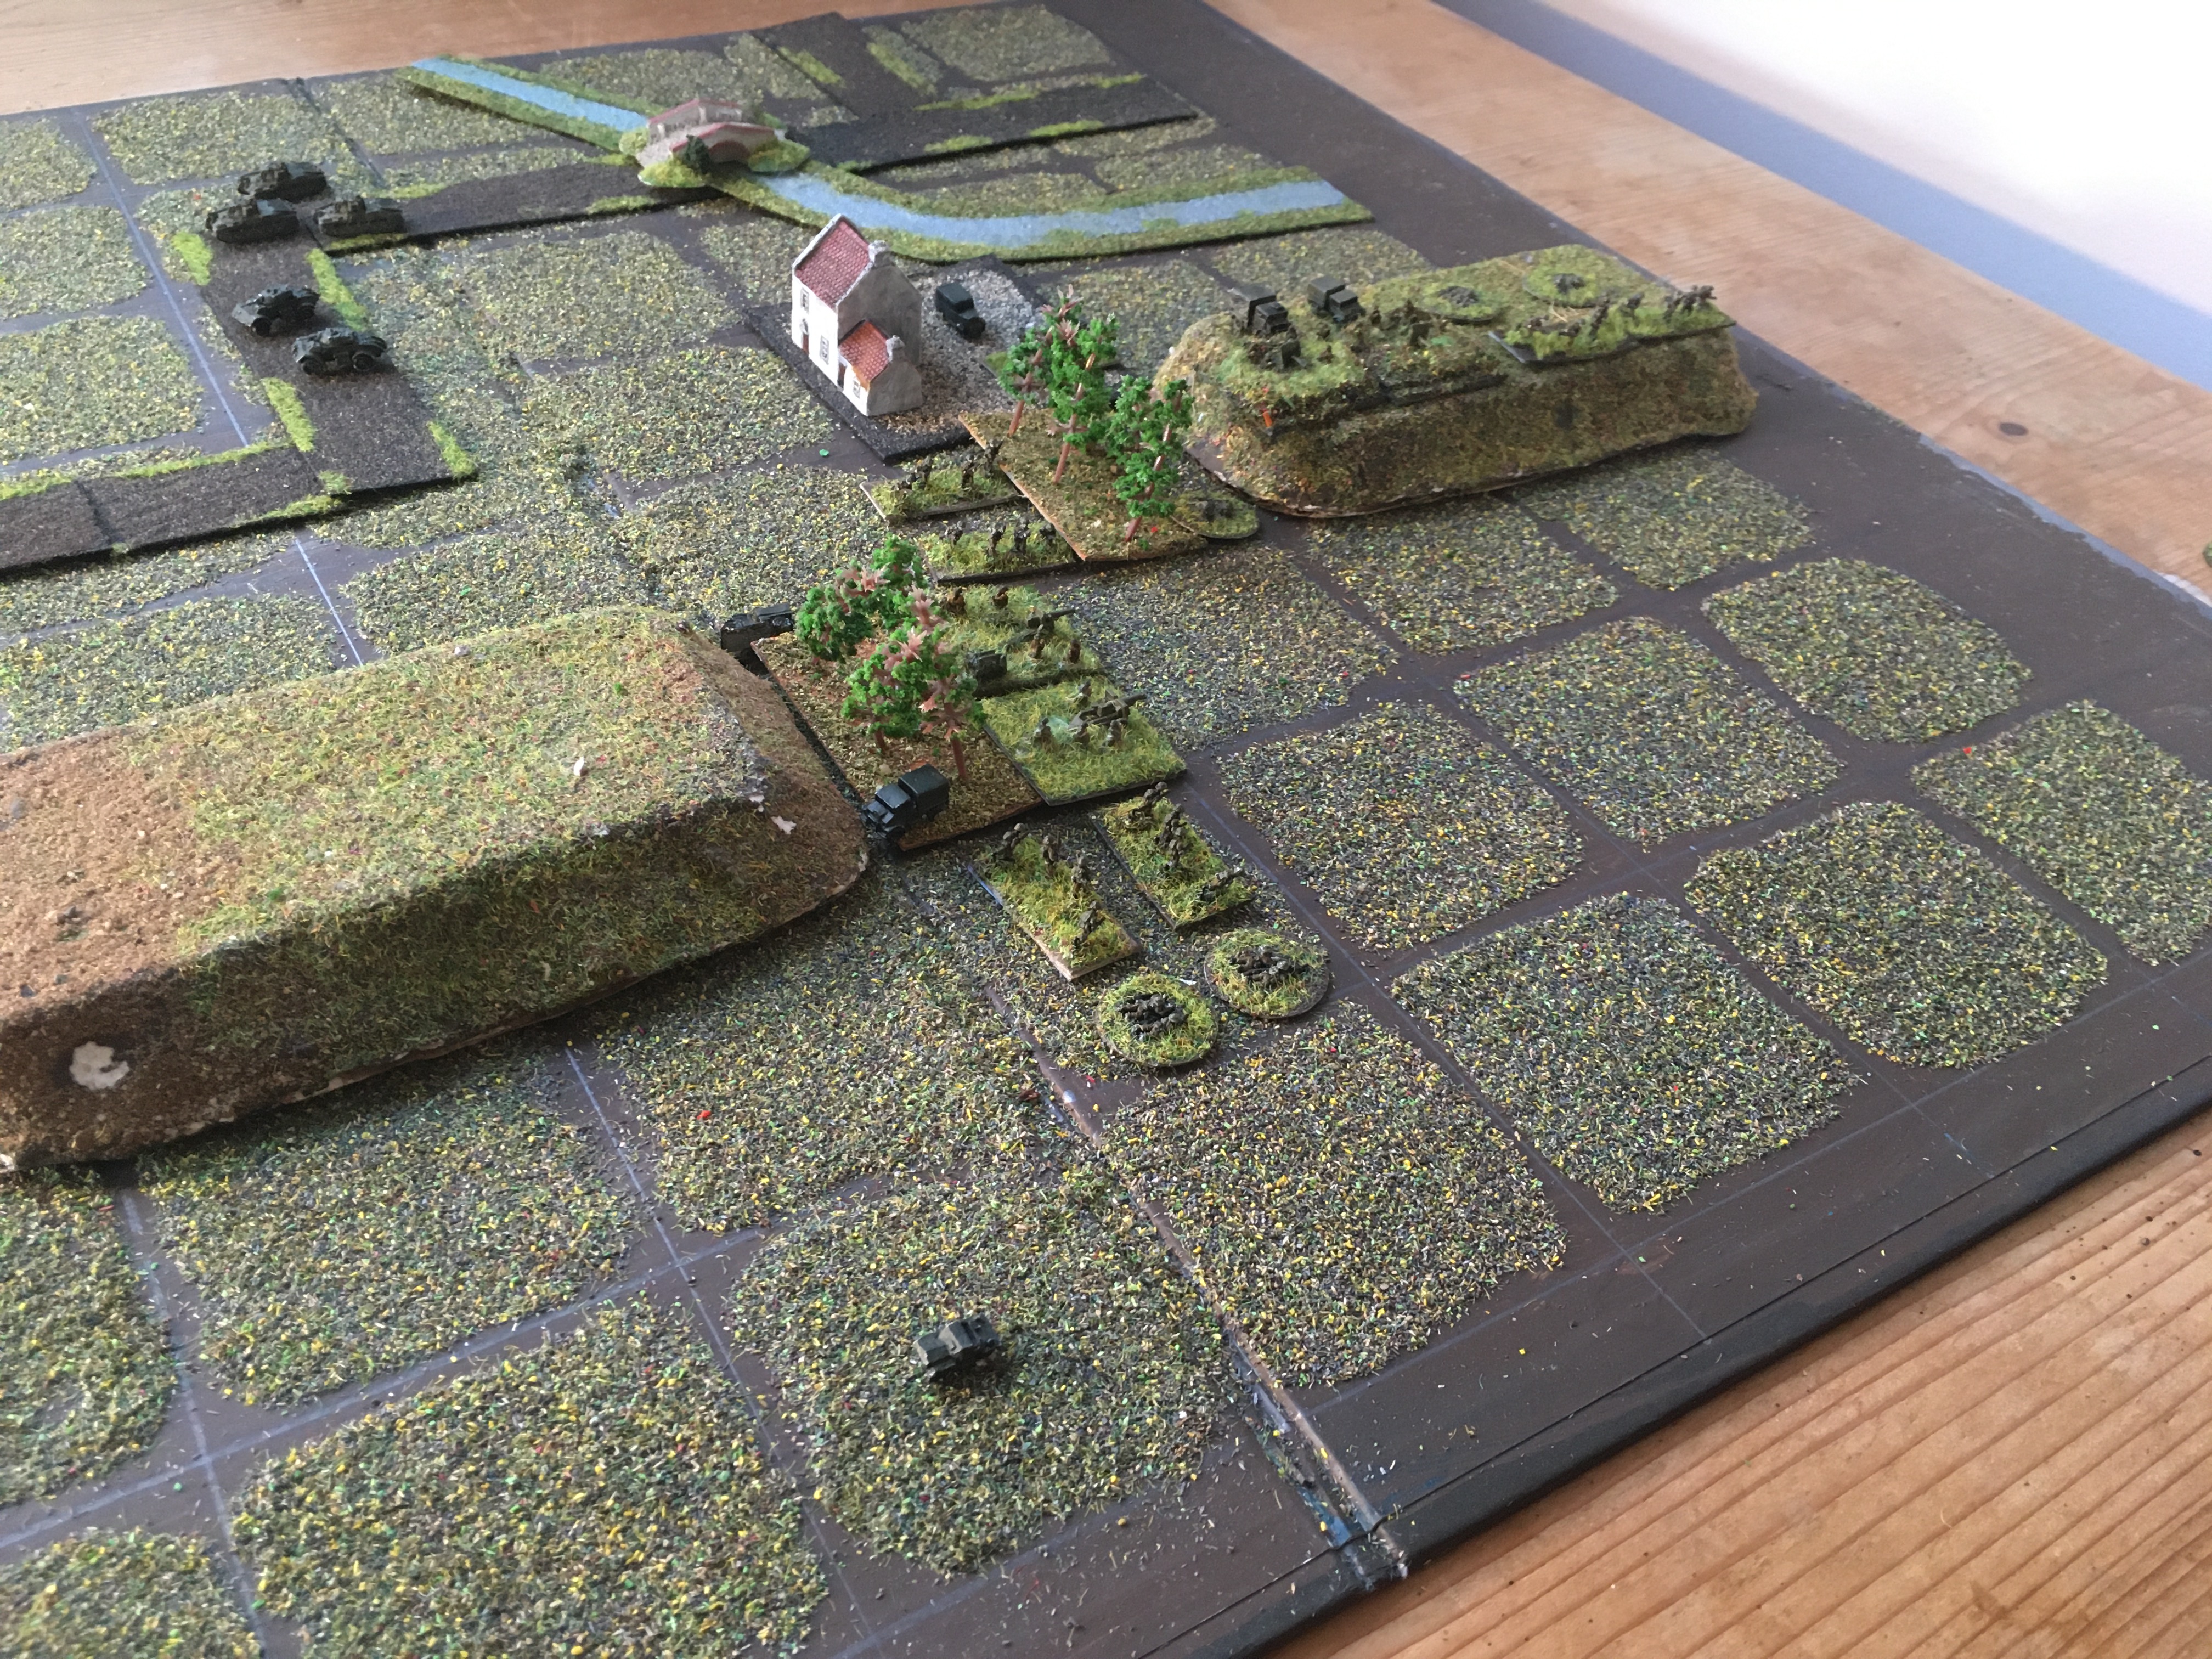
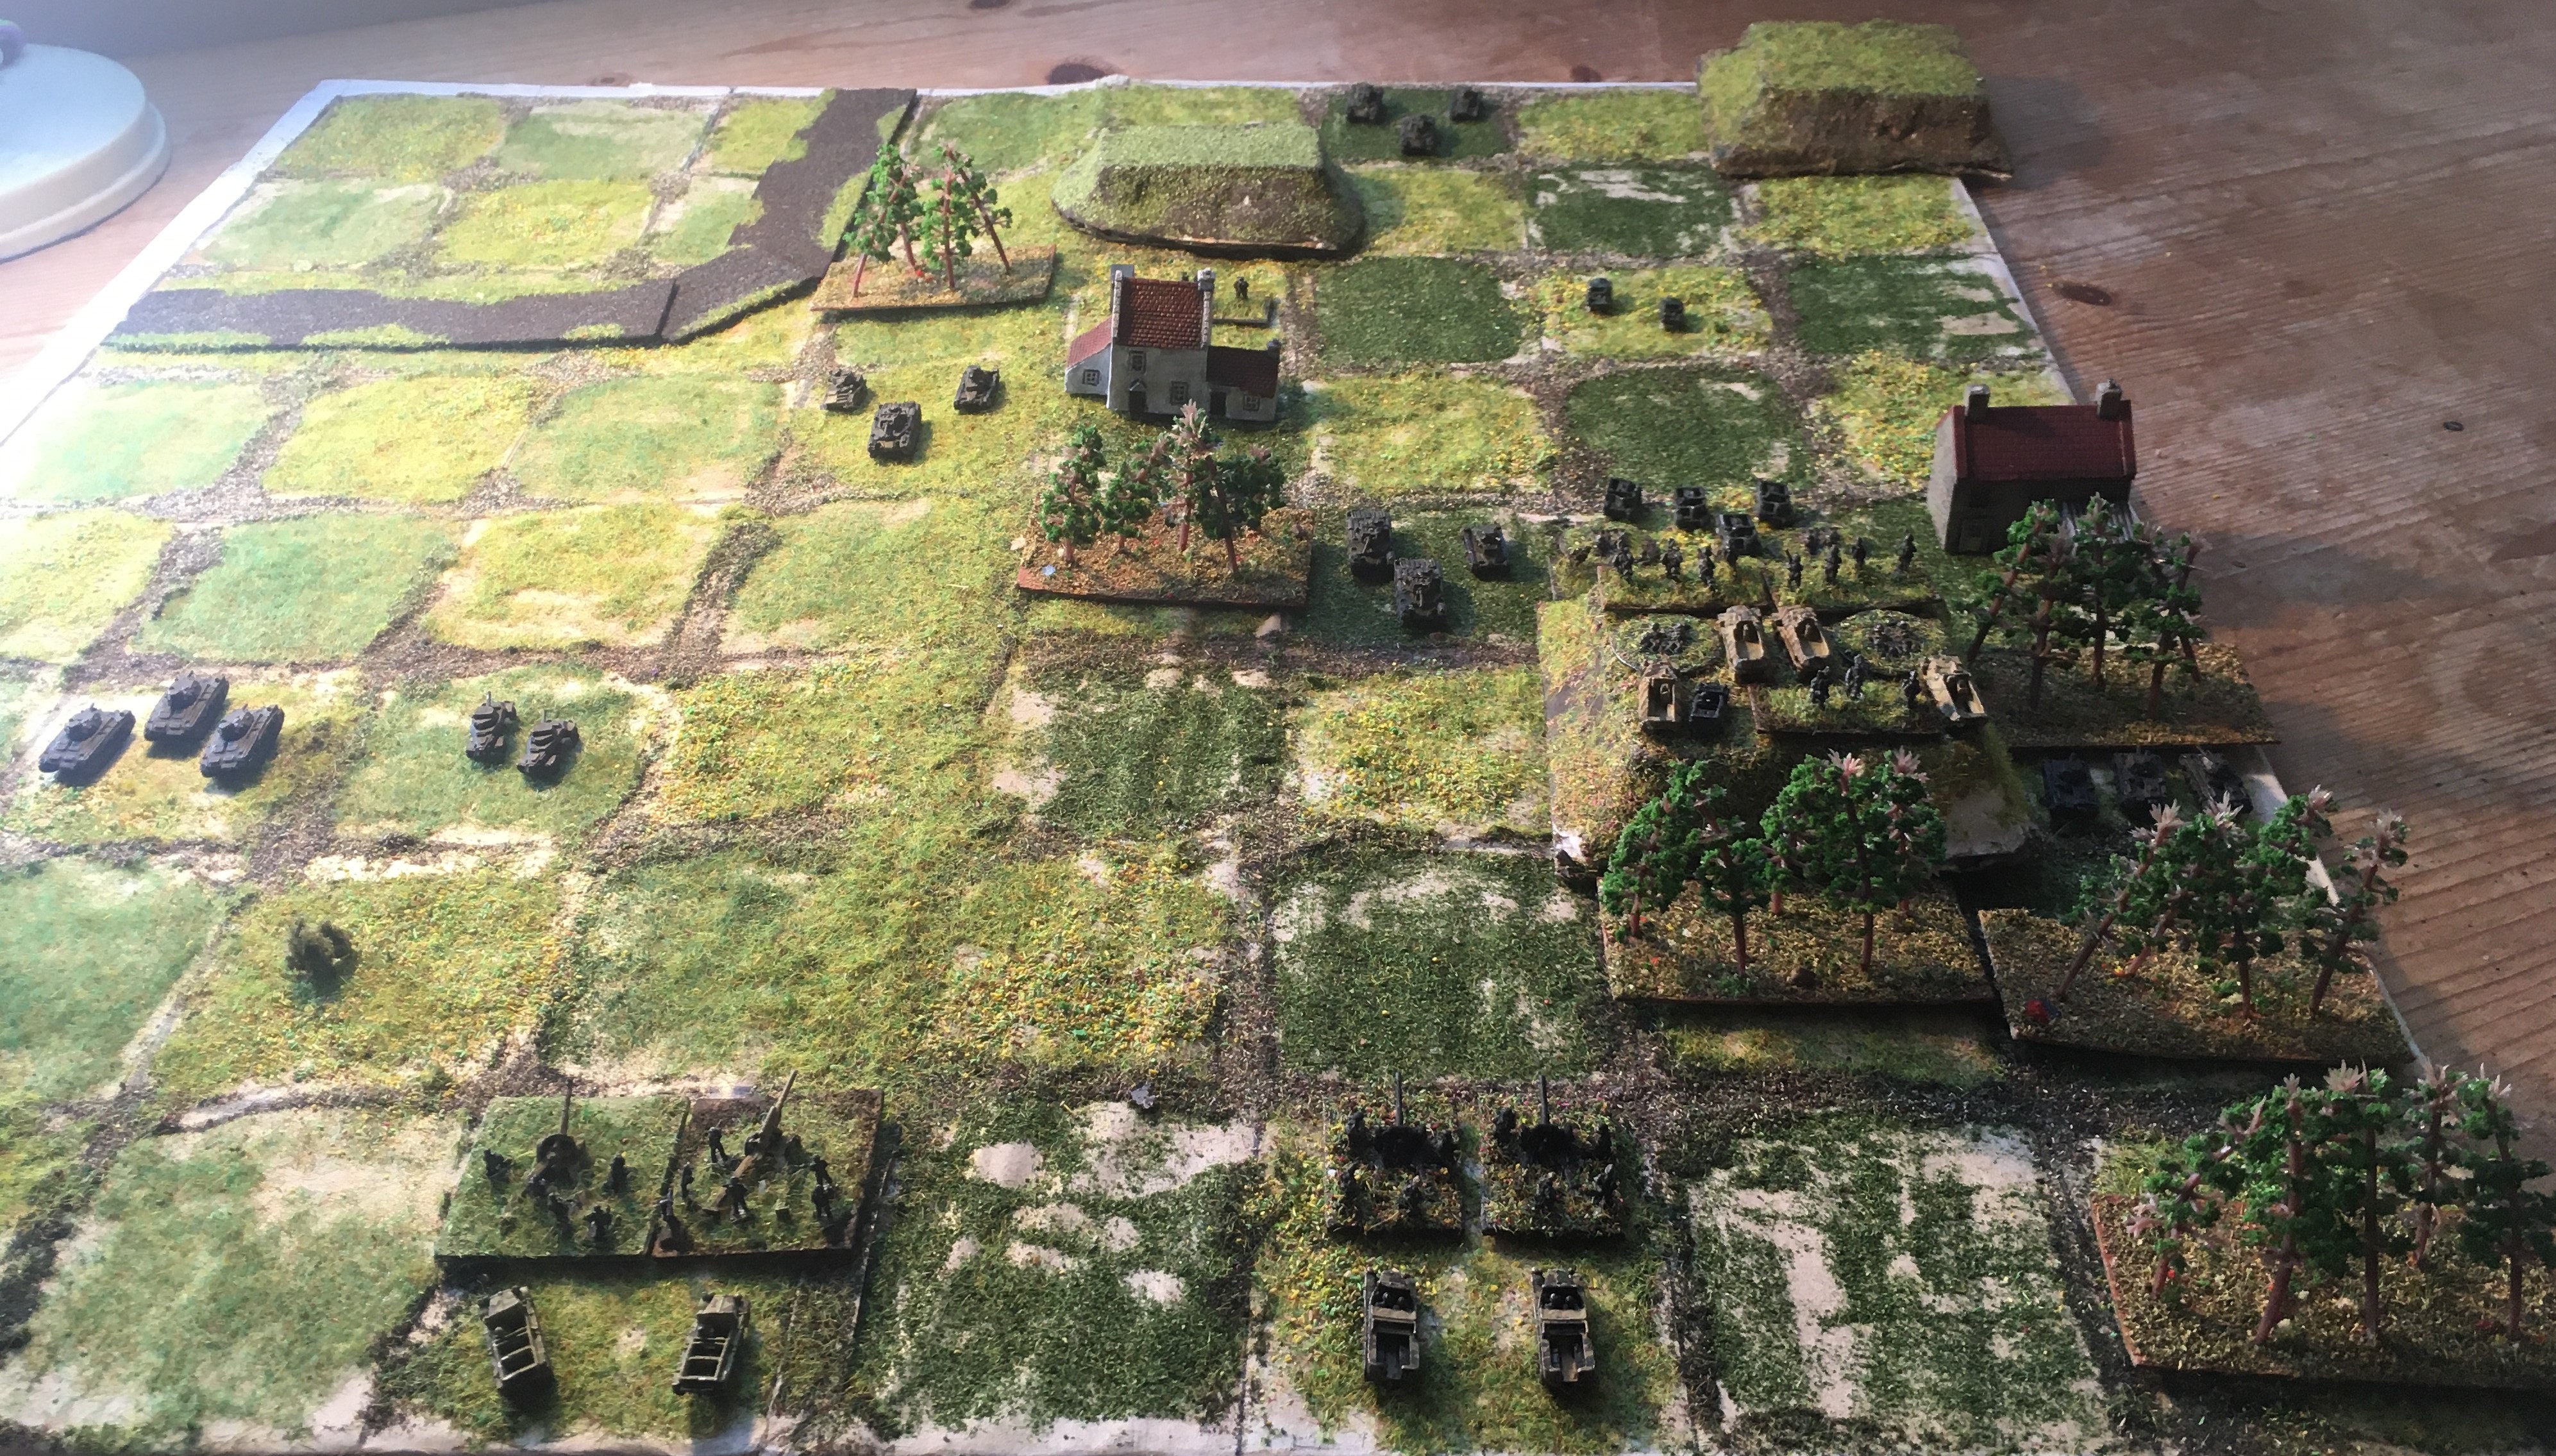
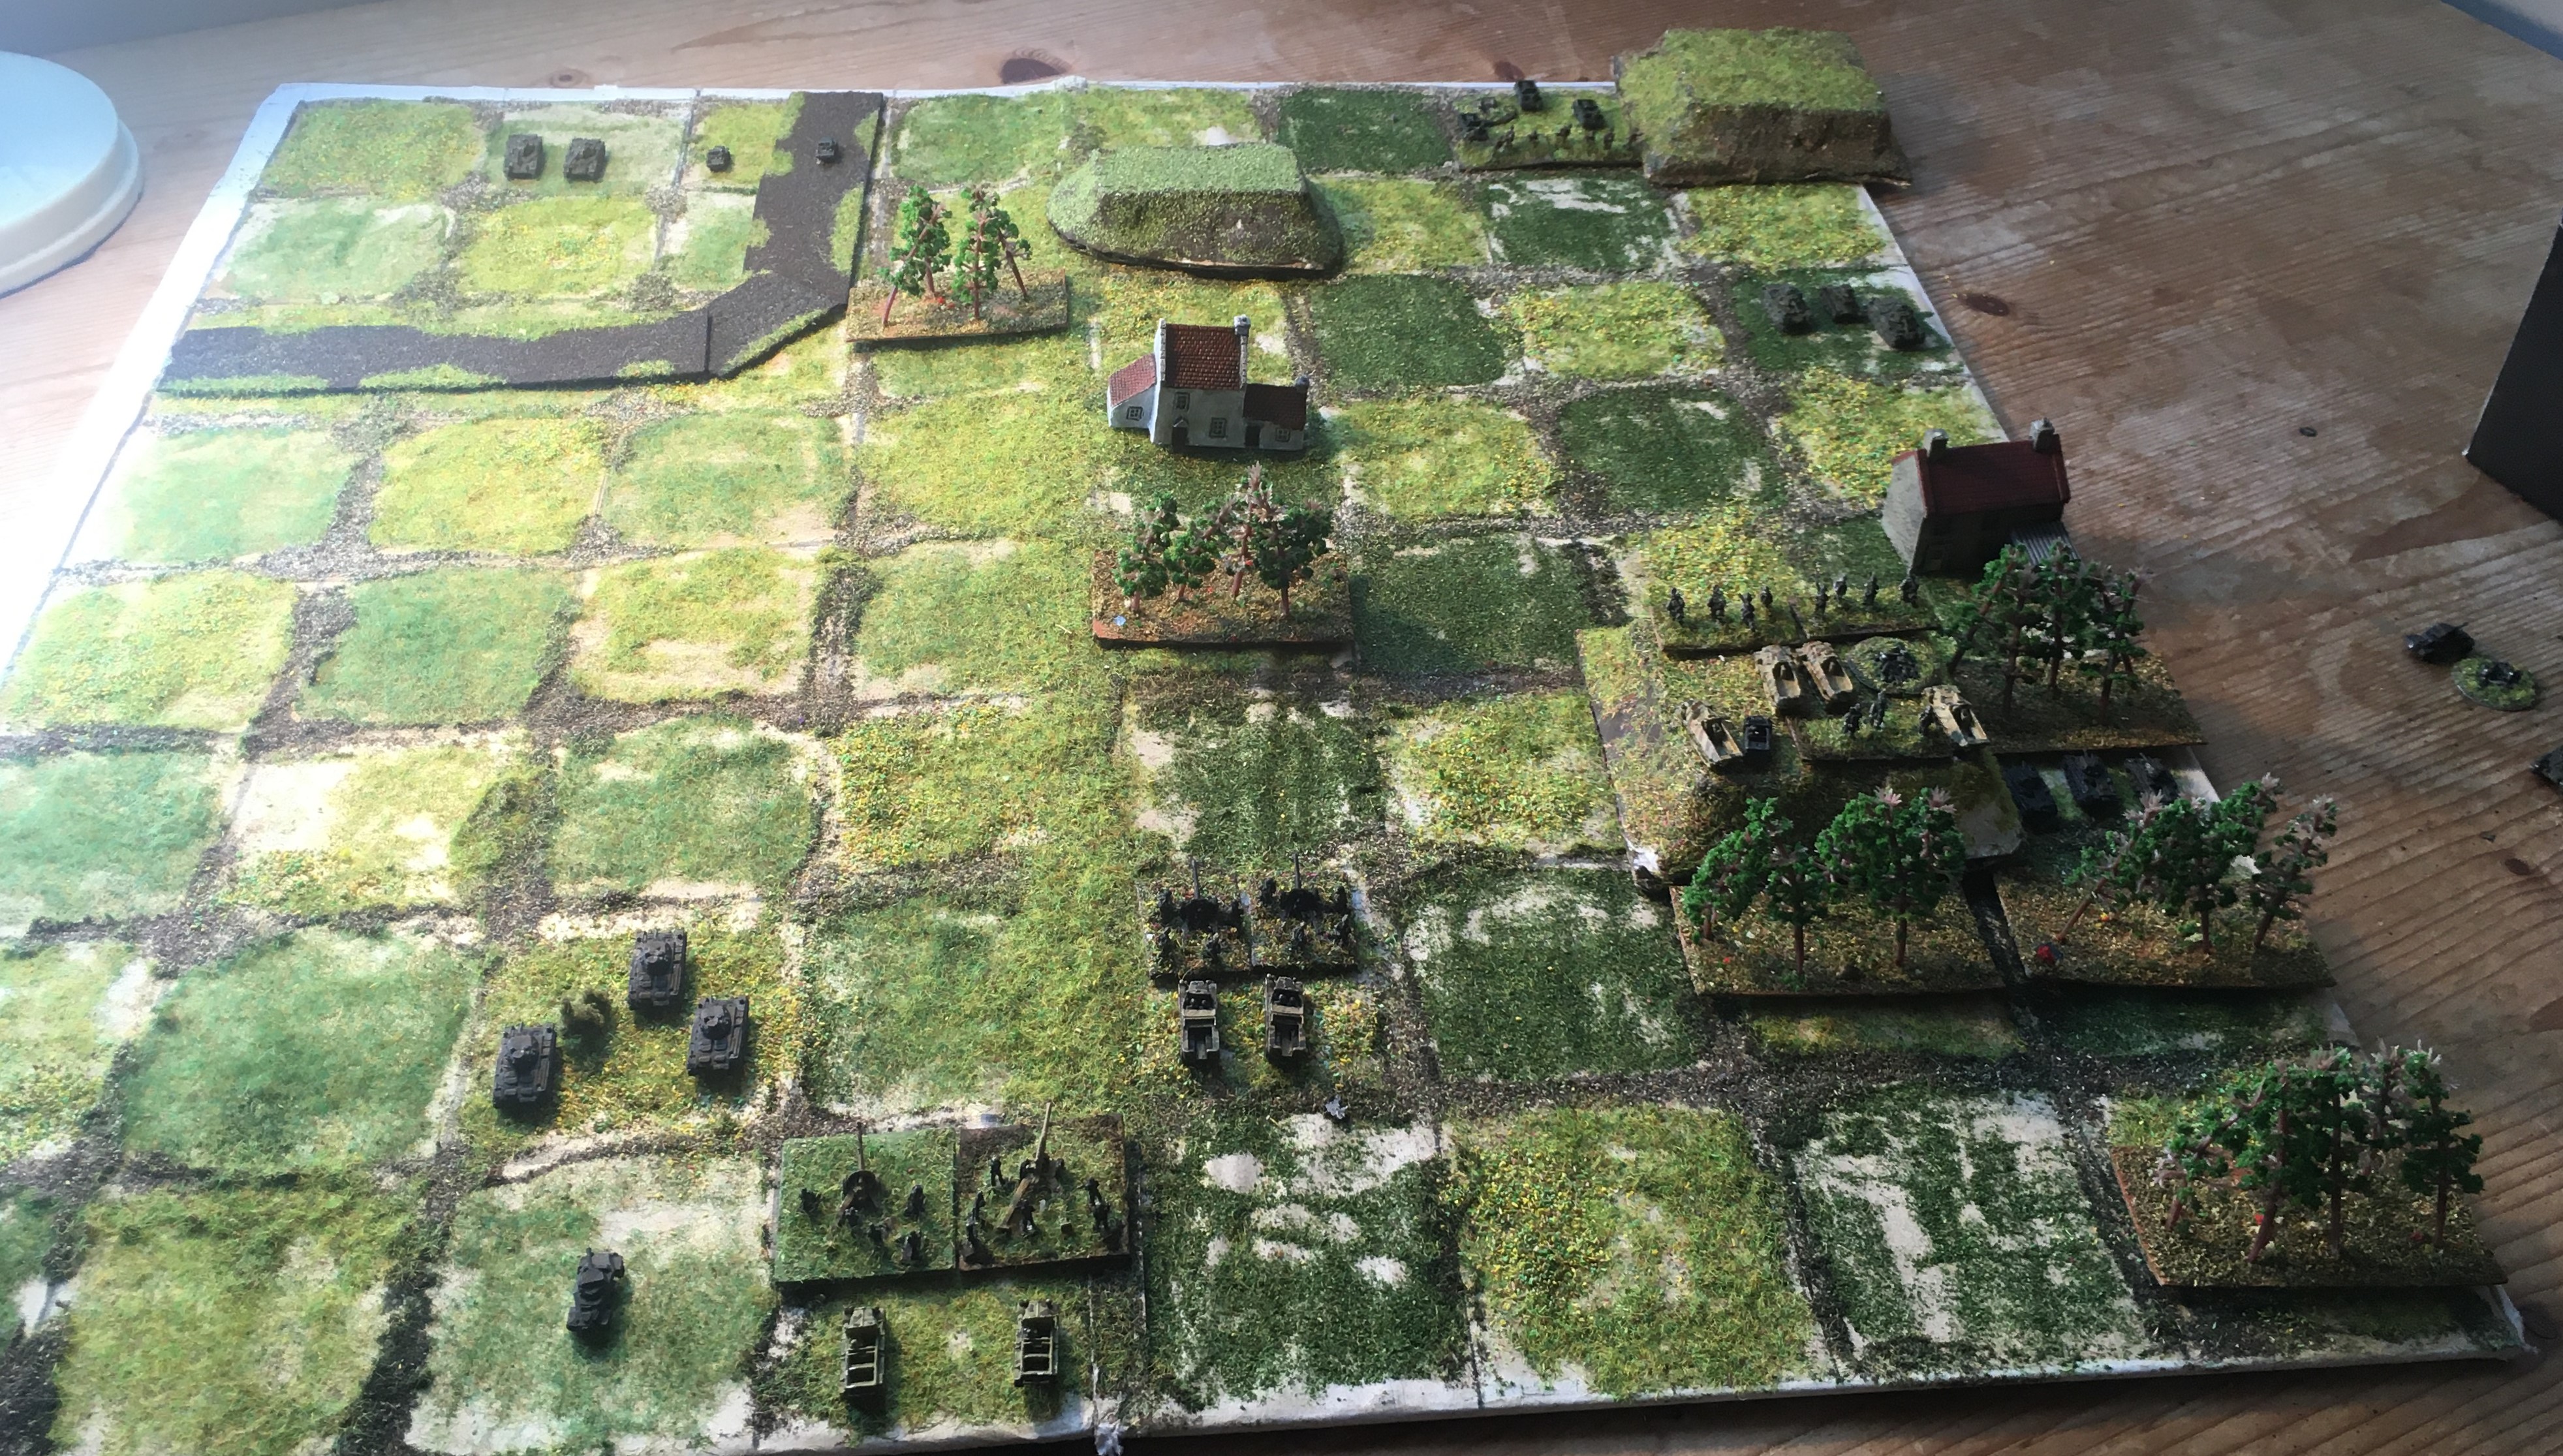
The battlefield: the British are spread out, but with the main weight of their position hanging on the high ground by the large woods to the right.


Another view: the British infantry occupies the high ground, but the British armour is quite widely spread.

The Battle:

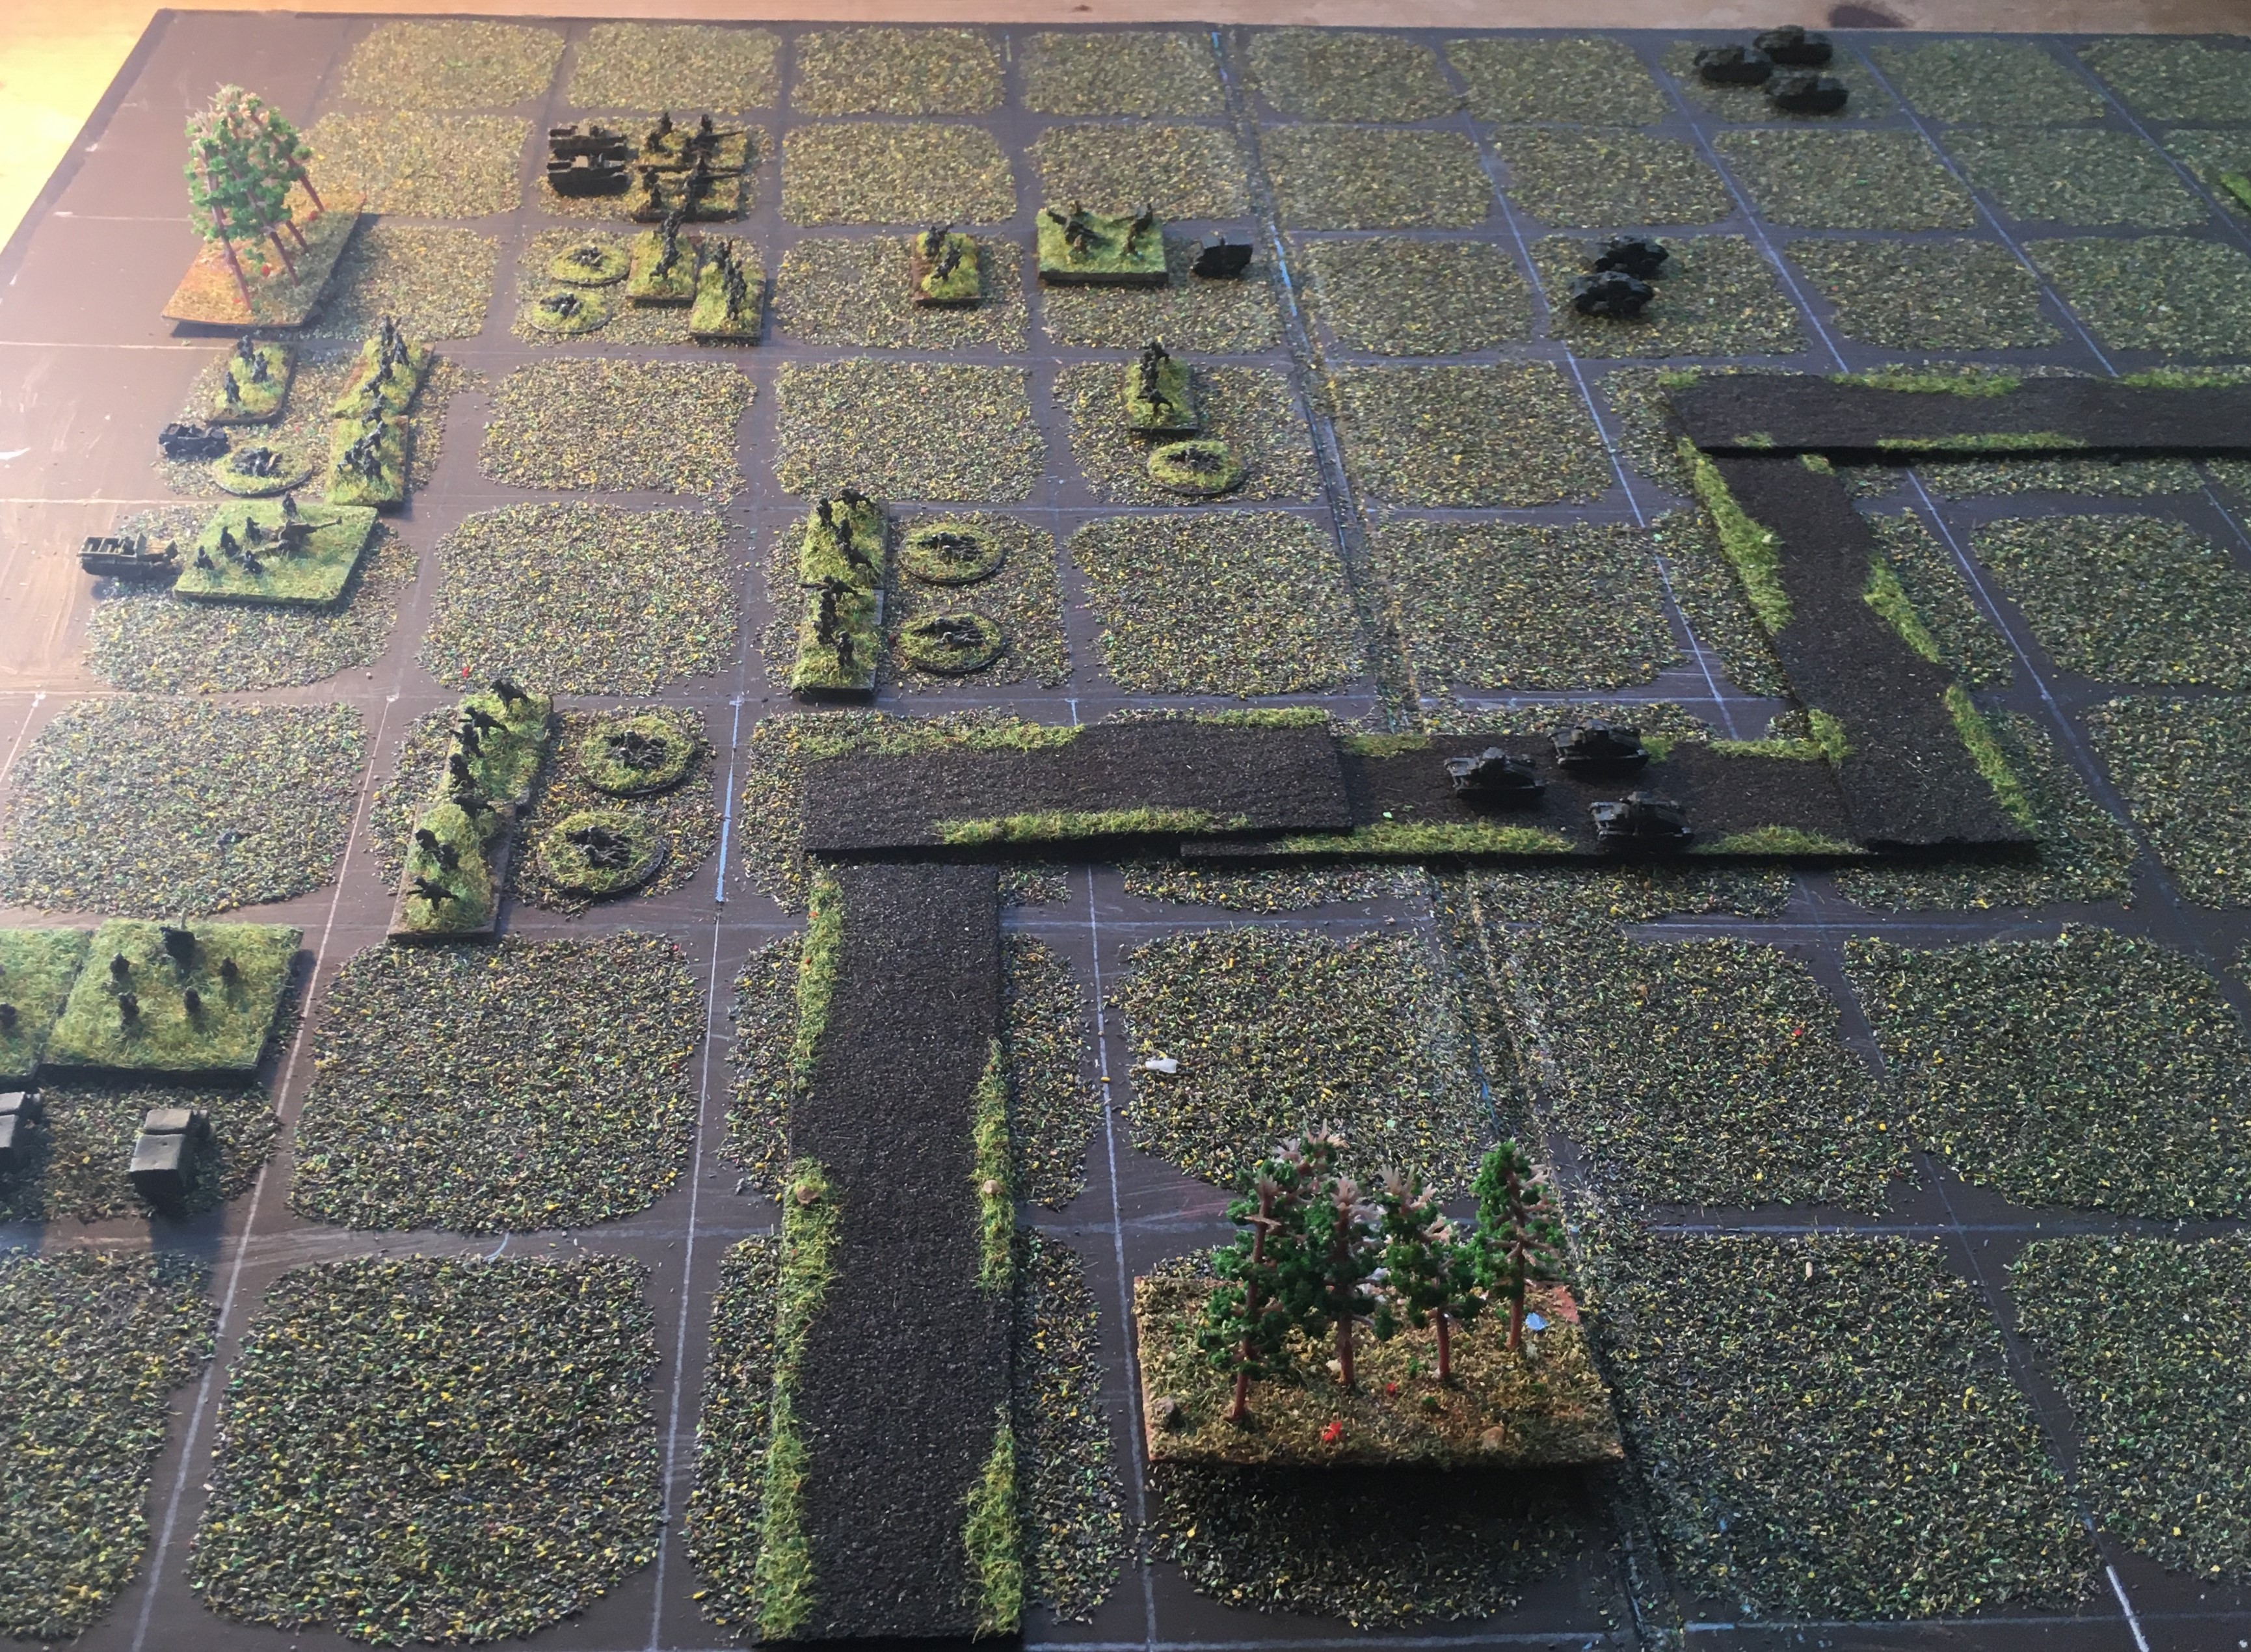
The Germans arrive, bringing their guns on in to the centre and attacking on both flanks

Slightly wider shot

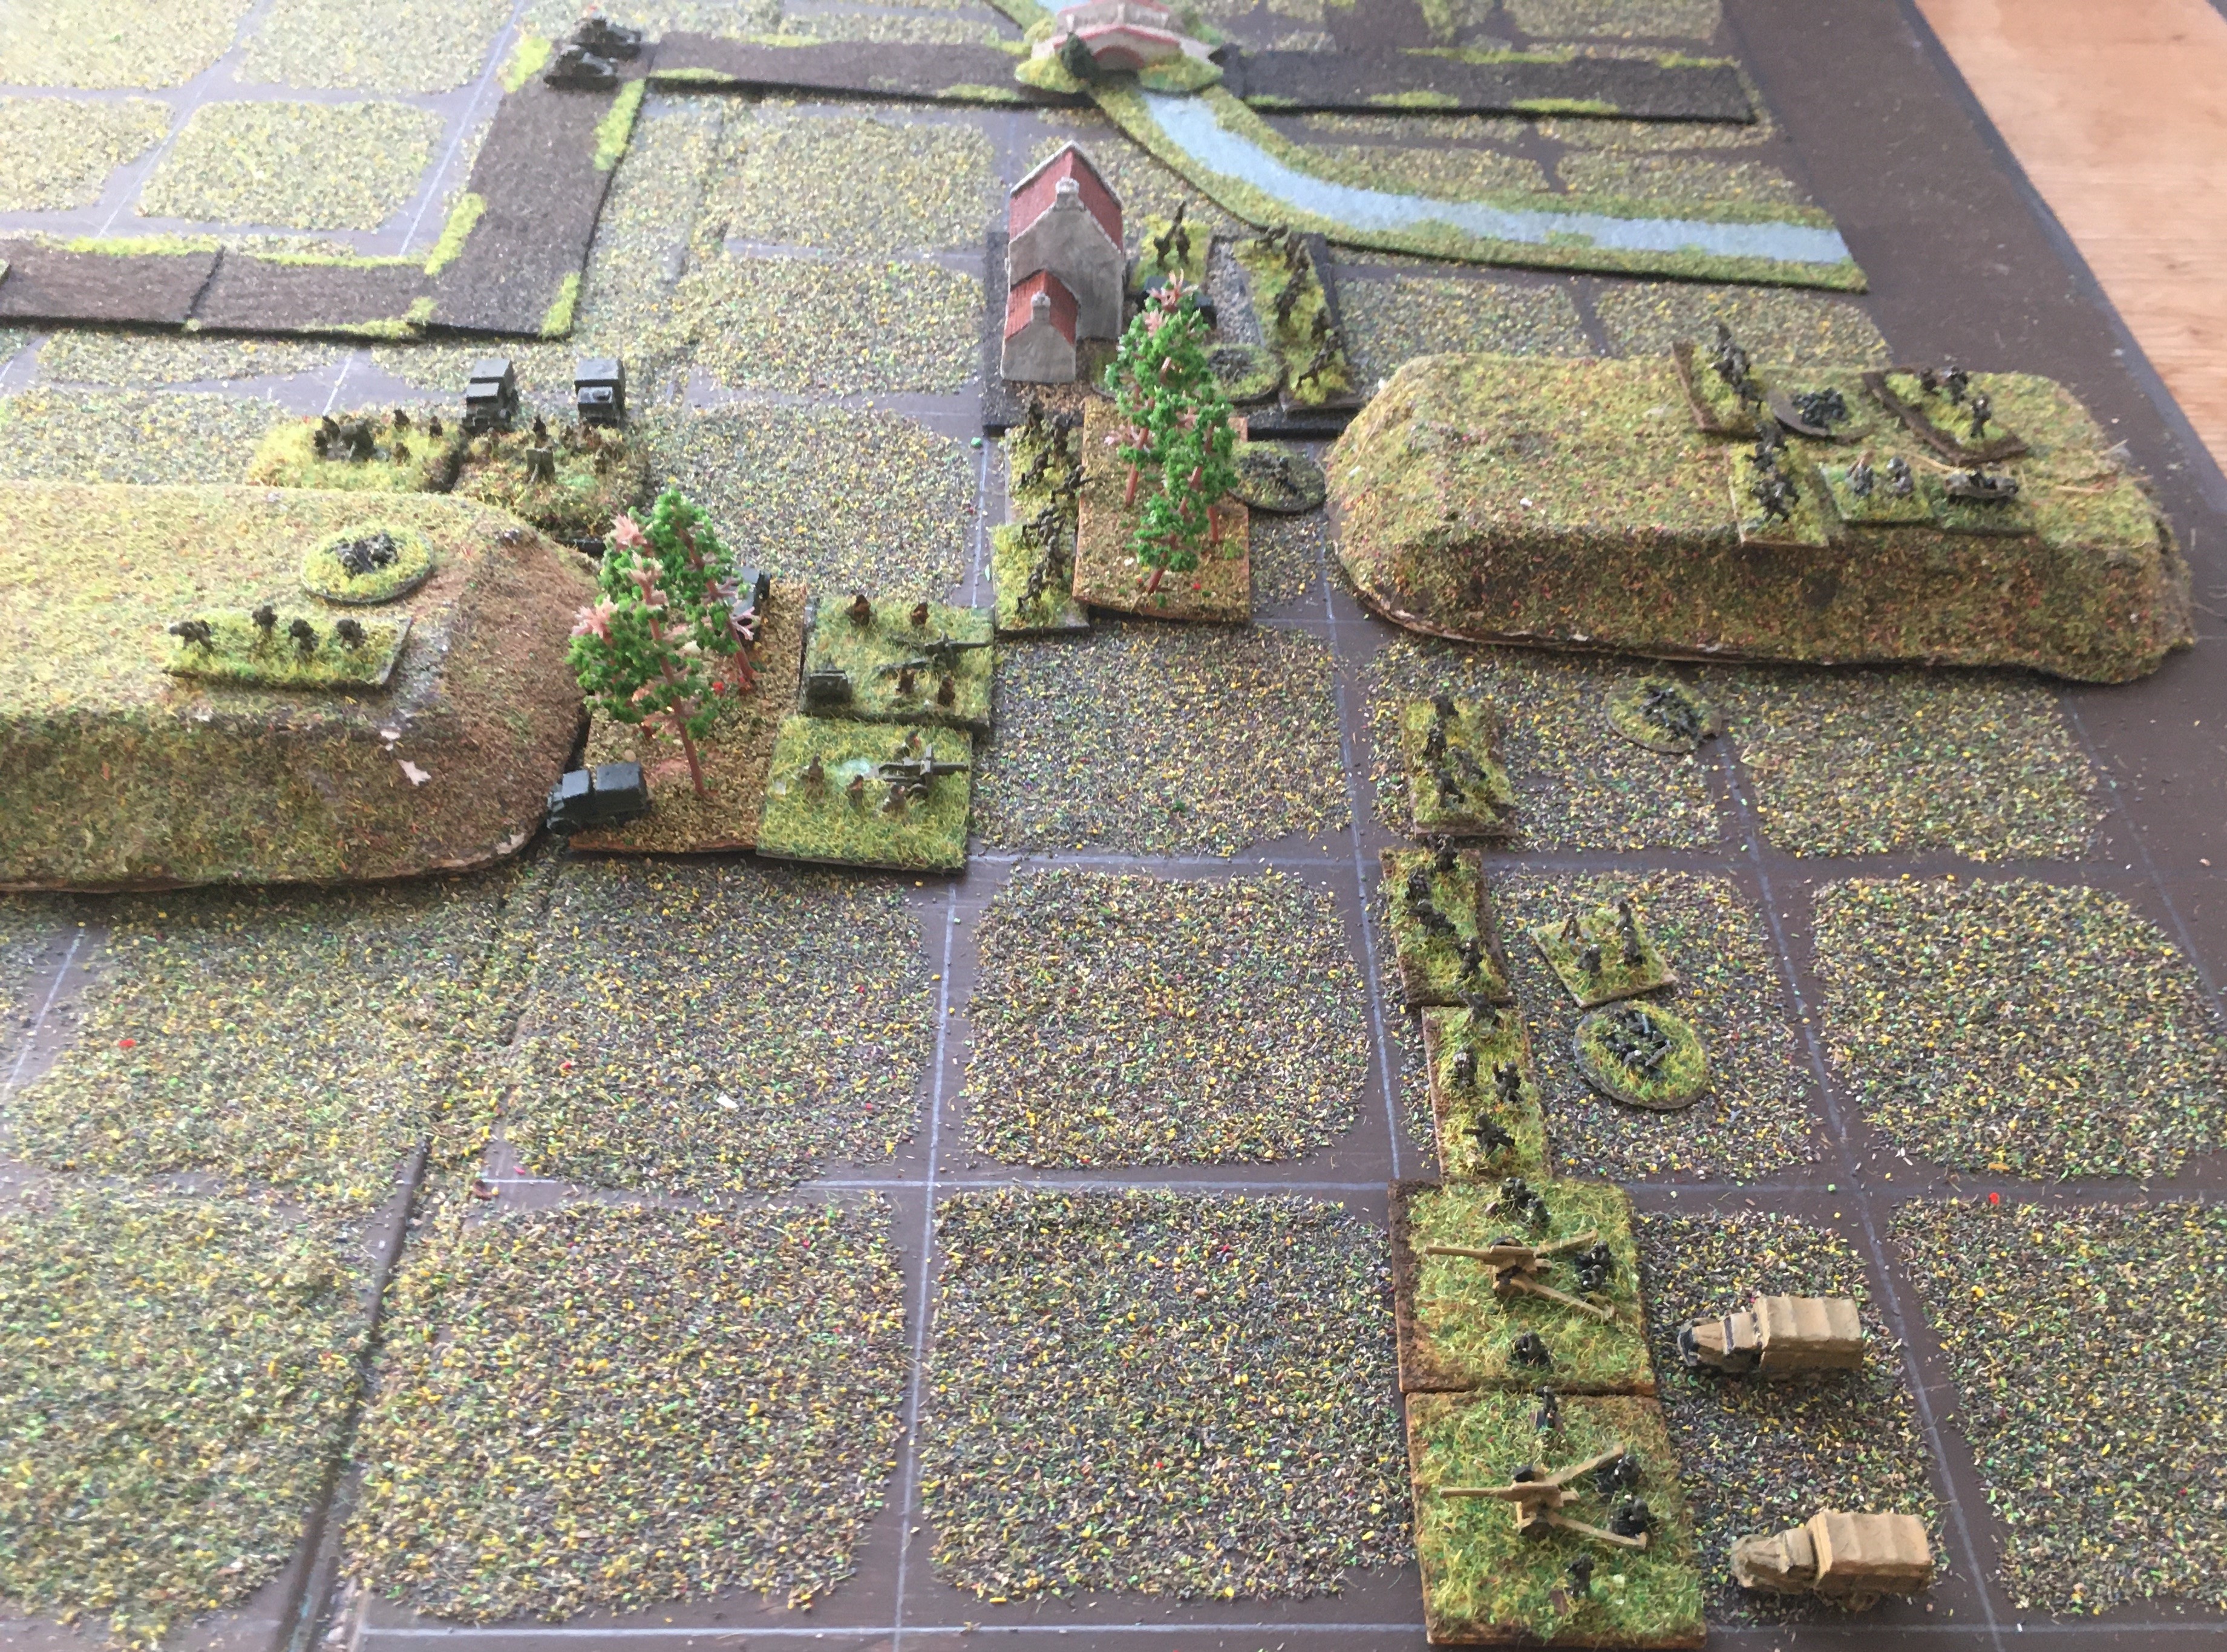
A little difficult to tell, but one of the British tank brigades has counter-attacked in the centre, whilst the Germans are attacking the hill on the right with panzers and panzer grenadiers - this attack succeeds, and the British motor infantry have been pushed back

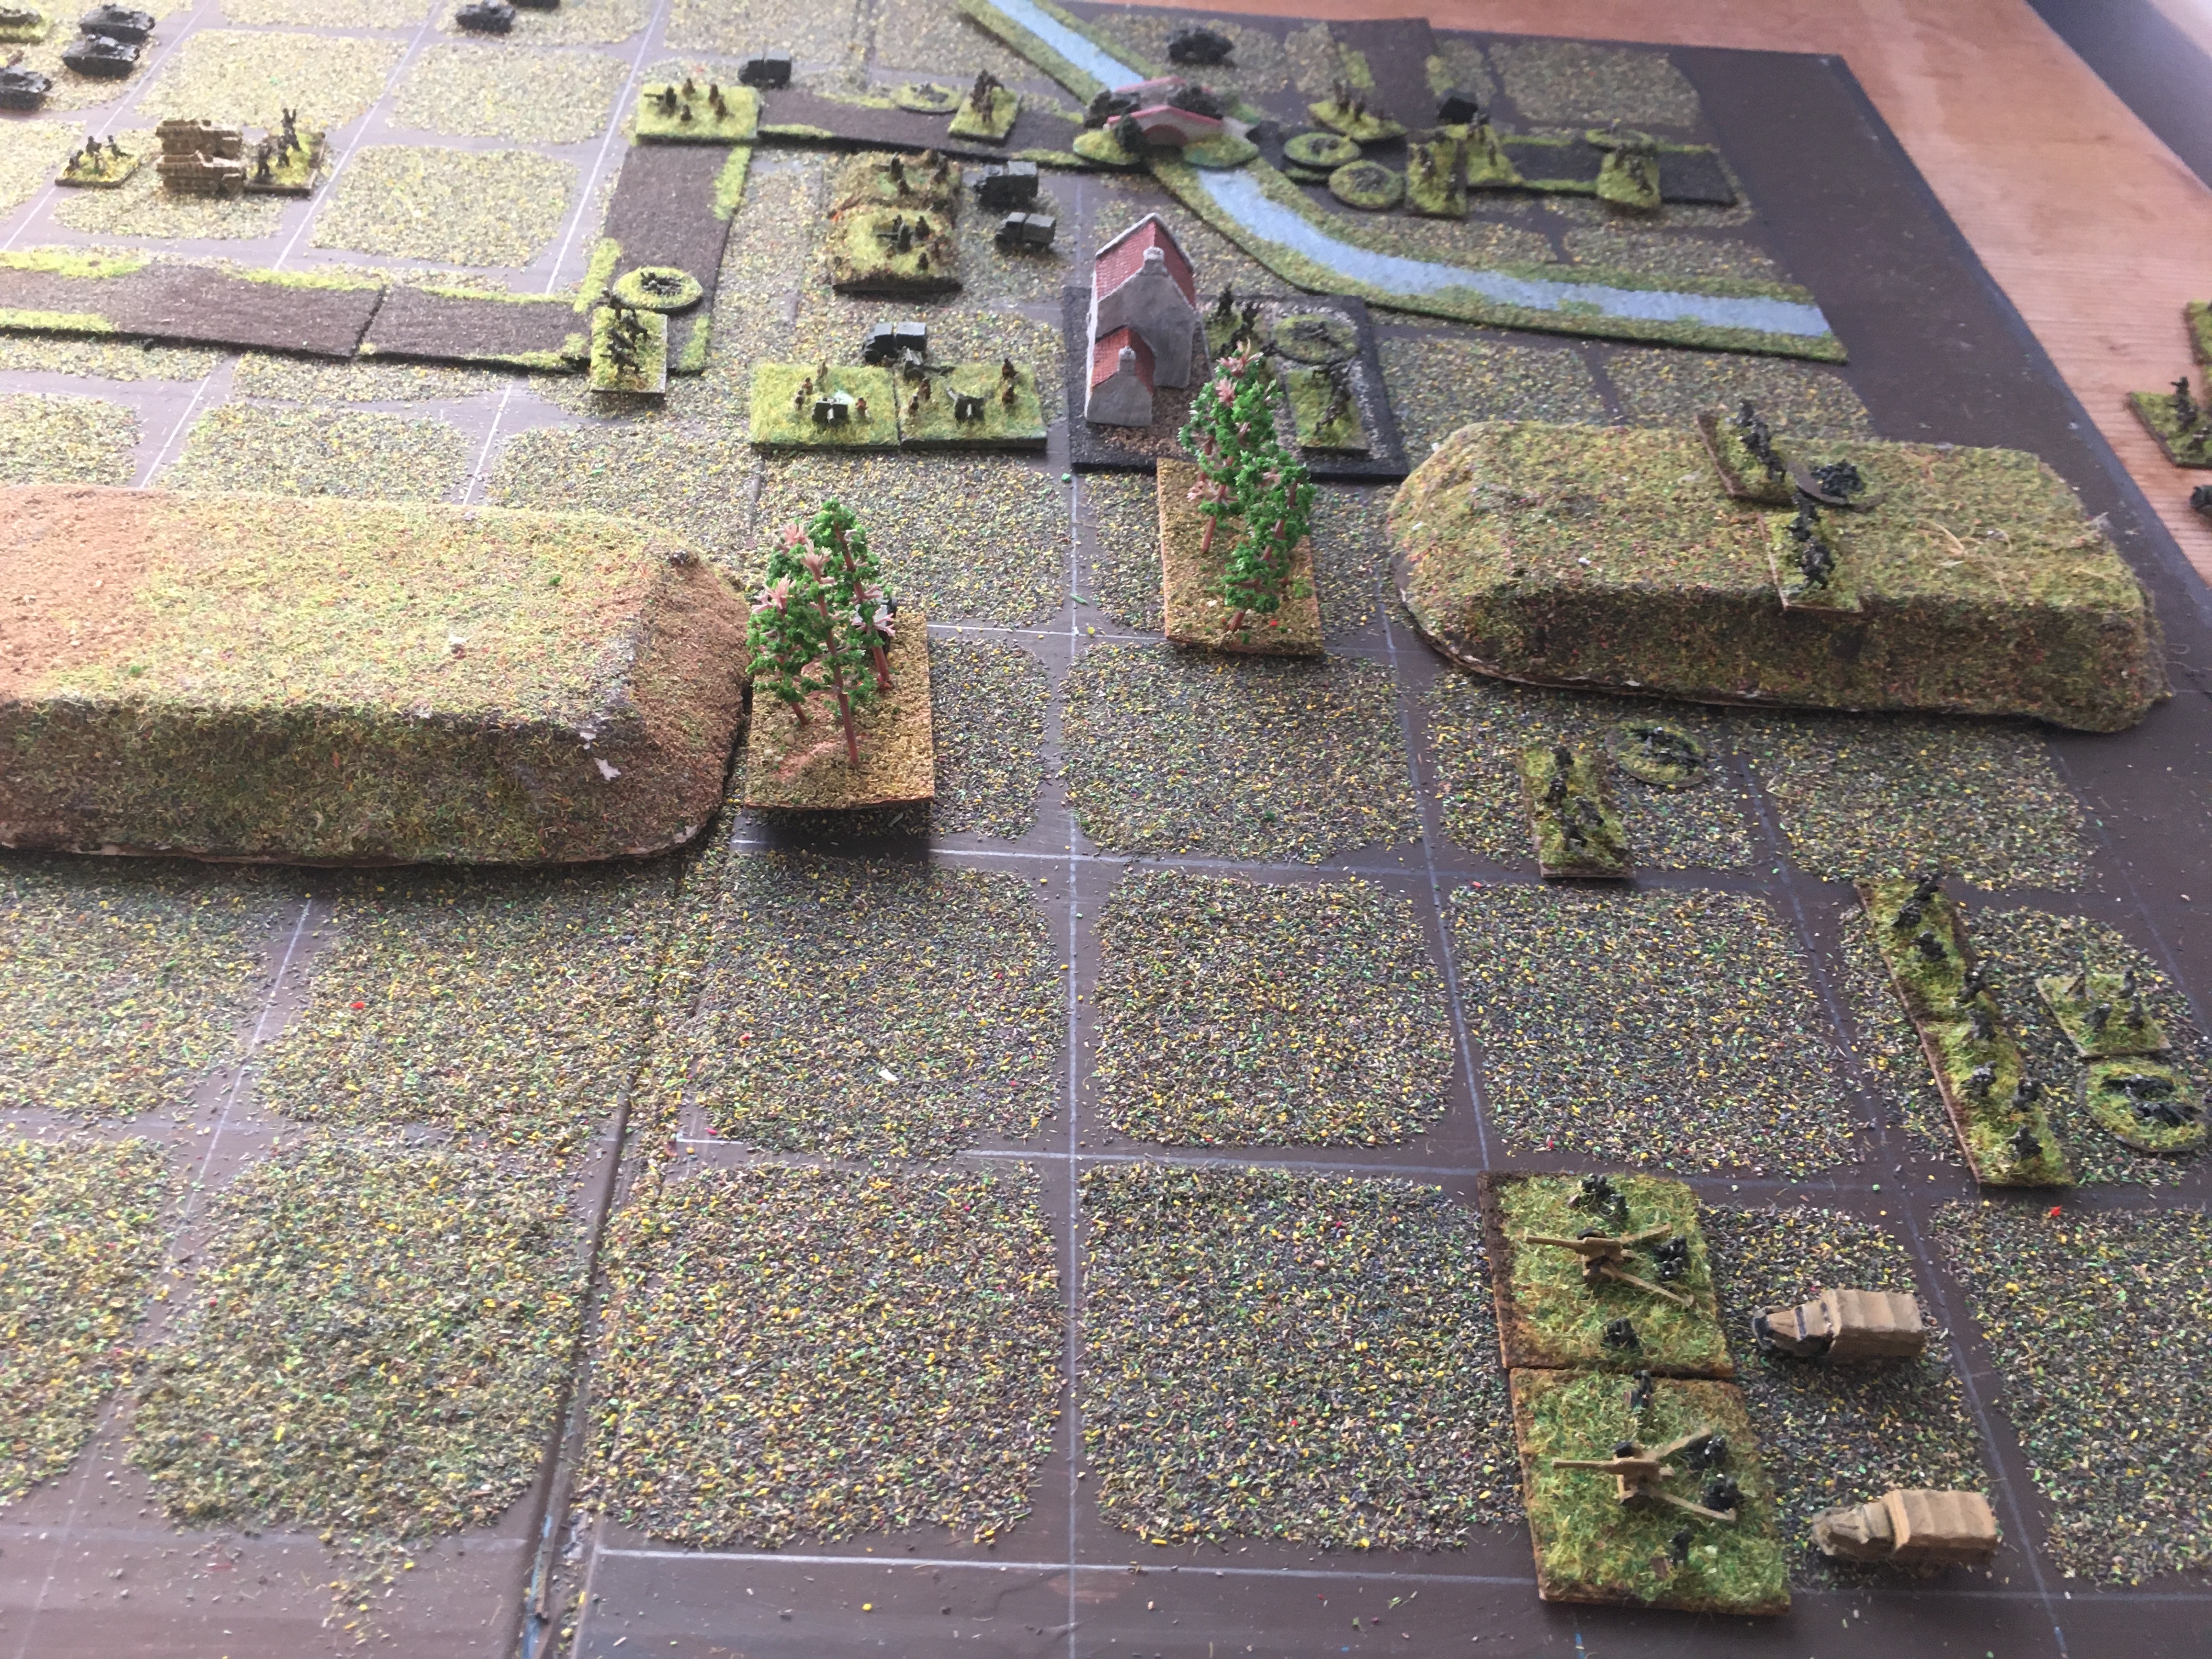
The fight on the left becomes a more swirling affair, as more British armour is committed but the Panzers are counter-attacking; honours are about even at this stage

Losses on both sides, but the British have had rather the worse of it and pull back slightly to establish a line

In essence, the extra firepower of the German artillery and anti-tank units has told

And then a fortunate shot eliminates the British HQ - added to the losses spread throughout the force, then this has demoralized Bobforce

Further British vehicles are destroyed as they prepare to retire

But the mobility of the force ensures its safety and in any case, the Germans have suffered sufficient losses to discourage an overbold pursuit

The position at the end of the battle - the Germans have pursued quite ineffectively despite the Panzer Grenadiers pushing forward on the right (top-right) and the British escape without further loss


Game Notes:  

This one provided another very interesting game although it is perhaps a little hard to follow visually.  I was using a lot of close combats in the armoured fight which is not really the best way to fight I think, but you are trying to engineer a series of flank attacks, so it ended up as a bit of a swirling, turning fight...until some decent German artillery and anti-tank shooting settled the issue with the lucky shot.  Eliminating a commander is hard to do but if it happens, it is really tough luck on the enemy.  C'est la guerre!  Otherwise it was a very even game.  The British can definitely win this one I think, but they have to balance mobility with avoiding becoming a target of the German artillery. 

This game featured a lot more 'kit' than the earlier games and this is going to be bit where the abstraction of the rules may bother the historical gamer a bit.  The dynamic between British and German forces in 1940 is highly dependent on whether the British have Matilda IIs or Is or A10s, and whether the Germans have Panzer IIIs, Panzer IIs, 37mm anti-tank guns or 88s.  This in turn is going to largely depend on what level of command you are imagining each force to represent.  However, I think this is where the scenario designer is going to come into their own by altering the numbers to fit the situation.  At this stage I was happy to not do that; visually I made the compromise by making the British armoured forces a mixture of the various types.

On that subject, this is why I don't use the 'Pinning' rules from Developing the Portable Wargame: although the rules seem fine as mechanics, I don't associate pinning (or suppression) as an action that has much meaning at a battalion or brigade level.

The vehicles in this one were all Heroics & Ros, as were the guns; the infantry are from Baccus 6mm and the buildings are by Leven.