I had been asked to do another playtest of 'The Farquhar Version', which regular readers of this blog will be well aware of by now. If not, it is essentially a re-engineered version of the 2nd edition of the WRG Modern rules back into WW2, which was the 'missing link' in the WRG chain of WW2 rules (the 1st edition of the WW2 and Modern rules are roughly equivalent, as is the 2nd edition of the WW2 and 3rd edition of the Modern rules). Since I have been mainly using Too Fat Lardies' pint-sized campaigns with their 'reinforced infantry platoon' forces, that gives quite a work-out to the detail of the infantry rules but not too much scope for massed armour and artillery action.
Entirely separately, I have been wondering how on earth to stage an old Villers-Bocage scenario from Miniature Wargames 065: "Wittman's Surprise".
The history seems okay (for the time) but the actual scenario seems to fall uncomfortably between a tabletop scenario and a campaign. The forces imply a 1:1 model:soldier ratio but the distances involved (the 'operational map' covers 18km x 12km) seem to imply a campaign - but there are no mechanisms for how one might do this. As an aside, this type of WW2 campaign is not easy to pull off successfully, because of the potential for rapid movement of separate forces. It isn't easy for real HQ in real life to execute and track, for that matter.
So, I am busy re-designing the scenario as a campaign, which suits the 'spirit' of the original scenario I think, whilst I have used it as the basis for a more straightforward battle game for this play test:
Orders of Battle:
British - 'Antforce' Battlegroup:
Bg HQ: 1 x SMG Comd Gp, 1 x Jeep
Motor Coy HQ: 1 x SMG Comd Gp, 1 x Rifle Comd Gp (Deputy), 2 x Trucks
Motor AT Pl: 3 x 6pdr AT guns, 3 x trucks
3 x Motor Infantry Pl, each: 1 x Rifle Comd Gp, 1 x 2" mortar, 1 x PIAT, 3 x Rifle Gps, 3 x LMG teams, 4 x M3 Halftracks
1 x Armoured Recce Sqn: Sqn HQ: 1 x Cromwell 3 x Armd Tp: 3 x Cromwell, 1 x Challenger
1 x Special Support Tp: 3 x Centaur, 1 x Challenger
2 x FOO: Scout Car, FAOwR
1 x FAC: Truck, FAOwR
Air support; 2 x flights of 4 Spitfire IX
Artillery support: 1 x battery of 8 x 25pdr in direct support
British towed 6pdrs have APDS, Challengers don't for the 17pdrs
German - Kampfgruppe Salz
KG HQ:
Heavy Tank Coy: 3 x Troops of 3 Tiger I (1 of the Tigers is the Coy Comd, another in a separate Tp is the deputy). The crew of the Coy Comd Tiger I has plot immunity the first time their tank is KO'd and can take over another Tiger I after d6 turns).
Tank Coy: 1 x PzIVH (Coy Comd), 2 x Troops of 3 x PzIVH
Pz Gr Coy: 1 x SMG Comd, 3 x PzSchrk Teams, with 4 x light vehicles; 3 x Pl of 1 x Rifle Comd, 3 x Rifle Gp, 6 x GPMG (each Rifle Gp has a PzFst), 3 x Hanomag
Recce Pl: 3 x 250/9
SP Arty: 4 x Wespe
SP AA: 4 x SP AA platforms
Arty Support: 1 x battery of 4 x 105mm howitzers on priority call, then under direct support. The battery has pre-registed the small town, the hill to the SE of the town, the crossroads to the W of the town and the village to the SE of the town.
No APCR for the Germans.
A note on the roads: the roads are all intended to be sunken. An element in the road is hull-down to fire from the flank, but a vehicle cannot get through a hedge from a road (it can the other way around). Line of sight cannot be drawn through a hedge, except if the element behind the hedge is considered right up to it.
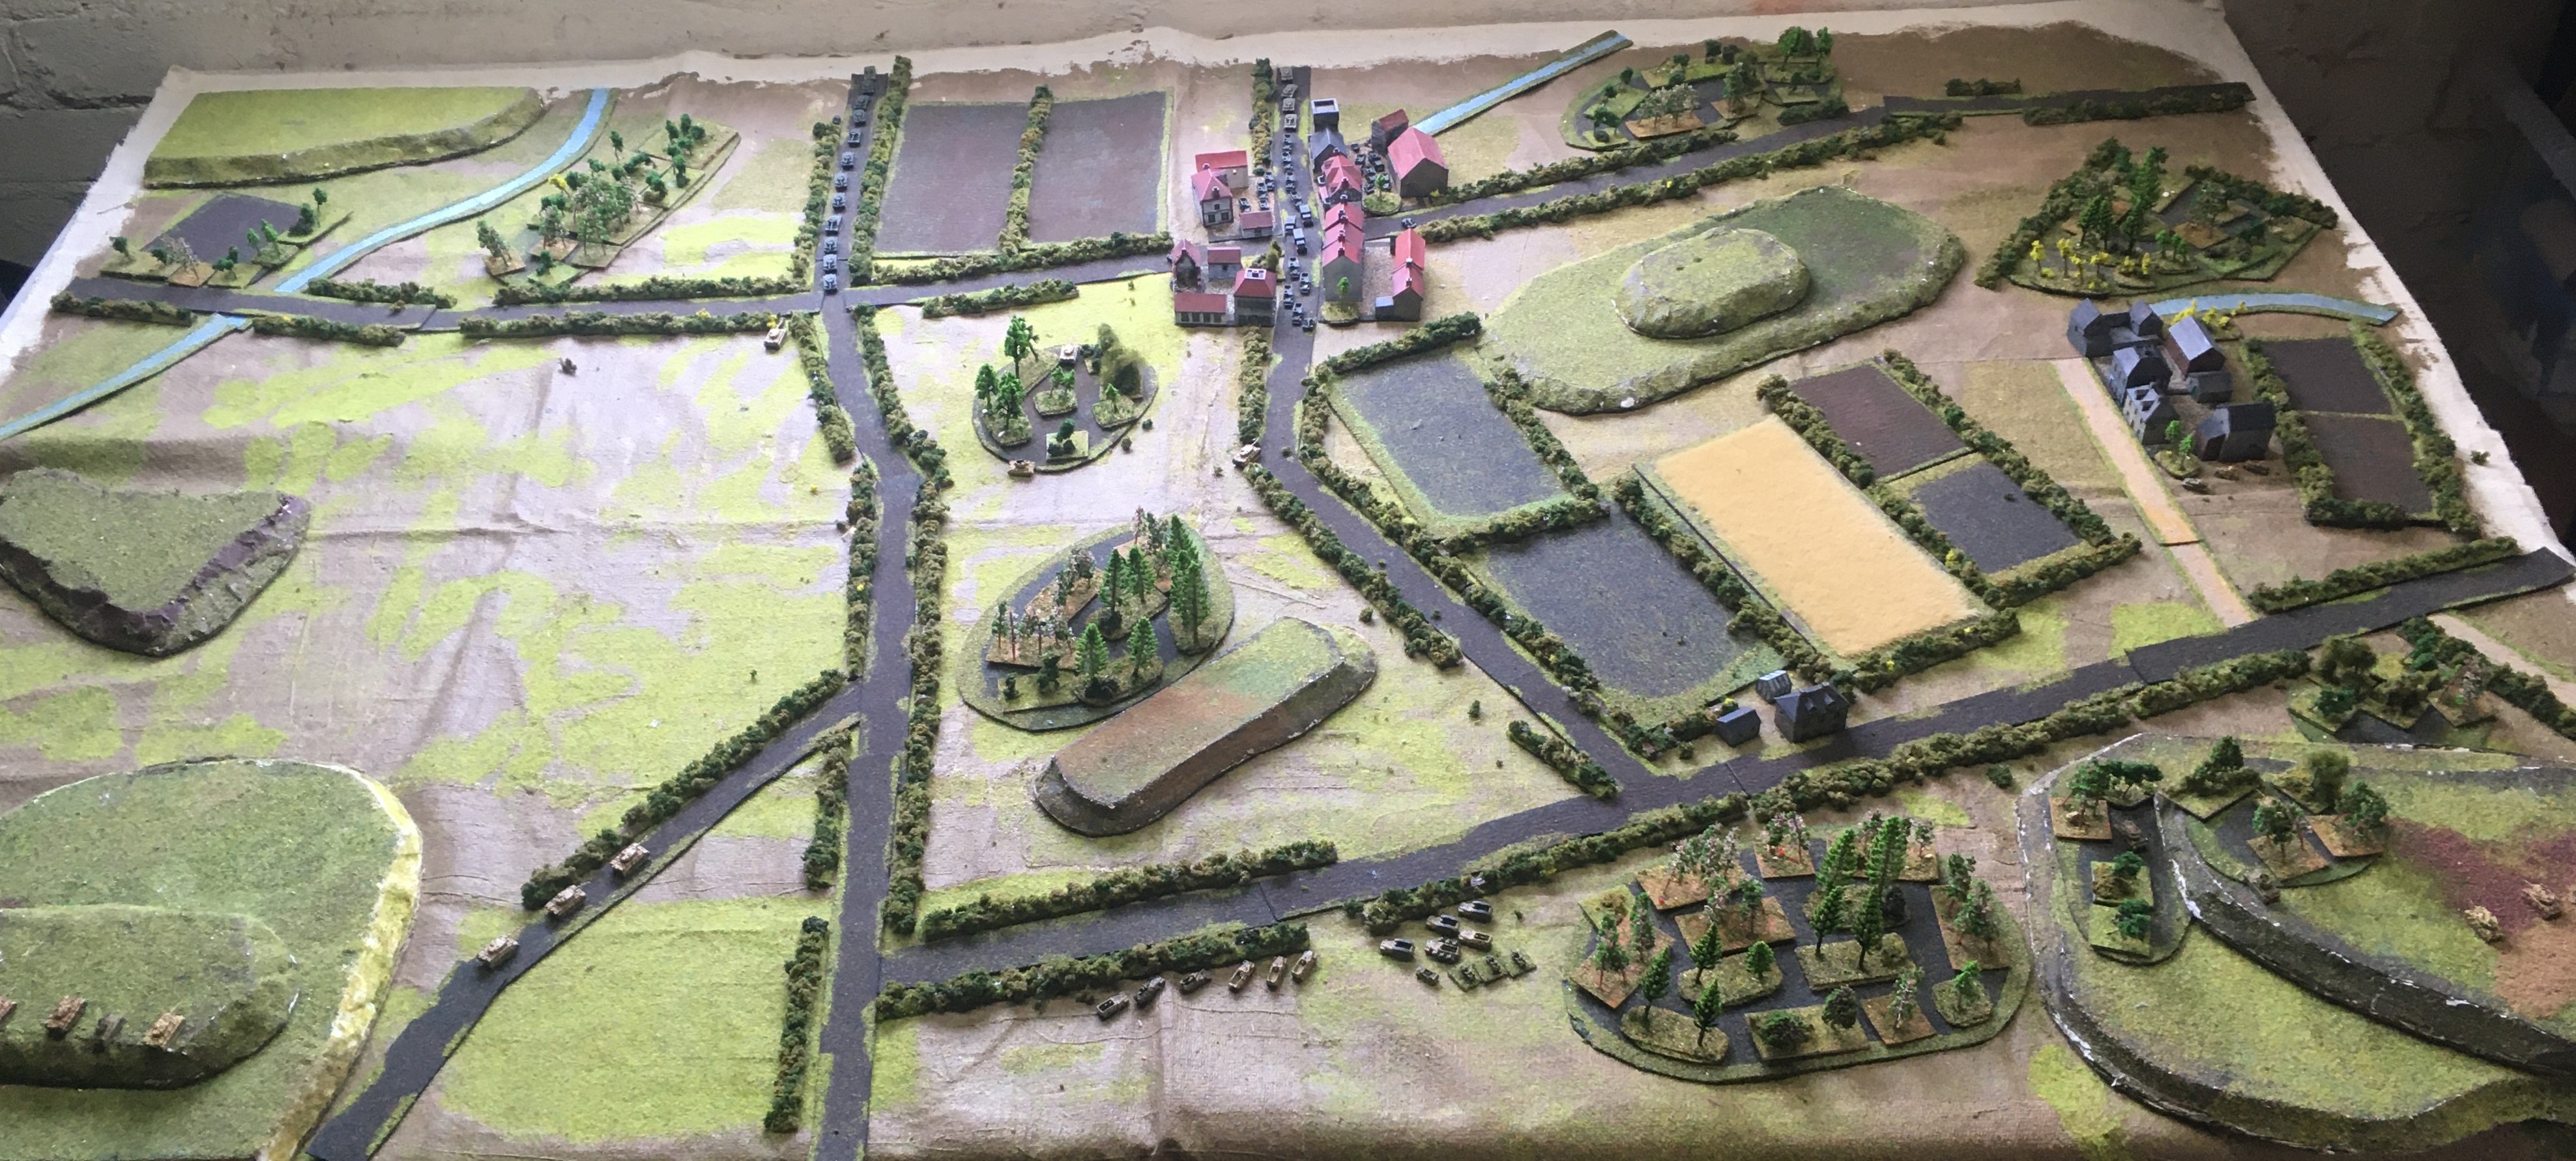
This isn't a full battle report - the game/testing got a bit too involved. These are just a few set-up pictures and vignettes from early on to frame and reference a few things I want to discuss below.
 |
The position at the start of the battle: the British are in two columns coming from the North (top); tanks to the West (centre-left), a reinforced Motor Coy to the East with its head in the town (centre)
|
 |
Two platoons of TigerIs, supported by a section of Wespes and an SP AA gun
|
 |
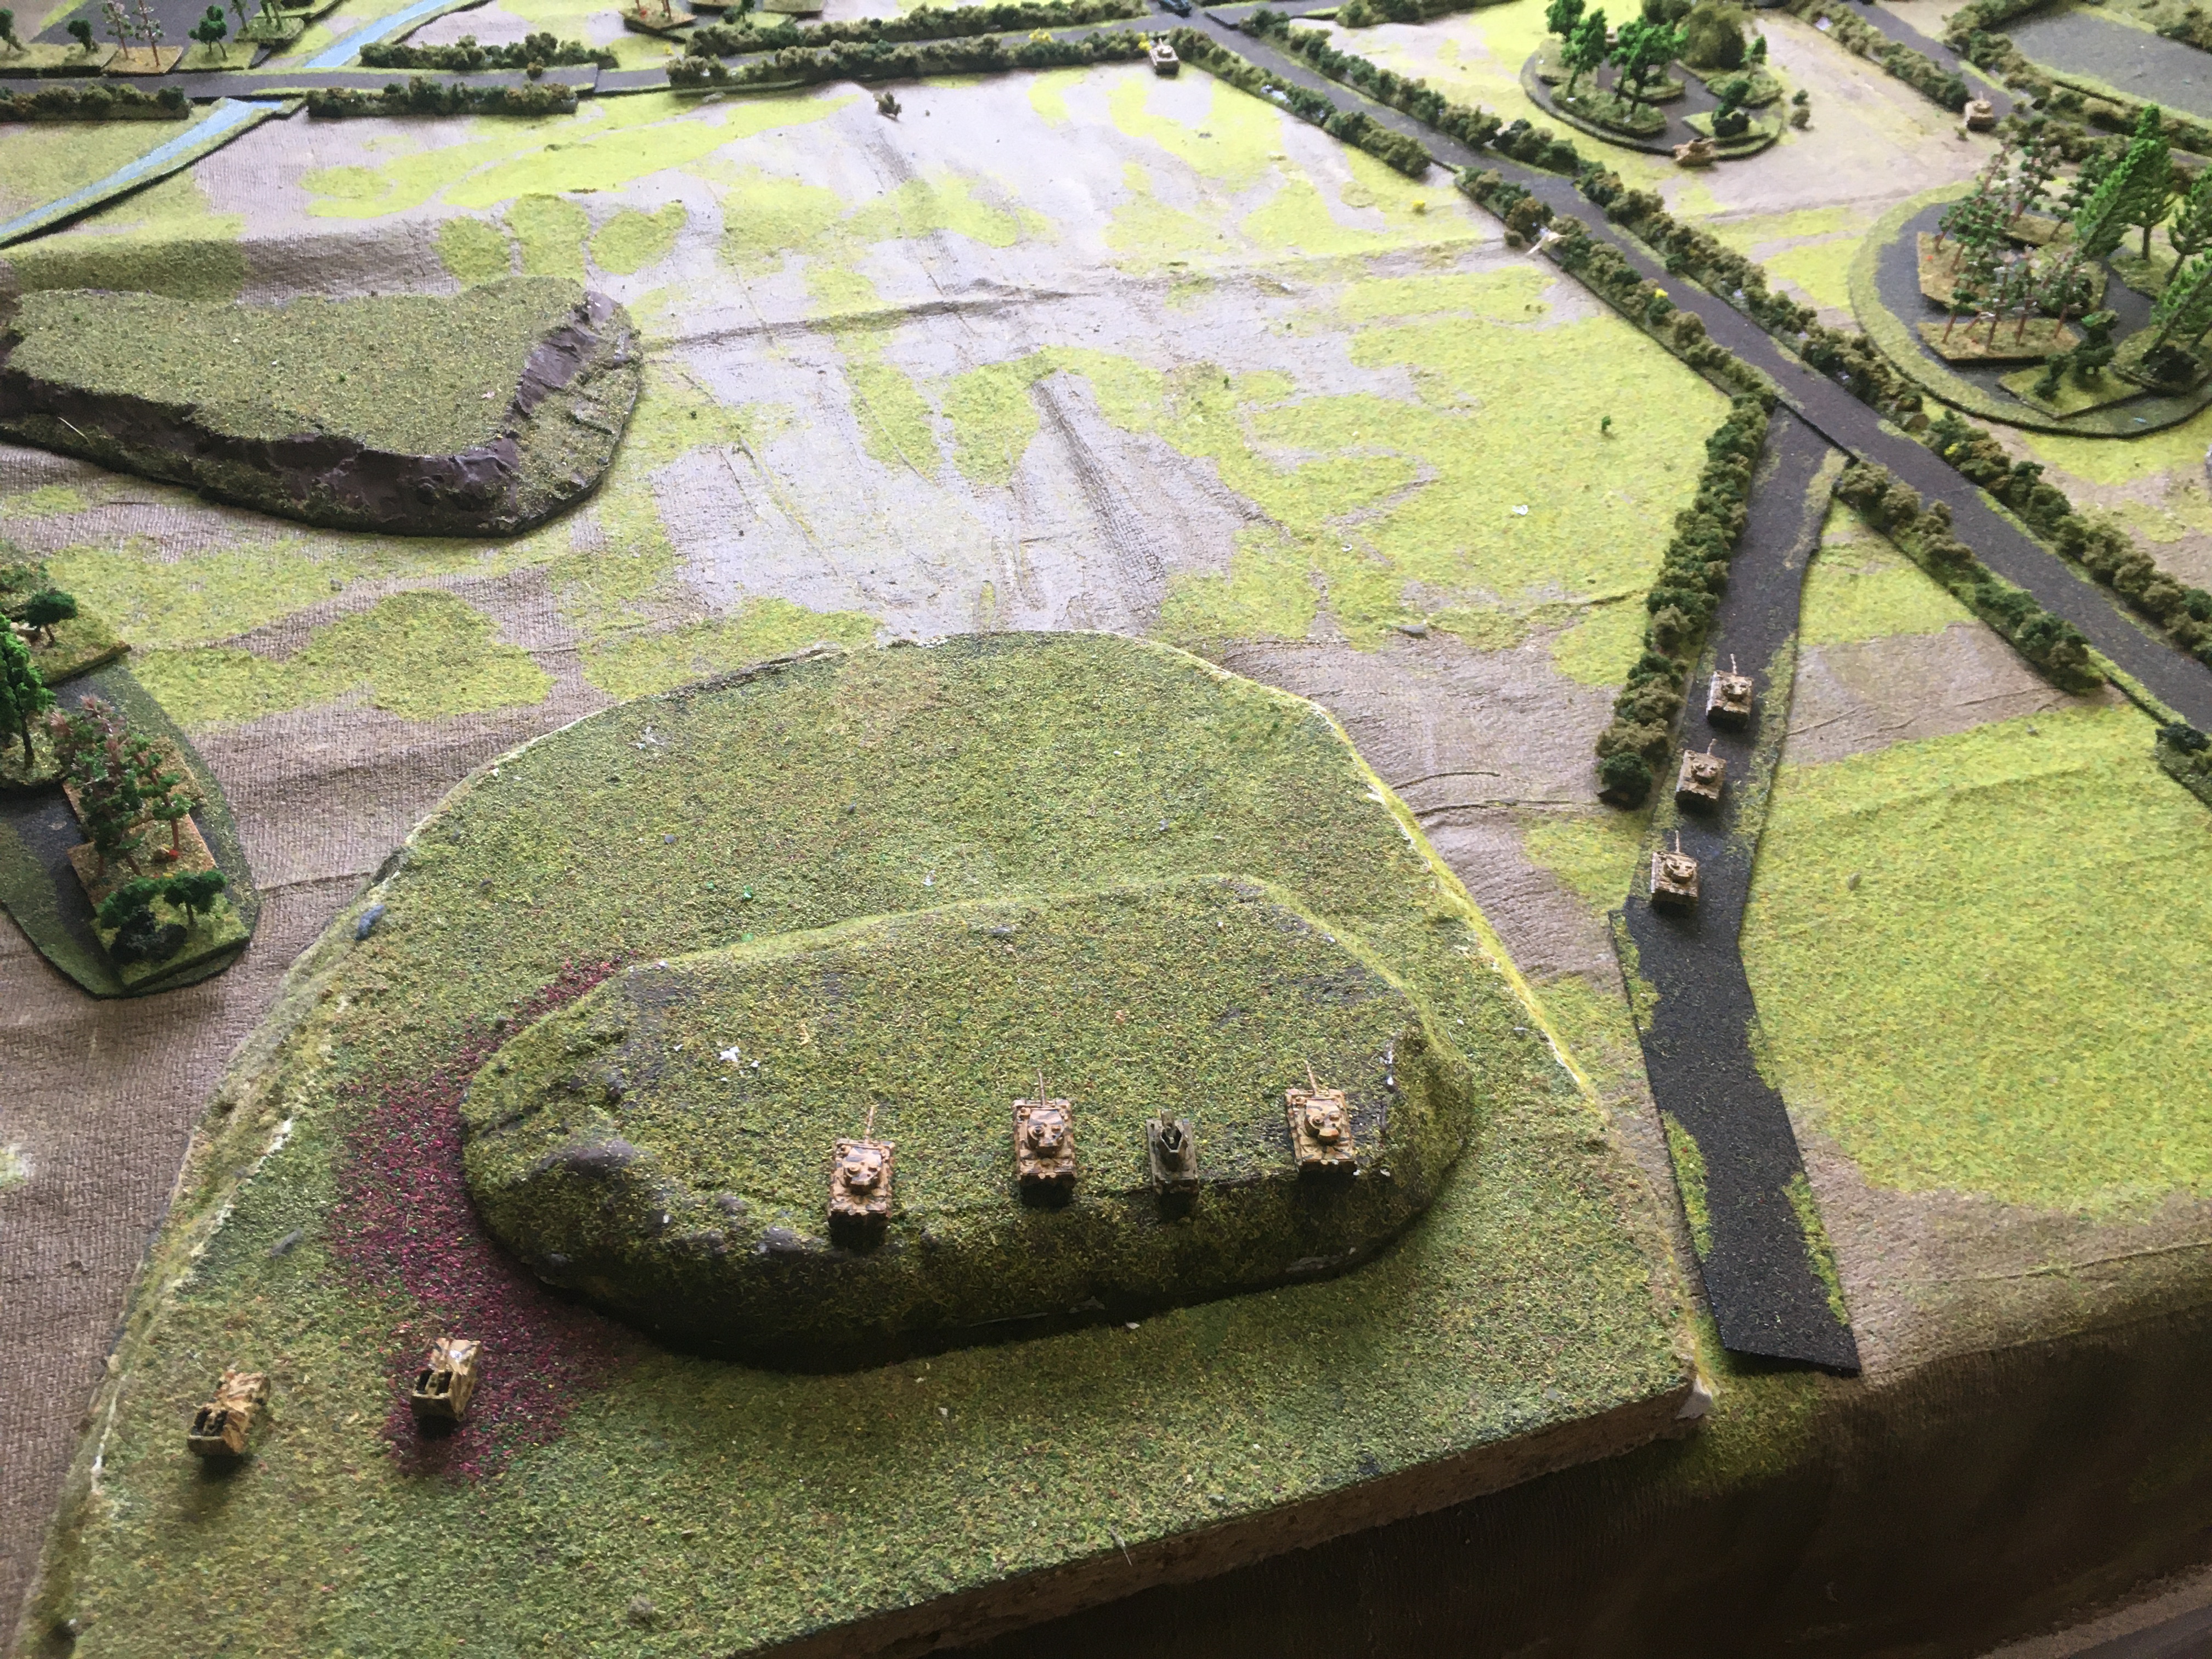
The lead Tiger Pl is placed in an ambush position: the Coy Comd is in the woods in the centre, with one Tiger covering each road.
|
 |
One Tiger in position to ambush the lead British tanks
|
 |
And another about to open fire on the halftracks and armoured cars leading the British advance down the other road.
|
 |
A closer look at the small town
|
 |
The German Panzer Grenadiers off to the south, about to start moving up to their positions.
|
 |
The German Recce Pl just outside the village to the east
|
 |
The German PzIV Coy on the high-ground to the south-east. They are considered to be positioned just in the trees/over the ridgeline at the start of the action,
|
 |
The battle begins with two Cromwells being brewed up in short order.
|
 |
The rear troop of the column gets out of the road to try and flank the Tiger, whilst everyone else is reversing, hoping that the smoke from the burning vehicles in the road is enough to screen them
|
 |
The British are in equal trouble in the town, with two armoured cars and an M3 half track (and the infantry section in side it) all knocked out
|
 |
The Motor Company quickly debusses and deploys its 6pdr anti-tank guns also
|
 |
The flanking Cromwells and Challenger (top-left) were all quickly knocked out by accurate long-range fire (c.1700m) from the Tiger platoon on the hill to the south-west; whilst the Company Commander's Tiger has knocked out a couple more tanks (road, top-left)
|
 |
But the lead Tiger has been knocked out (red/orange smoke, top left) by a Challenger coming onto its flank (in the fields, top); the crew invokes its special plot immunity and will turn up in another Tiger in 5 turns.
|
 |
The plot developing slightly: the leading Tiger platoon has fallen back after the loss of its command tank, but the Panzer IV company commander has given the codeword for the barrage to start on the town
|
 |
This is the last shot I took in this sequence: the Panzer Grenadiers are setting up in defensive positions to cover both roads, whilst the Tiger platoons are reforming by the Y-Junction (left) ready to counter-attack once the bombardment has stopped - it is causing heavy casualties already.
|
Essentially not a lot happened after this; the British infantry had taken quite heavy casualties in the artillery bombardment and struggled to get forward. There wasn't much future in the remnants of the Cromwell Sqn pushing forward too hard either.
Game Notes: Plus points - nice to get lots of stuff on the table, the rules worked well and tanks are fun. Minus points - remembering why I prefer company and platoon games to battalion games; not quite organizing things correctly for this type of game. All the individual mechanics worked well, especially the artillery. The treatment in these rules is great, although it does mean you have to think a bit about what kind of artillery support is available and what you can do with it. The tank fire was simple enough - it is more or less the same as WRG 1925-1950 except with a couple more armour classes and less quirks in it. The way that armour pentration increases at short range is dealt with nicely, in a more granular way than in 1st Ed but in a simpler way than in 2nd Ed. So all good stuff.
However, the game set-up did remind me why this type of gaming can be a bit of a grind. Taking them in no particular order (since they are all-related), these rules propose using individual soldiers and vehicles with a ground scale of 1mm:2m. And you do need those ranges to reflect some aspects of the fighting, especially German anti-tank deployment...but then the big ground scale (a vehicle is 40m long or so) interacts with the requirement for combat elements (i.e. individual vehicles and soldiers) to act in an individually optimal tactical manner (i.e. it matters which building they are in, which hedge they hide behind etc., which side of the platoon the PIAT is placed on) and to spot individual enemies: this creates a lot of work when there is more than a company maximum on each side. I'm sure I can get a bit smoother with practice, although the ground-scale issue is tricky. Perhaps the solution may be to use platoon-based elements and then mark off losses, like Korps Kommander from back in the day.
In any case, despite a couple of reservations, it was fun and I have left the table set-up to perhaps give it another go tomorrow. Some of my WW2 collection is desperately in need of some TLC: vehicles in this one mainly by Heroics & Ros, infantry by Baccus, buildings by Leven.


Your tabletop layout looks absolutely splendid.
ReplyDeleteThanks very much, Peter
DeleteAgreeing with Peter. A fantastic looking game.
ReplyDeleteThanks Ben, appreciate it
DeleteA fine game there for sure! I'm amazed that you were able to play this with so many troops on the table, given the ruleset being used. For me this would work perfectly well for BKC, which is after all aimed at sort of battalion level and upwards sized forces.
ReplyDeleteHi Steve, and thanks. Yes - think you are right, although WRG is supposed to be able to deal with forces of this size, there is quite a lot to keep track of as a solo player. I think perhaps there needs to be more compromises with the terrain to make this level of action more playable. But BKC and CWC are both 'on the list' to check out for the level in-between WRG and Spearhead; although I have been told Command Decision fits in that space too.
DeleteInteresting (and beautiful looking) game. It seems to me that 10 Tiger Is and 7 Pz IVs and a Panzer Grenadier company vs a similar number of Cromwells and British motorised infantry, with the Germans already placed in ambush gave little chance for the Brits.
ReplyDeleteIt is a fair comment; one of the advantages of solo gaming is that one can use these kinds of scenarios better than in a H2H game. The balance - such as it is - was to have a small number of Germans in ambush position but the rest well back and with a reasonable degree of support for the British.
DeleteAnd thanks for the kind words!
DeleteThis all looks very interesting , being quite a fan of the old WRG rule set l am always looking for ways of updating it without losing the spirit of the game . Is there any chance of seeing a copy of Farquhar version ? I appreciate that for copy right reasons it probably can’t be displayed on the blog.
DeleteI believe John intends to publish them in the relatively near future, so you should be able to get a copy at some point.
DeleteIt appears that these rules may be published if so l will be keen purchase a copy.
ReplyDeleteYes, John said he would be doing that.
Delete