The second scenario in Michael Hopper's book
Rise of Eagles 1805 is the
Battle of Gunzburg (but treat Wiki accounts with care!). It features Malher's Division of Ney's Corps trying to force a passage over the Danube in the face of Austrian opposition.
The French:
C-in-C: Malher (Capable)
3 units of Sappers, 1 base of Trained 8lb Foot Arty
1st Brigade: 3 bases of Trained SK2 Infantry, 5 bases of Trained SK1 Infantry*
2nd Brigade: 2 bases of Trained SK1 Infantry
3rd Brigade: 1 base of Veteran SK1 Infantry
*This brigade was split into two separate brigades for game purposes (Polemos suggests 2-6 for the strength of any one brigade)
The Austrians:
C-inC: d'Aspre (Plodding)
1st Brigade: 4 bases of Trained SK0 Infantry, 1 base of Trained Lancers, 1 base of Trained Light Cavalry
2nd Brigade: 3 bases of Trained SK0 Infantry, 1 base of Trained SK2 infantry, 1 base of Trained 6lb Foot Arty
3rd Brigade: 3 bases of Trained SK0 Infantry, 1 base of Trained Cuirassiers
Scenario Rules:
Every 4 turns (20 minutes in my scenario), Austrians can try and damage bridges if there are no French in musket range, with a 1-in-3 chance of doing so. The French can try and repair them, with a 1-in-3 chance if not in musketry fire, 1-in-6 chance if they are.
The Set-Up:
 |
| The Gunzburg battlefield: the villages of Leipheim on the left, Gunzburg in the centre, Reisensburg on the right. The French approach from the Northwest (top). |
 |
| Reinhardt's Brigade occupy Leipheim and the nearby crossing |
 |
| d'Aspre supervises the troops deplyed around Gunzburg. |
 |
| The Austrian right-flank detachment around Reisensburg |
 |
| Mahler's Division deployed in columns ready to advance |
 |
| Another view of the position around Gunzburg |
The Battle:
 |
| Mahler sends different regiments and brigades towards different crssing points in order to prevent a concentration of the defence |
 |
| The Austrians damage the bridge around Leipheim before the French can get close. |
 |
| Another French column approaches the other bridge around Gunzburg |
 |
| Malher leads the first assault across the bridge in person... |
 |
| ...which is driven back with loss! |
 |
| Accurate Austrian artillery fire pushes the other French column back down the road |
 |
| Mahler leads a second attack: the Austrian infantry look distinctly shaky as a result of French skirmisher fire... |
 |
| Mahler leads a battalion of the 25th Light over the bridge, sword-in-hand! There is a missing photo here, but what happened was that the leading French battalion was hit by some effective volleys and routed, but had gained enough time for the French supports to pass over the bridge |
 |
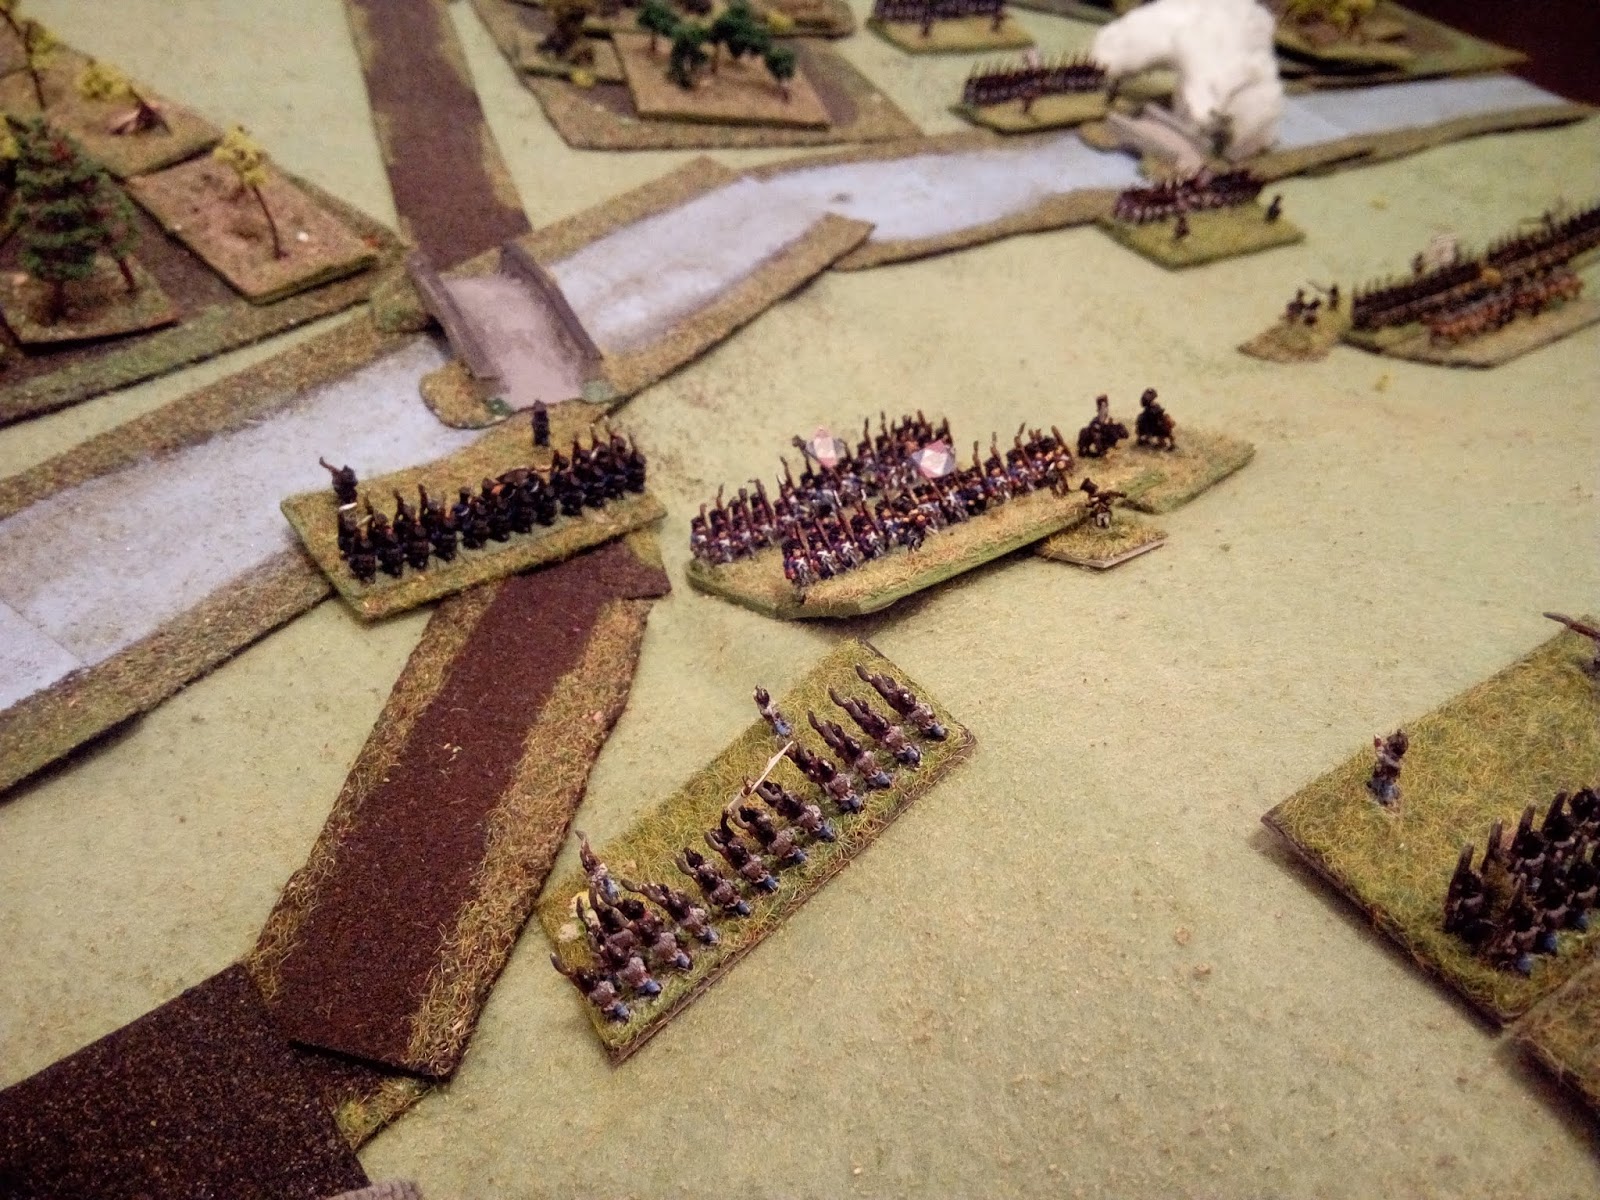
| A second French assault on the other bridge around Gunzburg is also successful, advancing through the Austrian artillery and musketry fire at the point of the bayonet. |
 |
| A wider shot of the action around Gunzburg: the French have successfully stormed across both bridges... |
 |
| d'Aspre throws his reserve regiment in to stabilize the situation on his centre-right...(note that as alluded to above, the leading French Light Bn has been routed and one of the Line Bns is now leading) |
 |
| But the 25th Light beat off the attack with loss, routing the lead Austrian battalion! |
 |
| However, the other Austrian counter-attack has been more successful, the Tyrolean Jagers leading an assault to push the French back with heavy loss over the bridge... |
 |
| French infantry (from the 59th Line) attempt to storm a third bridge, this time opposite Reisensburg on the Austrian Right |
 |
| Although suffering some loss, the French successfully storm this bridge too! (n.b. this bridge had been damaged by the Austrians but partially repaired by French engineers - I forgot to remove the smoke I was using as a damage marker) |
 |
| d'Aspre has quickly re-organized his right-centre to meet the attack of Mahler next to Gunzburg... |
 |
| There are mixed results! One of the French battalions is routed, but the main force (centre) is holding on, led by Mahler himself. |
 |
| Mahler leads another attack on the remaining Austrians... |
 |
| The French push forward towards Reisensburg, despite their numerical inferiority... |
 |
| And boldness is crowned with success! |
 |
| Unlike for Mahler in the centre, who is driven back in disorder, the Austrians holding on in spite of their own casualties and disorder... |
 |
| In order to reduce the pressure on the Austrian Right somewhat, the Austrians counter-attack in the centre-left! |
 |
| The leading French battalion has been routed (top) and the remainder of the column has been pushed back down the road... |
 |
| d'Aspre tries to outflank Mahler's force (left) |
 |
| On the Austrian Right however, things have gone disastrously and the whole brigade is in headlong retreat! |
 |
| Only the single battalion which was trying to outflank the French remains to d'Aspre between Gunzburg and Reisensburg (right) |
 |
| On the other hand, d'Aspre's centre-left has been entirely successful, with the French having abandoned their artillery and all their infantry in rout |
 |
| Mahler brings troops from his successful left to reinforce the attack on the centre |
 |
| d'Aspre calls back his troops to try and scratch together a force to hold back the oncoming French |
 |
| The isolated Austrian Bn to the right of Gunzburg is defeated and routed, despite causing some casualties to the French |
 |
| The single Bn of French grenadiers tried to storm the bridge over Reisensburg after the French engineers repaired it under fire, but were driven back by the Austrian musketeers |
 |
| Mahler brings up superior numbers for his assault on Gunzburg |
 |
| There is a fierce struggle in the village... |
 |
| But French numbers tell, although one column was thrown back by Austrian artillery firing canister.. (top-right) |
 |
| But the Austrians have had enough and retreat in disorder! |
 |
| The Austrian Left will be forced to abandon its position too. |
Game Notes: A good scenario produced a good game. The French have a difficult task, but they are generally superior troops. In this game a mixture of hard fighting and a bit of luck led to victory: the Austrians did perhaps a little better than in history but the dismal effort on their Right led inevitably to defeat as Mahler was able to bring in superior numbers of better troops onto the Austrian flank.
This time, all the French infantry in the scenario were distinctly better than their Austrian opponents: effectively 3-up for the Grenadiers, 2-up for the Light Bns and 1-up for the Line Bns. This consistent superiority allows the French to make otherwise risky attacks and (mostly) get away with it. Here is a different way of expressing the quality of troops in Polemos:
2 (2) - Austrian Line Infantry
3 (2) - French Line Infantry
4 (2) - French Light Infantry; Tyrolean Jagers
5 (4) - French combined Grenadiers
The first number is the value of the troops in infantry combat, that in brackets their strength against cavalry and artillery. The scale is arithmetic (i.e. added to a D6 roll per combat), so it does not mean that a French light infantry unit is worth twice an Austrian line infantry unit. On the other hand, it does show that the Austrians do have to work very hard to resist French attacks, whilst French Grenadiers and light infantry can pull off attacks that the Austrians just can't: e.g. against superior numbers, uphill, towns and so on. If anyone noticed that the Austrians did pull off a very effective counter-attack over one of the bridges, four points to note: firstly, the French were already shaken; secondly, the Austrians had artillery support; thirdly, it was the Jagers leading the assault; and lastly, in Polemos GdD, bridges do not provide any bonus to the defenders in the rules as written...


No comments:
Post a Comment