General Situation: After his defeat at the
Battle of Cricket St. Thomas,
Hopton was called East to help restore the situation in the South after the fall of Portsmouth, to distract and delay Waller's victorious forces. This was achieved, but his opponent in the Southwest, the
Earl of Bedford, took this opportunity to advance further into Somerset, cutting off Hopton from his main areas of support in Cornwall and Devon by occupying Bridgwater and preventing Royalist movement of the River Parrett. His mission in the south achieved, Hopton has retraced his steps westwards and is intending to break past the Earl of Bedford's army.
Royalists:
Hopton (Good):
4000 Foot (4 Veteran Foot (M) bases, 4 Raw Foot bases (M) ), 4 Guns (2 Arty bases)
1750 Horse (8 Veteran Horse (Sw) bases, 6 Raw Horse (Sw) bases); 250 Dragoons (1 Raw Dragoon base)
n.b. M - 1:1 pike:shot ratio; Sw - Swedish tactics
Parliamentarians:
Bedford
(Poor): 4000 Foot (4 Veteran Foot (SH) bases, 4 Raw Foot bases (SH) ), 8
Guns (4 Arty bases), 1750 Horse (8 Veteran Horse (D) bases, 6 Raw Horse (D) bases); 250 Dragoons (1 Raw Dragoon
base)
n.b. SH - 1:2 pike:shot ratio; D - Dutch tactics
(n.b. - I stuffed up the calculations, both sides should have had 500 Horse less than they actually had here. As both sides were the same, I figure that no real harm was done).
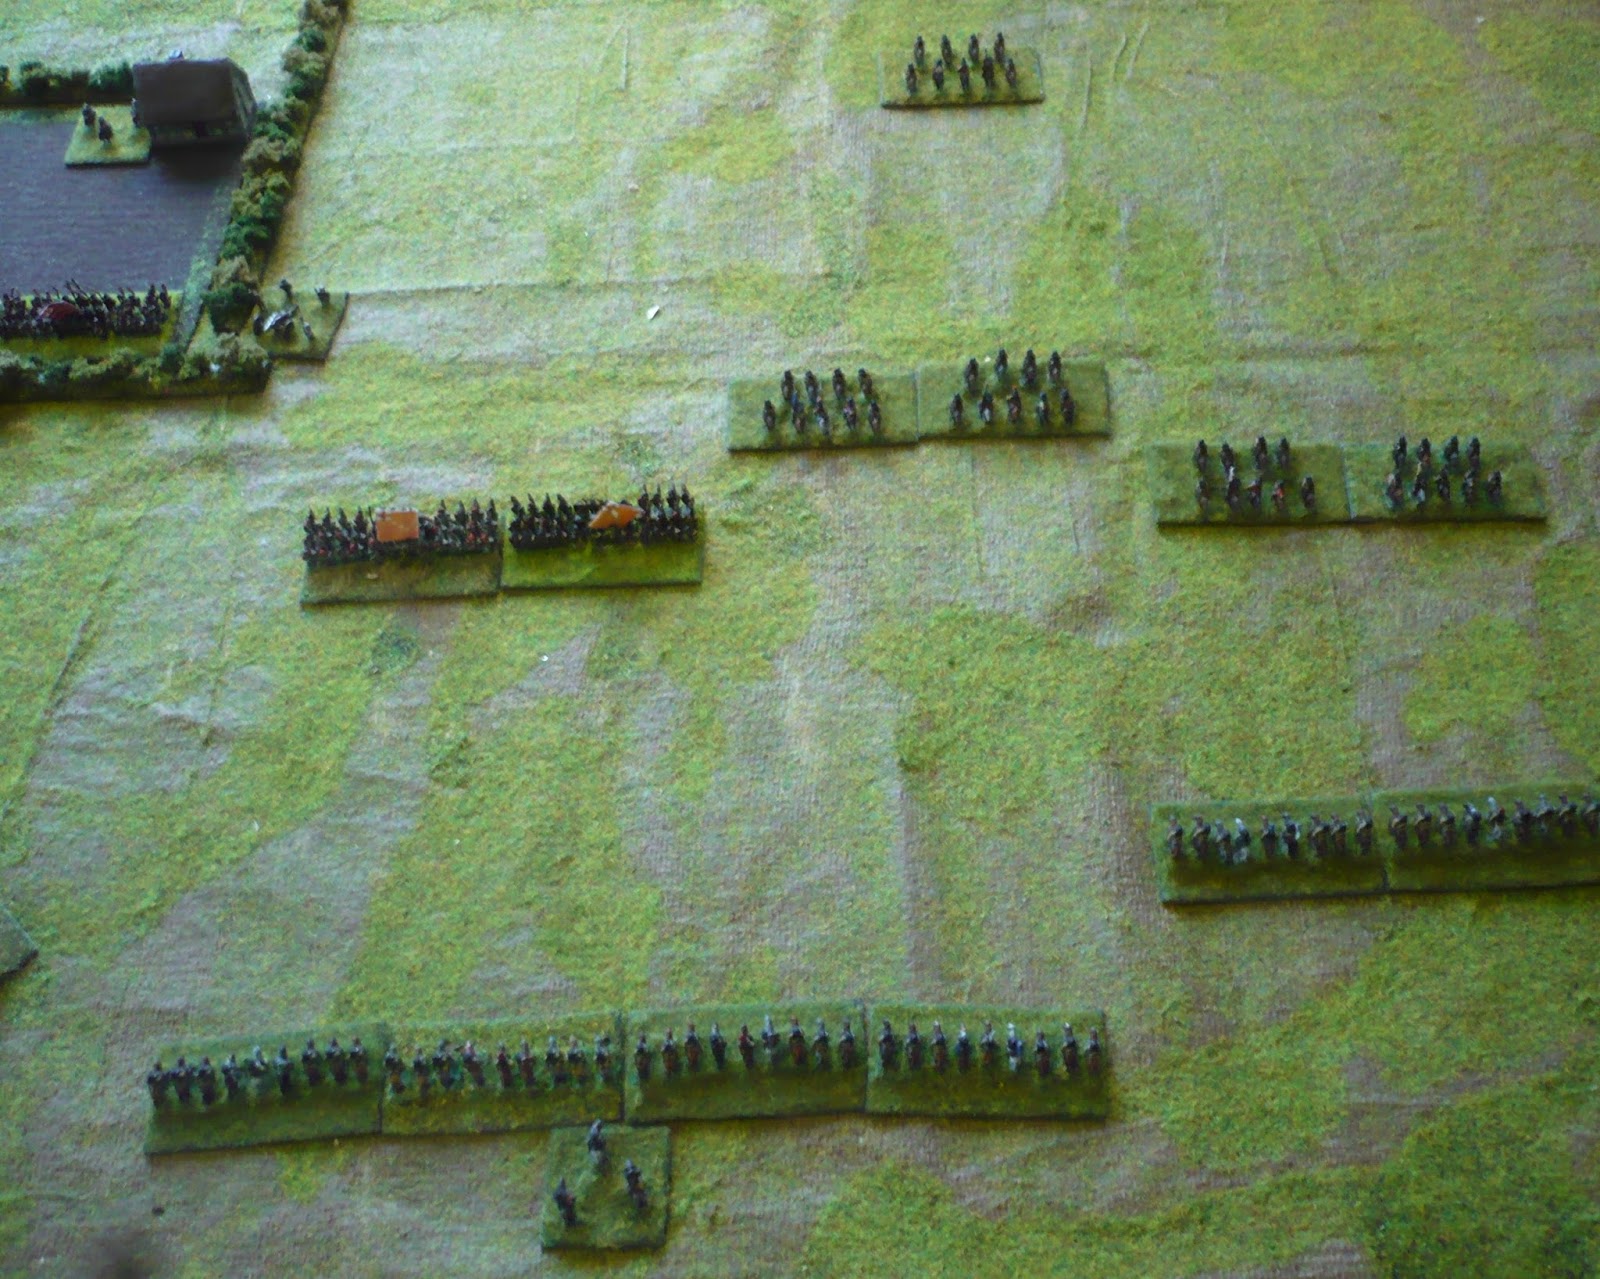
The Set-Up:
Yet again, I rolled up a rather sparse set of terrain! The terrain is randomly generated according to the tables given in the Polemos ECW rule book and for the second game in succession, I generated very few terrain features.
 |
| The Parliamentarians are defending the North (top) around an isolated farm, using a standard formation: infantry in the centre, horse on the wings. The Royalists have overloaded their right wing with cavalry |
 |
| Room to manoeuvre on the Royalist left wing is limited by the presence of the River Parrett and some marshy ground around its banks. |
 |
| A view along the lines from the East: Royalists approaching from the left, Parliament's forces to the right, defending |
 |
| And from the opposite angle, behind the Parliamentary right wing. |
The Battle:
 |
| The Royalist infantry on the left advance and are confronted by Parliamentary cavalry: the Earl of Bedford has ordered his right-hand infantry brigade out from the cover of the hedges to support. |
 |
| The Royalist cavalry on theit right advance; Hopton halts the left-most brigade, fearing to charge too recklessly into the veteran Parliamentary infantry which is supporting the Royalist cavalry. |
 |
| The first clashes! The Royalist Horse charges in... |
 |
| The Royalist infantry on the left continue to push forward... |
 |
| The melee on the Royalist right continues: the first troops become disordered and start to waver... |
 |
| Same position, slightly different shot |
 |
| The Parliamentary horse begins to break in places...but the Cavalier cavalry is also looking shaky... |
 |
| The Royalist veteran infantry confidently move up to attack the Parliamentary horse on the Royalist left at pike-point |
 |
| Another Royalist infantry brigade moves forward to try and storm the Parliamentary main position |
 |
| The Parliamentary horse's first line comes off slightly the worse, but the second line restores the situation, by and large. Some Royalist cavalry again begin a wild pursuit of a defeated enemy (top-left) |
 |
| The Royalist infantry on the left have routed some of the Parliamentary horse; Parliamentary infantry begins to pour in musketry to try and stop their advance |
 |
| Parliament's left wing advance, daring Hopton to throw in his final brigades of horse |
 |
| So near and yet so far: Royalist infantry briefly break through the hedge, but are repulsed subsequently |
 |
| The Parliamentary forces have formed a solid line again on their left |
 |
| A see-saw combat on the Royalist left sees Royalist infantry break some of their veteran oppenents (see the base routing top-left) |
 |
| But the Parliamentary centre has held-off a second assault, this time leading to the right-hand Royalist battalia breaking... |
 |
| A Parliamentary charge against the Royalist's second line cavalry has some of the cavaliers on the run, the others wavering... |
 |
| Stalemate on the Royalist left, as some of the Royalist infantry are broken in their turn |
 |
| The final position on the Royalist right: the defeat of that second-line brigade has stopped much hope of Royalist victory here. The action continued indecisively for a couple of turns, before it was clear that the battle was a tactical draw. |
Game Result:
A tactical draw - the Royalists lost slightly more infantry, the Parliamentarians more horse, plus two guns (temporarily). However, the strategic win was clearly with the Earl of Bedford again, as he has held Bridgwater and the line of the River Parrett against Hopton. Both sides lost c.850 men in this quite hard fought struggle.
 |
| The Earl of Bedford |
 |
| Ralph Hopton |
Game Notes:
The
Polemos ECW rules continue to give a good game, quick to play but with convincing results, generally. I may play about with the troop quality modifiers a little: using only Veteran and Raw (because this fits in better with "The King's War", which is the boardgame being used as the campaign engine) seems to create too many "sure things". The 1:1 pike:shot ratio continues to perform very well against 1:2 pike:shot ratio troops, perhaps ahistorically. The problem is that if musketry is generally ineffective, then more pikes seems like a good idea! But on the other hand, this may be a consequence of my poor tactics...
There is also still much to be understood about exactly how best to use horse in this game. The Royalist cavalry do have the advantage in terms of more ferocity in the charge, but their recklessness does leave them very vulnerable to second echelon forces of Parliamentary horse.
Figures by
Baccus 6mm, on a homemade mat on a 5'x3' table.


Always enjoy your AAR's. thanks for sharing.
ReplyDeleteThanks Norm, much appreciated.
ReplyDeleteExcellent stuff! ECW in 6mm really looks terrific and provides a grand scope to the battlefield augmented by your terrain layout. Being unfamiliar with Polemos ECW, I would appreciate an overview so that I might understand your pike-to-shot ratio tactical conundrum.
ReplyDeleteThanks very much Jonathan.
ReplyDeleteMy overall review of Polemos ECW is here: http://hereticalgaming.blogspot.co.uk/2016/03/polemosenglish-civil-war-2-nd-edition.html
In respect of this particular issue...Polemos ECW has a combat system reminiscent of DBA. Shot-heavy infantry units have a 1 point advantage in ranged combat over equally mixed shot-pike infantry. However, the shooting table is calibrated so that infantry need to be 2 up on an opposed D6 die roll (all other things being equal); so the shot-heavy unit need to beat the mixed unit to stop them (never mind do them damage); a mixed unit will have a 1 point advantage in close combat, almost certainly made a 2 point advantage by getting the "advancing" bonus. The mixed unit only needs to win the modified opposed die roll to force their opponent to recoil. And two successive recoil results will rout a unit...
Add in the extra solidity of the mixed unit against cavalry and it seems much more efficient than the shot-heavy unit. No individual bit of the reasoning seems at fault, but systemically I'm not sure there is much advantage in having the extra muskets - which wasn't what soldiers of the time felt. Does all that make sense?
Of course! Thanks for the explanation.
Delete