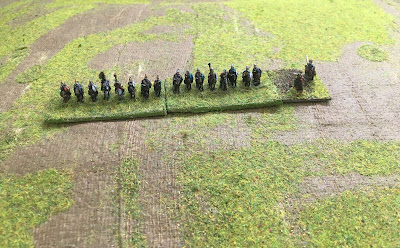
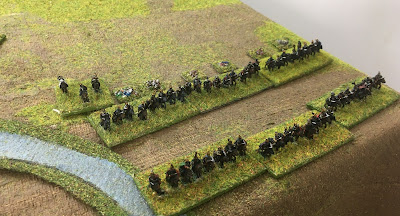
The Scenario: A complicated little scenario this for the second battle in the campaign. Initially, the Mandubi will attack the Germans. A Roman force of two legions plus a cavalry force are force marching to reach the battlefield, whilst Ariovistus and more Germans, plus the Treveri warbands, are trying to reach the Germans defending against the Gaulish advance. The shape of the battle will therefore be strongly determined by which reinforcements arrive first...
The Romans:
The Mandubi:
Two tribes, each of 4 bases of Raw Tribal Foot and 2 bases of Trained-Elite Cavalry
Their leader Biuito (Average, Rash) and an officer Rigant (Poor, Steady)
VIII Legion:
Commander: Decius (Poor, Steady)
4 bases Trained Legionaries (Armoured)
2 bases Trained Cavalry
1 base Artillery
IX Legion:
Commander: Geta (Inspiring, Steady)
4 bases Trained Legionaries (Armoured)
2 bases Trained Cavalry
1 base Artillery
Roman Cavalry:
Commander: Publius (Average, Steady)
4 bases Trained Cavalry
When/if the Romans arrive, Geta will assume command of the whole force.
The Germans:
German Infantry:
Commander: Adalgard (Average, Cautious)
4 bases Trained Tribal Foot
2 bases Trained Cavalry
German Cavalry:
Commander: Widald (Average, Rash)
4 bases Trained Cavalry
Treveri Tribe 1:
Commander: Casso (Average, Cautious)
4 bases Raw Tribal Foot
2 bases Trained-Elite Cavalry
Treveri Tribe 2:
Commander:Sano (Average, Cautious)
2 bases Raw Tribal Foot
2 bases Trained-Elite Cavalry
Ariovistus' Personal Warband:
Commander: Ariovistus (Inspiring, Steady)
4 bases Trained Tribal Foot
2 bases Trained Cavalry
German Infantry:
Commander: Adalgard (Average, Cautious)
4 bases Trained Tribal Foot
2 bases Trained Cavalry
If Ariovistus arrives, he will take over the force; until then Widald will command.
The arrival of reinforcing contingents is controlled by the dice. At the end of each turn a die is rolled and a '6' means that the contingent arrives on the next phase of the relevant player. The Romans will arrive behind the Mandubi, and Ariovistus behind the Germans; if the Treveri should arrive, it will be on the Romans' right flank.
The Set-Up:
The terrain generator made a slightly hilly but very open area around a stream in current North-Eastern France/South Belgium.
 |
| The Mandubi foot warriors |
 |
| A contingent of the Germanic cavalry |
 |
| Gallic and German foot warriors face each other over the stream (left); whilst the cavalry face-off on the far bank (right) |
 |
| A wider shot: the Gallic commander Biuito has positioned himself with his bodyguard in the centre of his forces (bottom-left) |
 |
| The battle begins with Widald himself leading a charge of the German horseman against their Mandubi opponents - the Mandubi are looking distinctly shaky... |
 |
| And are routed in short order! The Germanic cavalry becomes disorganized as it starts to pursue. |
 |
| The Mandubi infantry (left) shake-out to present a better front to the now numerically superior Germans on this flank |
 |
| The Romans arrive first! IX Legion advances and its commander assumes command of the whole force |
 |
| VIII Legion appears on the left flank |
 |
| A wider shot, as the Romans arrive |
 |
| The Gallic foot attack the Germanic cavalry in the flank, as they try to reform after pursuit. |
 |
| Some of the German horsemen rout, before Widald gets the remainder of his men in some kind of order. |
 |
| To ease the pressure and take advantage of the divided Mandubi foot, the German foot warriors advance over the stream |
 |
| The outnumbered Gauls fall back from the bank of the stream |
 |
| Meanwhile, the Roman cavalry are charged by a contingent of German cavalry, who cause some damage to the Romans! |
 |
| The Romans just manage to hang on in the fight, with their commander amongst them |
 |
| The Treveri arrive to support their German allies |
 |
| Quickly entering the fight, some of the Treveri horsemen charge into the Mandubi Foot! |
 |
| Another shot - note that the remaining Mandubi foot have managed to push back their German foes around the stream (bottom-left) |
 |
| The Mandubi push on into the stream (left), although their main body is routing (bottom-centre) |
 |
| As more Romans come up, the German cavalry in the centre are beaten and routed |
 |
| Biuito at the head of his bdyguard assist the remaining foot warriors, who have eliminated most of the German tribal foot to their front |
 |
| A wider shot of the situation around the stream |
 |
| And a wider shot of the centre and right flank of the Gallo-Roman force as a whole |
 |
| Meanwhile, the Roman outflanking movement is progressing well (left) |
 |
| The Roman reserve cavalry moves in to the gap left by the defeated Mandubi |
 |
| More Roman cavalry get involved, and the Treveri horsemen start to break (right)! |
 |
| VIII Legion crossed unopposed and is now beginning its wheel (left) |
 |
| IX Legion is also across, and hastily reforming before it can be attacked by the remaining Treveri horsemen, who are being blocked by the routing German foot warriors (centre-right) |
 |
| The Roman Cavalry victorious against the Treveri (bottom) |
 |
| The position at the end of the battle, as the Germans and their Gallic allies start to flee the battlefield, with the Romans and remaining Mandubi advancing across the field |
One of the delights of campaigning is that it generates types of battles that don't come up so often in one-off battles. This was reminiscent of one of the campaign 'warm-up' games I played, except this time it was the Romans who arrived first, and Ariovistus who didn't show up at all. Naturally this determined the overall flow of the battle. The only thing I think I need to change is one of my campaign-wargame translations: basically each force in the campaign rules has a number of strength points, which I have made equivalent to two Polemos:SPQR bases. Except for the specified cavalry units, all of the units are made predominantly of infantry but one strength point can be divided between cavalry and skirmishers. However, it is so obviously better in these rules in most circumstances to take the cavalry rather than the skirmishers, I am going to amend this in future to a point must be taken as 1 base cavalry, 1 base skirmishers. Since all sides were affected equally in this battle, I don't feel any need to replay the action, it is just a note for going forward.
However, in the longer-term, I am not quite sure about how I feel about the effectiveness of cavalry in this game. The author in his design notes seems to feel it possible that players will find cavalry underrated: I find this...surprising.
We'll go through an example: 2 Trained Cavalry bases attack 2 Trained Tribal Foot bases, each supported by another Trained Tribal Foot base behind. So, first, the Cavalry will charge:
Cavalry charging = 4; Tribal Foot defending = 2 (i.e. a +2 advantage)
If the cavalry is elite, has a general close by, is armoured or charging flank or rear, or if the defender is overlapped, this advantage will be greater
If the foot is in cover or in fortifications, the advantage will be lower
Either side can gain an advantage by being uphill, or the other side beig shaken.
On an even roll, the Cavalry will charge home. If it gets a single additional point of advantage by a better die roll or by having a general around or similar, the Foot will also become shaken.
Assuming the cavalry charge home, the fight goes into the combat sub-routine:
Cavalry attacking foot = 3; Tribal foot defending against mounted = 1 (i.e. a +2 advantage)
The cavalry will then get a +2 advantage for charging (total +4)
The foot get a +1 advantage for having the extra rank (total +3)
Both sides get +1 for being unformed unshaken in the first round
On an even roll, the cavalry will cause a +1 recoil shaken result; this is typically the beginning of the 'death spiral', since the combination of cavalry following up and the foot being shaken will mean that this level of advantage continues throughout the combat: any additional factor in favour of the cavalry will increase the effect. (n.b. if the Cavalry is Roman, they are slightly less likely to damage in the first round, more likely in subsequent rounds - this is usually a disadvantage, since you want to do more damage in the first round and increase the chances of the death spiral...). If the foot were Roman Legionaries instead, the 'charge' sub-routine is exactly the same. In the combat sub-routine:
Cavalry attacking foot = 3; Legionaries defending against mounted = 3 (no advantage)
The cavalry will then get a +2 advantage for charging (total +2)
The foot get a +1 advantage for having the extra rank (total +1)
Cavalry get +1 for being unformed unshaken in the first round (total +2)
The difference here is in the second round (assuming no damage to either side, but Legionaries pushed back), the difference will be '0'. Cavalry ideally need one or two advantages against Legionaries (although one of a general present, overlap or Elite is often in play).
Compare the same combat with DBA:
Cavalry 3 vs Warband 2 = a +1 advantage; the most likely outcome is a 'recoil' result for the foot, although it needs only a 1 point swing to make it a cavalry recoil instead (cavalry recoil on drawn combats).
So overall, I don't think it is obvious that cavalry are under-powered in Polemos: SPQR. Whether they are over-powered is a different question...
Rules used were (obviously!) Polemos: SPQR, figures by Baccus 6mm.


