
The Terrain:
Interestingly, the scenario did not actually come with a map. My mind rebelled against this slightly but I did my best to set it up in accordance with the description given in the text:
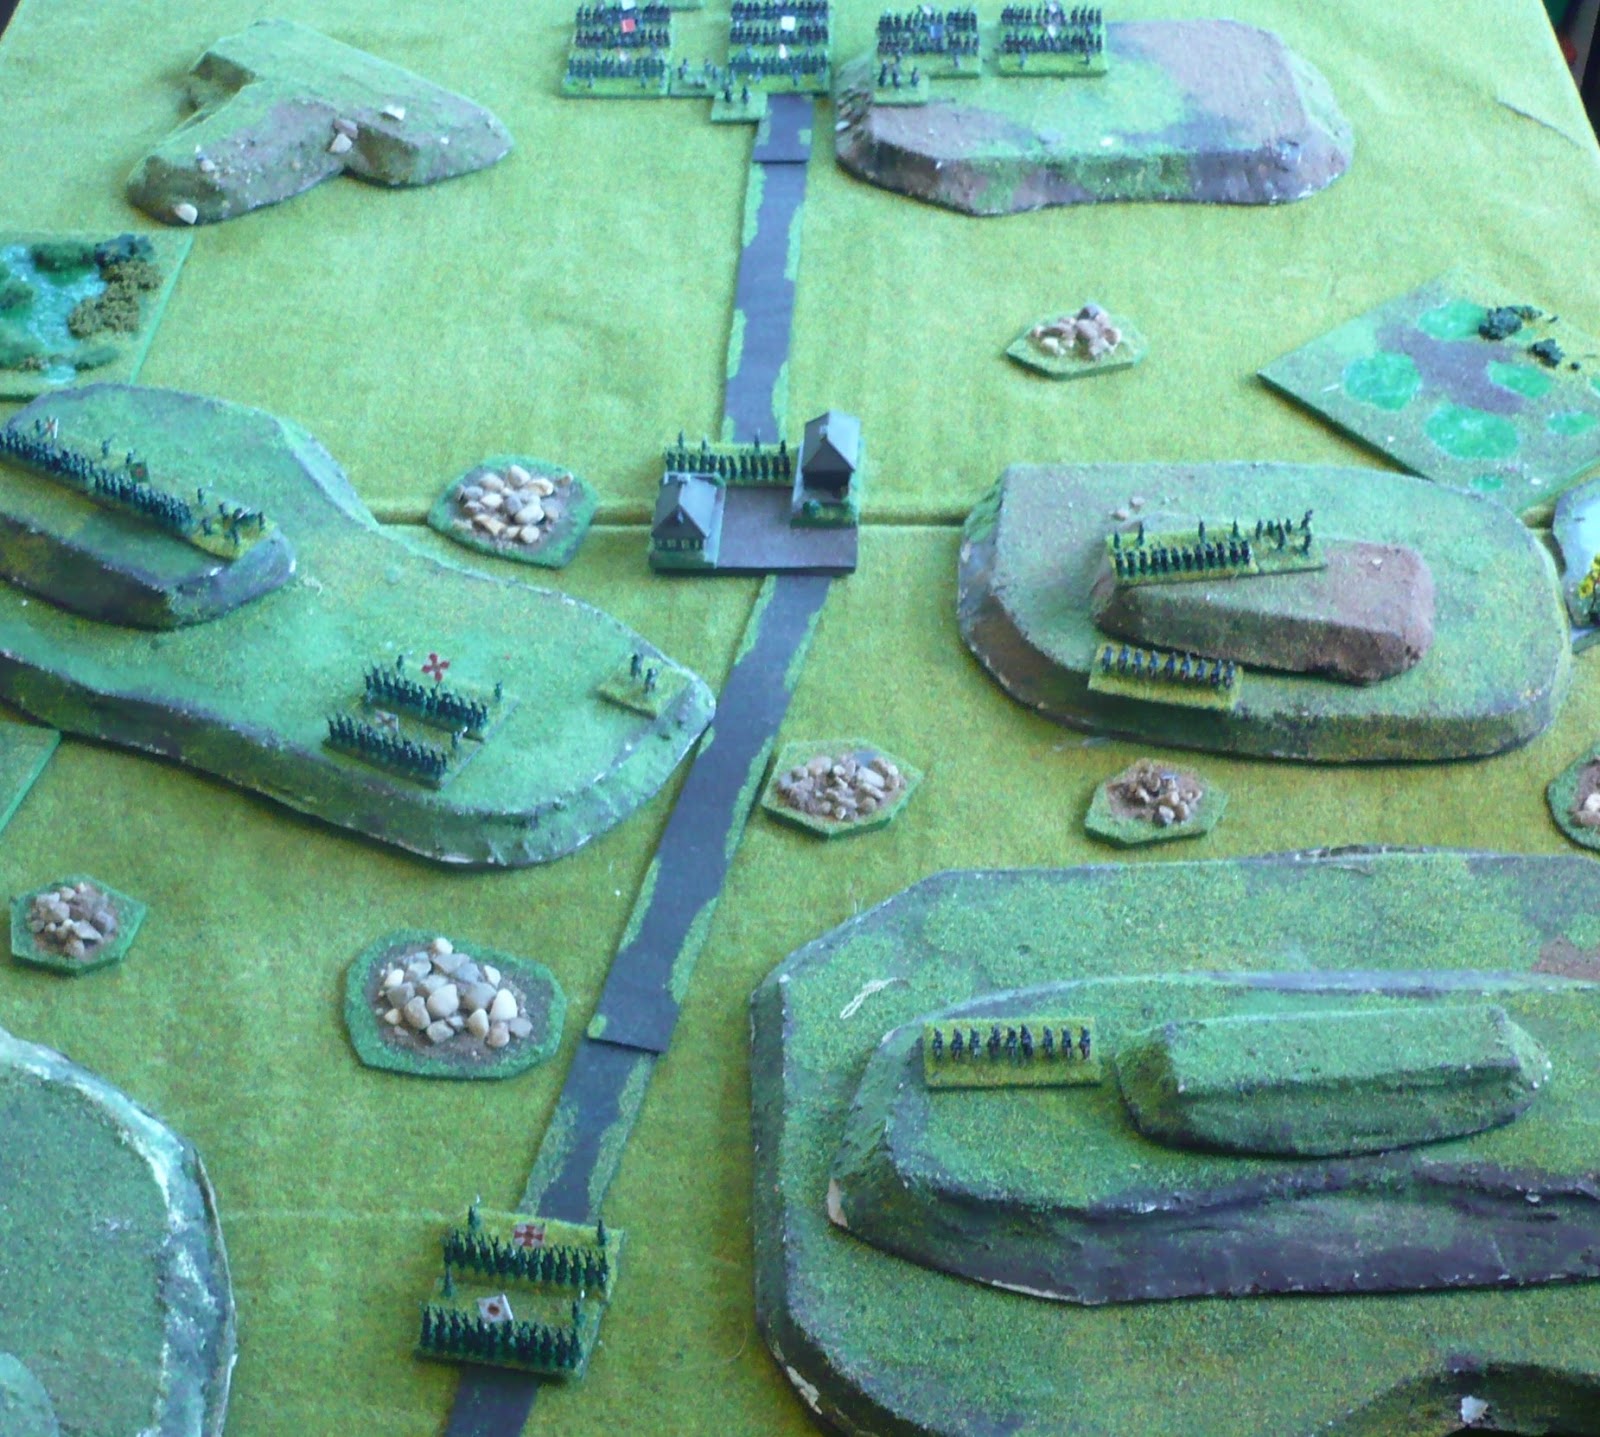
"The main feature of this battlefield is a large area of high ground that is covered by broken or rough ground known as the Saltanovka Crags. The crags culminate in a significant crest on the defender’s side of the table, which is the objective for attacking forces. To make matters more complex for the attackers, the crags are flanked on either side by marshland. However, a substantial roadway runs from the centre of the attacker’s board edge through the defender’s, bisecting the crags. There is a village in the middle of the board adjacent to the roadway, at the start of the heights. There are also a few other lower hills on the plain beneath the crags."
The article then detailed the particular rules covering the effects of this terrain, such as the reduced movement rate going up the slopes and the fact that the village is dilapidated and isn't really a proper strong point.
The Orders of Battle:
The Imperial Russian Army
Gen Husin (Capable)
1st Brigade: 4 bases of Trained SK1 infantry
2nd Brigade: 2 bases of Veteran SK1 infantry (Grenadiers)
3rd Brigade: 2 bases of Trained SK2 infantry (Light Infantry)
Cavalry: 2 bases of Trained Light Cavalry
Artillery: 1 base of 12lb Foot Artillery, 1 base of 6lb Horse Artillery (*used as a Foot Bty in this game; in the Polemos rules, Horse Btys can't normally be used for long-range bombardment)
The Imperial French Army
C-in-C Gen Deschamps (Capable)
1st Division: Gen Lefort (Capable)
1st Brigade: 2 bases of Trained SK2 Infantry (Light Infantry); 4 bases of Trained SK1 Infantry
2nd Brigade: 4 bases of Trained SK1 Infantry
3rd Brigade: 4 bases of Veteran SK1 Infantry (converged Elite Coys.)
1 x 6lb Foot Bty
Cavalry Brigade: 2 bases of Trained Light Cavalry, 1 base of 6lb Horse Artillery
The French C-in-C was forbidden from committing his elite brigade until the village was cleared.
The Set-Up
 |
| The French approach along the road from the left; the Russians in defensive positions along the crags and in the village in the centre. The Russian grenadiers remain in reserve (right) |
 |
| View from behind the advancing French columns |
 |
| And the view from behind the Russian defenders. Note that the artillery is placed on the crags on each flank |
The Battle
 |
| The French columns advance swiftly. Accurate Russian artillery fire causes some delay on the French left-hand column (top) |
 |
| The French columns begin to break out into formations deplyoed for attack! The Russians bring up their Grenadiers to supprt the light infantrymen defending the village |
 |
| A textbook French light infantry attack takes the village and throws out the Russians! The left-hand French infantry find advancing much tougher because of the continuous accurate Russian artillery fire |
 |
| Same position, different perspective. Note the single figure by the Russian column just above the village, indicating its disorder |
 |
| Same position again, but showing the wider context. Note the Russian cavalry moving to support the infantry defending the crags to the south of the road (bottom-centre), facing the French line. However, the Russian Grenadiers' morale collapsed as a result of the village battle and they withdrew from the field! This appeared to leave the morale of the entire Russian Army quite shaky... |
 |
| The Russian Jaegers deliver a superbly executed "volley-and-charge" reminiscent of British guardsmen, and knock an attacking French column down the slopes. |
 |
| The French prepare an attack from the village to try and force the pass |
 |
| Before the next French attack gets going however, the Russian light infantrymen launch a second, devastating charge! The leading French battalion routs in tatters, the supporting battalion is distinctly wavering, despite the presence of the French general... |
 |
| The Russian counterattacks continue to devastate! Note that the Russian light infantry has continued its attack and routed the second French battalion, whilst the infantry brigade on the southern crag has matched this with an attack of its own, which has devastated two more French battalions. A pity for the French, as their attack from the village has started to be successful and pushed the Russian defenders back. |
 |
| Different perspective |
 |
| And from a bit further out |
 |
| The end of the battle as the French force's morale collapsed, two of the three infantry brigades being now spent. The Russian light infantrymen maintained their discipline and this kept the Russian force from facing a similar collapse. |
A fast, interesting, enjoyable game, played out as usual for me using the Polemos General de Division rules.

As ever, hills are very considerable obstacles in this ruleset and I continue to internally debate the case for reducing the defensive modifiers somewhat. The Russians did get a bit luckier generally on the key dice rolls too! The formation and force morale rolls also played a typically big part in the game. The early collapse of the Russian grenadier brigade (a 1-in-6 chance) left the Russians within one more broken formation of a possible army collapse for the rest of the game - fortunately for them, they rolled well (low) after this disaster. The French on the other hand failed four key morale rolls in a row which led to the collapse of two infantyr brigades and then the whole army's morale. In retrospect, the French were slightly drawn into an attack on too wide a front and would have done better to mask the slopes and force the pass until the leading Russian high positions were bypassed. Better luck next time!
The table was a 4'x3' board. Figures Baccus 6mm Napoleonics, with buildings by Timecast. The game took just over an hour of playing time, with the game lasting 11 turns (c.55 minutes of game time). This scenario was very well designed and gave a good game. I am still in two minds about the lack of a map though. A part of me thinks "a picture is worth 1000 words" but a part of me thinks that it is a good way of ensuring players just use the closest thing they have to hand, rather than stressing too much about trying to match an imaginary map. I suppose much will depend on wether the scenario requires very precisely laid terrain to make it work.
Excellent replay. I have the magazine and thought it was a nice looking article, but never even noticed that it didn't have a map, though they do almost take a page column to describe it. Thank You, I will revisit the article now.
ReplyDeleteThanks very much Norm, much appreciated.
DeleteGood points about providing a narrative description of a battlefield versus providing a map. Is it possible that the map was accidentally dropped by WSS?
ReplyDeleteThanks for the feedback, I'm glad the scenario worked. Yes, we could have done with a map. Sorry!
ReplyDeleteThanks Dale and Guy. As I mentioned, it was a little different to rely on a description rather than a map but I think it turned out okay - it didn't harm the game. Given a sufficiently good explanation (as there was in this scenario), this map-less way can work, better than I had first imagined.
DeleteHi Gents I do have a map if you need one don't know what happened to it , that said your recreation is remarkably like the set up I had
ReplyDeleteThanks Adrian. I would be interested in seeing your original map, but I think it is heartening that your text description enable a set-up which was apparently quite close to your original.
ReplyDelete