The Battle of Montehermosa, early June 1809
General Situation: King Joseph and the Army of Spain were in a difficult position, with every possible move dangerous. Should they fall back into Leon? Force a way through to Madrid and then escape? Attack Wellington directly? Play for time and wait until Moncey's III Corps could rejoin them from its period refitting between Salamanca and Astorga? In the end King Joseph vacillated between the Madrid withdrawal and attack, but Cuesta's close pursuit persuaded Joseph that a precipitate retreat would be a defeat without a battle, whereas with luck he might check or defeat Wellington and Cuesta. Noting that Cuesta was slightly exposed, Joseph has ordered an all out attack. Could Wellington arrive in time to bring succour to the Spaniards?
Orders of Battle:
The Army of Spain - King Joseph (Plodding)
Saligny's Div: 3000 Infantry, 6 Guns
Latour-Maubourg's Div: 5000 Cavalry, 6 Guns
I Corps - Suchet (Decisive)
Ruffin's Div: 4500 Infantry, 6 Guns
Villatte's Div: 3000 Infantry, 6 Guns
Valence's Div: 6000 Infantry, 6 Guns
Treillard's Div: 3000 Cavalry, 6 Guns
I Corps Artillery: 24 Guns
IV Corps - Lefebvre (Capable)
Sebastiani's Div: 3000 Infantry, 6 Guns
Lapisse's Div: 45000 Infantry, 6 Guns
Lahoussaye's Div: 2000 Cavalry, 6 Guns
IV Corps Artillery: 12 Guns
V Corps - Mortier (Capable)
Rey's Div: 4500 Infantry, 6 Guns
Gazan's Div: 4500 Infantry, 6 Guns
Lorge's Div: 3000 Cavalry, 6 Guns
V Corps Artillery: 24 Guns
VI Corps - Ney (Decisive)
Bisson's Div: 4500 Infantry, 6 Guns
Marasin's Div: 4500 Infantry, 6 Guns
Mermet's Div: 3000 Infantry, 6 Guns
Grouchy's Div: 1000 Cavalry, 6 Guns
VI Corps Arty: 12 Guns
Infantry: 45000 Cavalry: 14000 Guns: 156
The Allied Army
Spanish Army of the Centre - Cuesta (Plodding)
Zayas' Div: 3000 Infantry, 2000 Cavalry, 6 Guns
Moretti's Div: 4500 Infantry, 1000 Cavalry, 6 Guns
Total: 7500 Infantry, 3000 Cavalry, 12 Guns
The British Army - Wellington (Decisive)
Anstruther's Div: 6000 Infantry, 6 Guns
Spencer's Div:
6000 Infantry, 6 Guns
Hope's Div: 6000 Infantry, 6 Guns
Baird's Div: 7500 Infantry, 6 Guns
Paget's Div: 3000 Cavalry, 6 Guns
Lecor's Div: 1500 Infantry, 6 Guns
Ferguson's Div: 6000 Infantry, 6 Guns
Craddock's Div: 7500 Infantry, 6 Guns
Cotton's Div: 3000 Cavalry, 6 Guns
Otway's Bde: 1000 Cavalry
Reserve Artillery: 36 Guns
Infantry: 40500 Cavalry: 7000 Guns: 90
The Deployment:
 |
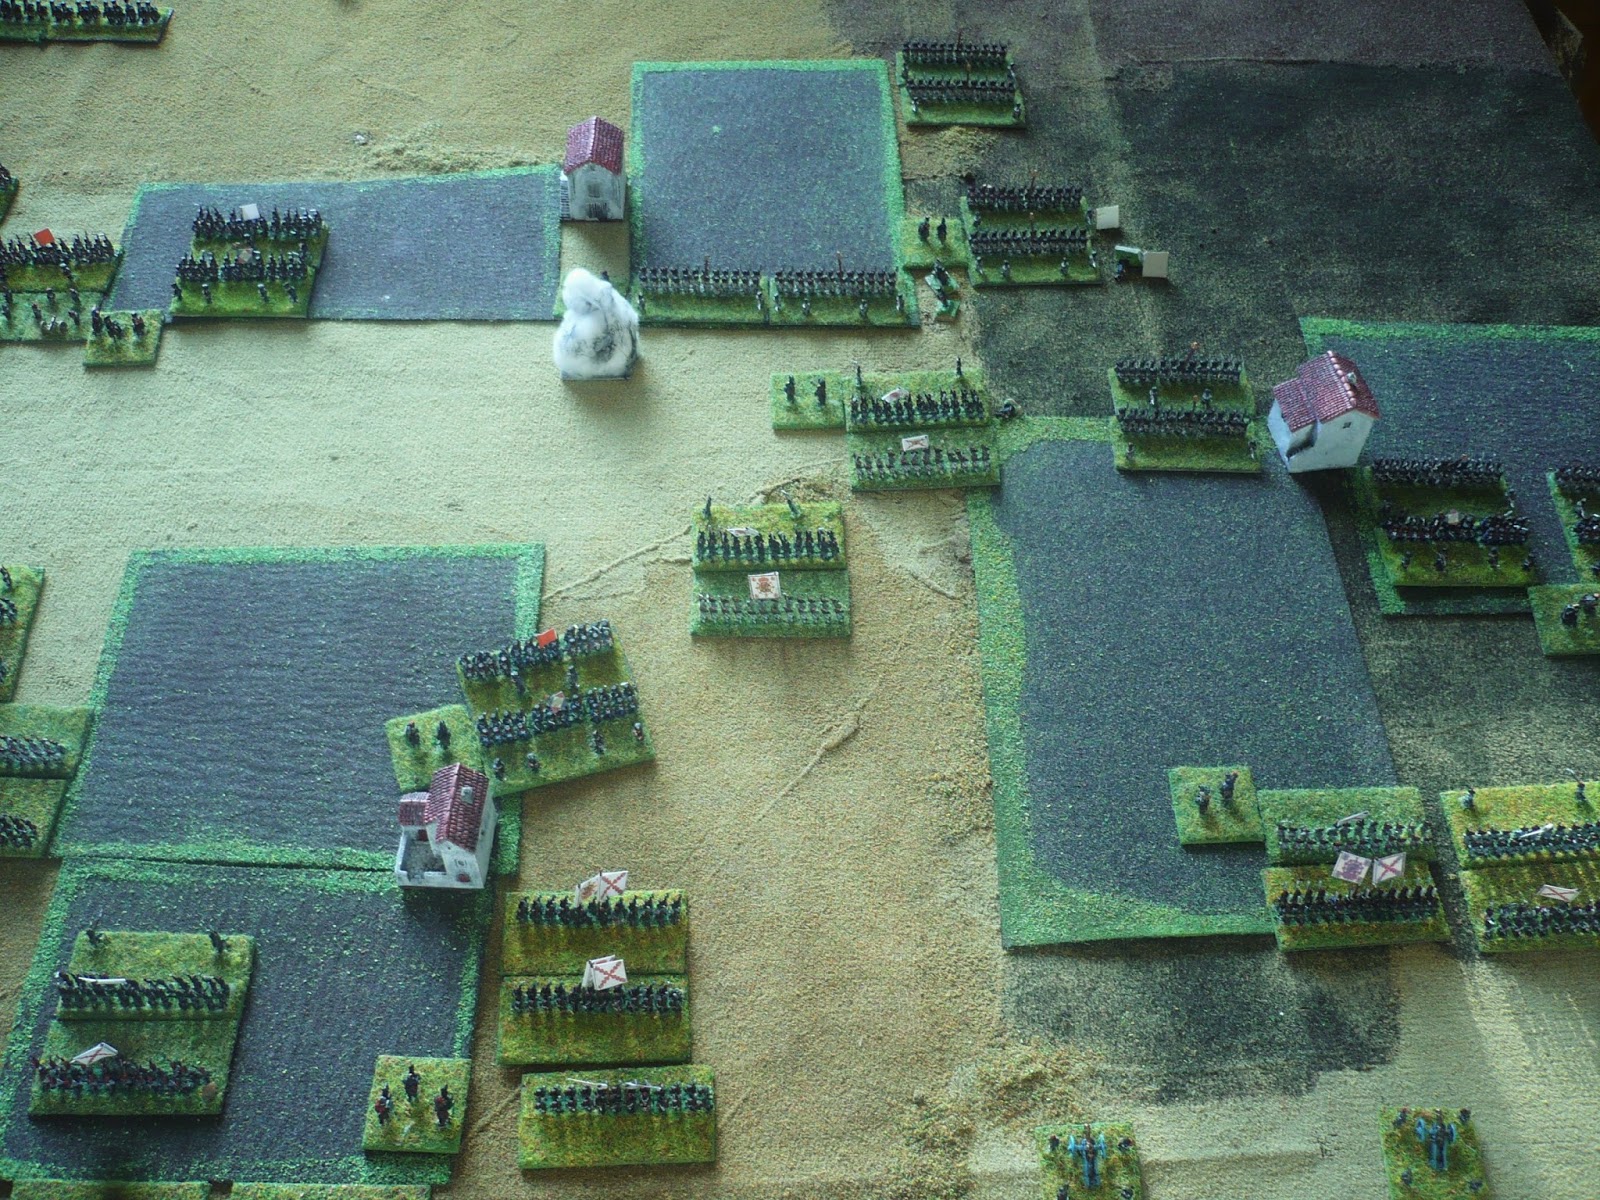
| The centre and right of the battlefield, French at the bottom. The terrain generator came up with a river, so I made the scenario into a river crossing scenario. Ney's VI Corps is on the left of shot advancing over a pontoon bridge in the woods; Lefebvre in the centre with the Army reserves at the bottom below the hill; Mortier's V Corps in on the right. Detachments of Morretti's Division are defending the central and right-hand bridge, a detachment of Zayas' Division faces the French in the woods. |
 |
| A closer-in shot of the French right flank |
 |
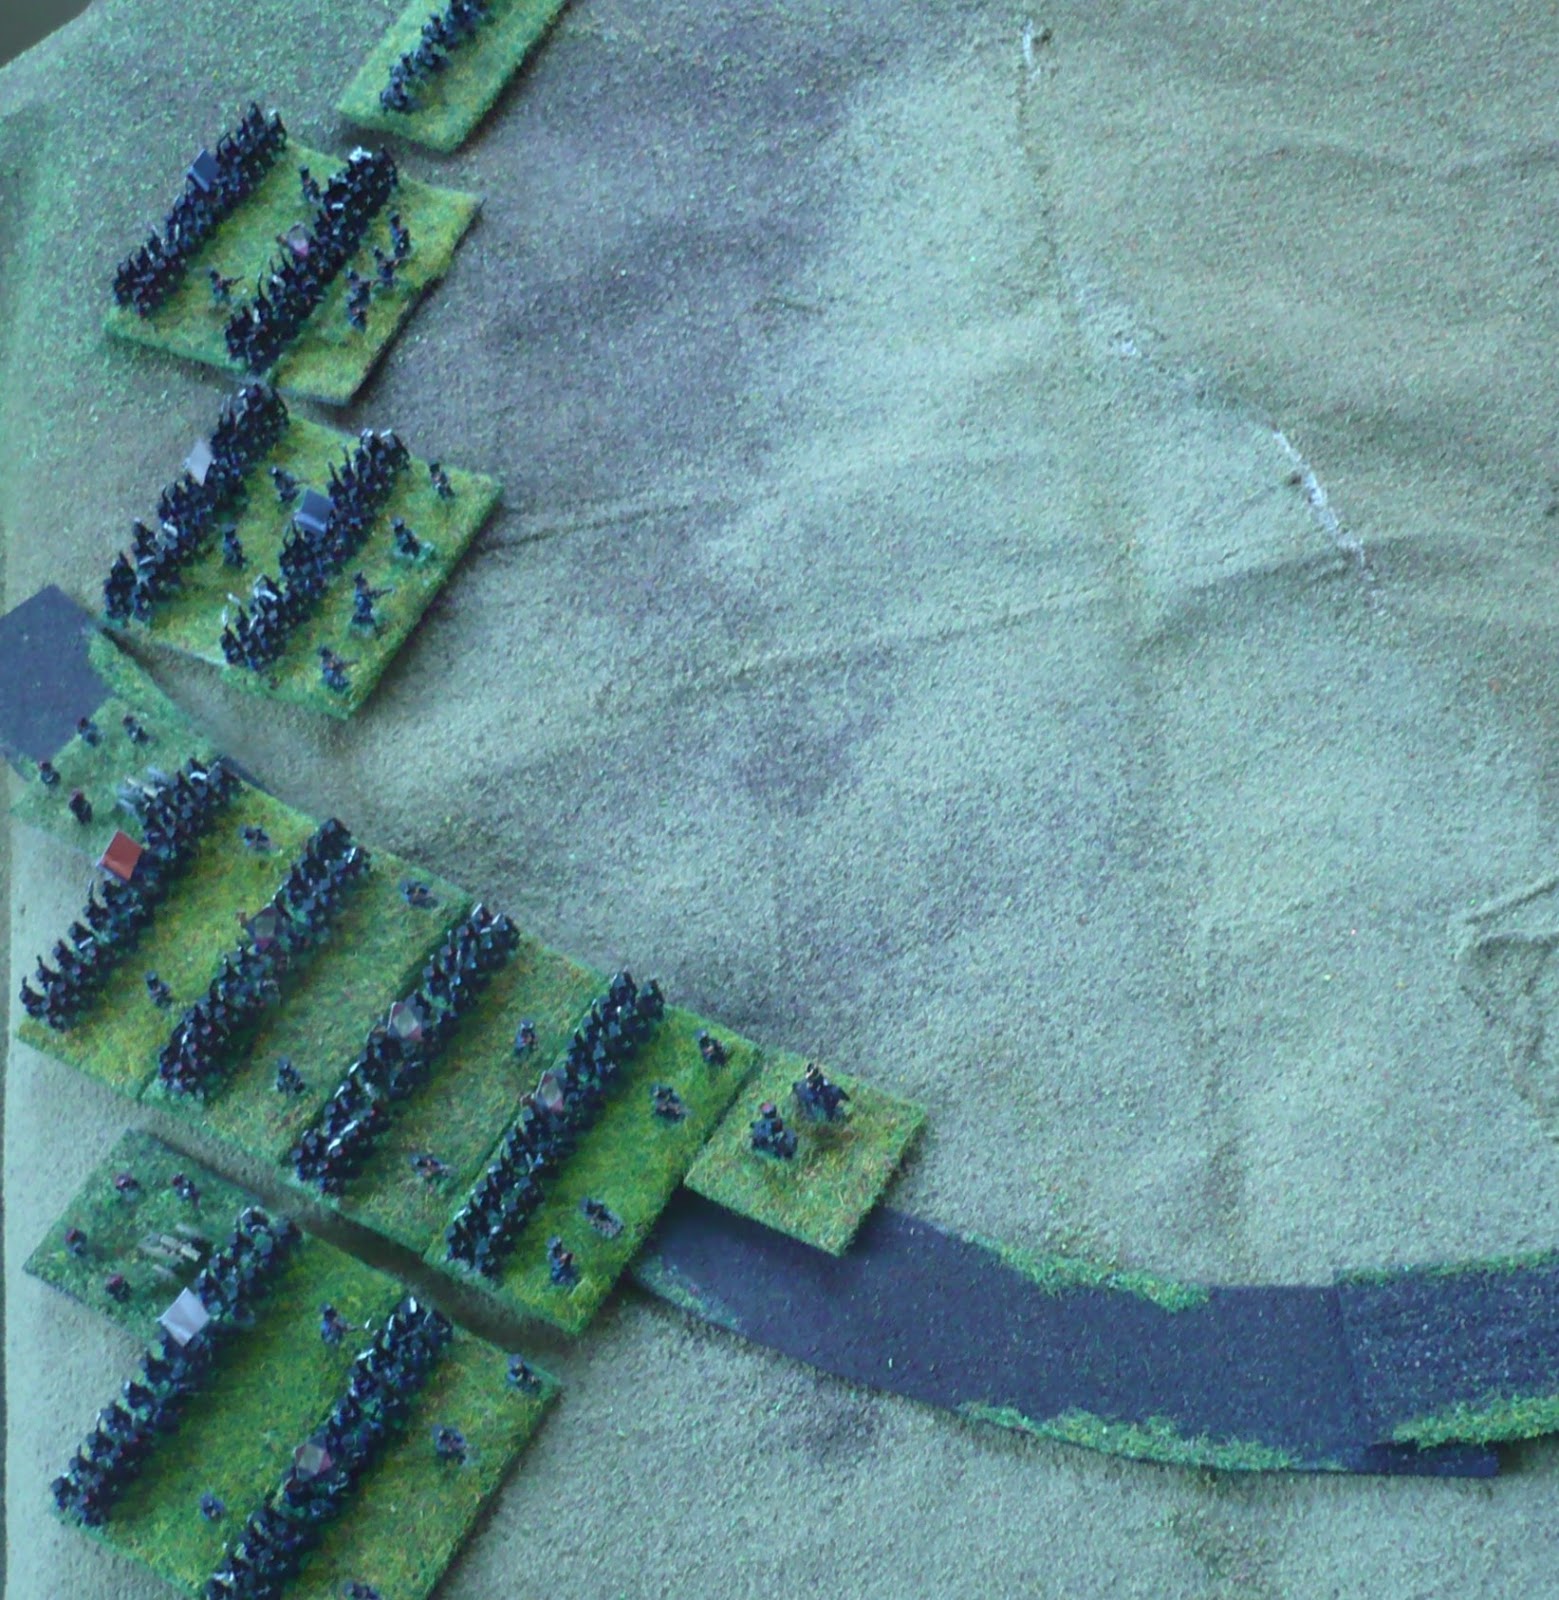
| The left-hand side: Suchet's I Corps faces another of Zayas' brigades guarding the bridge; and another shot of Ney with his leading troops across the pontoon bridge |
 |
A shot looking down the river from French left (near) to French right (far)
|
 | | | | | | | |
| The view from the Spanish side: looking down towards the French centre and right. |
The Battle
 |
| First blood to the French in the morning sunlight: Suchet's Corps (left) and Ney's Corps right successfully sieze the bridges, in Ney's case routing the Spanish opposition too. |
 |
| The Spaniards fleeing (left) and the Frenchmen of Ney's VI Corps advancing (right) |
 |
| Stalemate on the French right: Mortier's troops briefly gained the bridge and threw the Spanish back, but the arrival of Wellington's forces in the nick of time restored the situation. |
 |
| The French artillery forced the Spaniards defending the central bridge back in disorder; again the arrival of the Allied troops in the nick of time restored the situation. British heavy cavalry have moved up to the support of Moretti's hard-pressed infantry |
 |
| Ney's VI Corps has cleared the woods and advanced to the brow of the hill and thrown back a British cavalry attack in disorder; this was merealy a feint however for Wellington to prepare his assault on the most exposed French Corps |
 |
| "Bold measures are the safest": Suchet proves he isn't a general for nothing as he leads an immediate counter-attack by Rey's Division which throws back an advancing British division in confusion |
 |
| A closer view of the same position |
 |
| On the extreme left, the British hurriedly try to get into formation to repel Suchet's I Corps; however Wellington's attack has demolished Bisson and Mermet's Divisions of VI Corps; can Ney, leading his last unbroken division (Maransin's) halt the rout? |
 |
| A closer view of the position around the wood: French infantry fleeing to the left, Lecor's Portguese have turned to face the remainder of Ney's troops. British light cavalry look on to the exit from the wood whilst further British troops advance; and to their rear, the British cavalry (defeated by Ney earlier) is regrouping |
 |
| Maransin's Division is largely broken in the woods and the advancing British light infantry seize the pontoon bridge. Ney has fought off the attack on the last of Maransin's brigades (see Ney in the woods) but he is now surrounded... |
 |
| and Ney, Marshal of France, has no option but to offer Wellington his sword! |
 |
| In the left-centre, the British light cavalry has taken thousands of prisoners from Ney's fugitives; Suchet, cool-headed in the crisis, has formed a strong line to halt any further pursuit; in the extreme top-left, Craddock's division is barely holding out against Rey's infantry |
 |
| Suchet has stabilised the French left-flank, but the destruction of Ney's cavalry (the Chasseurs of the Guard no less!) completes the utter defeat of VI Corps. The French army is split into two... |
 |
| On the right, Mortier's troops have fought their opponents to a standstill but have not been able to advance themselves: stalemate |
 |
| Lefebevre's Corps got a nasty shock in the centre, as the Spanish infantry and British cavalry routed a Dragoon brigade from Lahoussaye's Division and advanced over the bridge! French reserves restored the situation and the Spanish and British retired to a stronger defensive position |
The Finale
The battle continued for quite a while after this without anything much of note happening! Wellington knew that strategically the battle was won and was unwilling to risk a tactical reverse which might change that, so he methodically prepared to advance. On the French side, Jospeh realized that a further tactical reverse might result in the loss of the entire Army of Spain, so carried out a (very skillful) disengagement without significant further loss. The French cavalry superiority ensured that there would be no very close pursuit and the remaining French troops left the battlefield in good order.
The Results
Casualties were actually surprisingly light, except for the destruction wrought on Ney's Corps. The Spanish lost 2400 infantry, 1100 cavalry and 12 guns, mostly from Zayas' mauled division. The Allies lost around 1100 infantry and 250 cavalry and 12 guns, the majority from Craddock's Division which was roughly handled by Suchet's troops. The French however lost 4500 infantry and 600 cavalry killed and wounded, but losing 6000 prisoners and 12 guns on top - along with one of the best French commanders Marshal Ney. Although the disengagement was carried out skilfully and successfully (in recognition of which, many picked troops from I and V Corps were transferred into Joseph's Guard!), the strategic position for King Joseph is dire, as Wellington has cut off his escape into Leon. Joseph must cut his way out the long way through the devastated lands around Madrid in the face of Spanish opposition...or surrender!
 |
| Marshal Ney, after fighting off a strong British attack, had no option but to offer his sword to Lord Wellington after being surrounded and cut off in the Battle of Montehermosa |
Game Notes
There was considerable French success at the beginning of the game - the additional French commanders (the French have Corps commanders on the table, the Allies don't) give the French forces a significant tactical advantage in combat over the Allies, particularly the Spanish, who suffer from less effective skirmishing tactics too. Luckily for the Allies, Wellington's troops turned up quite quickly after the start of this battle. Some determined Spanish resistance in some sectors meant that Wellington was able to concentrate overwheleming forces against the most advanced Frecnh Corps - that of Ney. And Ney was duly overwhelmed! The French then made lots of feints, covered by strong artillery fire, to prevent the Allies opportunistically exploiting this success and all the remaining French troops escaped.
I think this battle identified a weakness in my use of "marching to the sound of the guns rules". Both sides have used this in the campaign and I think the mechanism is sound (each leader rolls against his initiative to march to the sound of the guns, then roll a '6' on a D6 to arrive). However, until this point I have allowed each side to arrive en masse. I think it would be more realistic for troops to arrive one formation at a time from that point onwards, but each formation already moving (i.e. can continue to move for a single tempo point/PIP until halted).
The game took about two and a half hours of playing time which is longer thsan usual, but the cat-and-mouse end of the game took a while to play out, It was played on a 5'x3' table. Rules as ever were the Polemos Marechal d'Empire Napoleonic set and the figures are from Baccus 6mm.